How to Allocate RAM to Minecraft
Last Updated :
03 Jan, 2024
Minecraft, with its widespread and immersive open-global surroundings, often needs a good gaming computer or laptop to ensure a smooth and exciting gaming experience. One way to enhance overall performance is using allocating extra Random Access Memory (RAM) to Minecraft.
Minimum Requirements for Minecraft
| Component |
Minimum Specification |
| CPU |
Intel Core i3-3210 3.2 GHz / AMD A8-7600 APU 3.1 GHz or equivalent |
| RAM |
2 GB |
| Video Card |
Integrated: Intel HD Graphics 4000 (Ivy Bridge) or AMD Radeon R5 series (Kaveri line) with OpenGL 4.4<br> Discrete: Nvidia GeForce 400 Series or AMD Radeon HD 7000 series with OpenGL 4.4 |
| Pixel Shader |
5.0 |
| Vertex Shader |
5.0 |
| Operating System |
Windows 7 and upper |
| Free Disk Space |
At least 1 GB for Game Core and Other Files |
Note: These specifications represent the minimum requirements for running Minecraft.
How to Allocate RAM to Minecraft through the Official Launcher
Step 1: Check Your System Specifications
Before making any adjustments, ensure that your laptop meets the advocated specifications for Minecraft. Allocating too much RAM on a system with confined sources may also have detrimental effects.
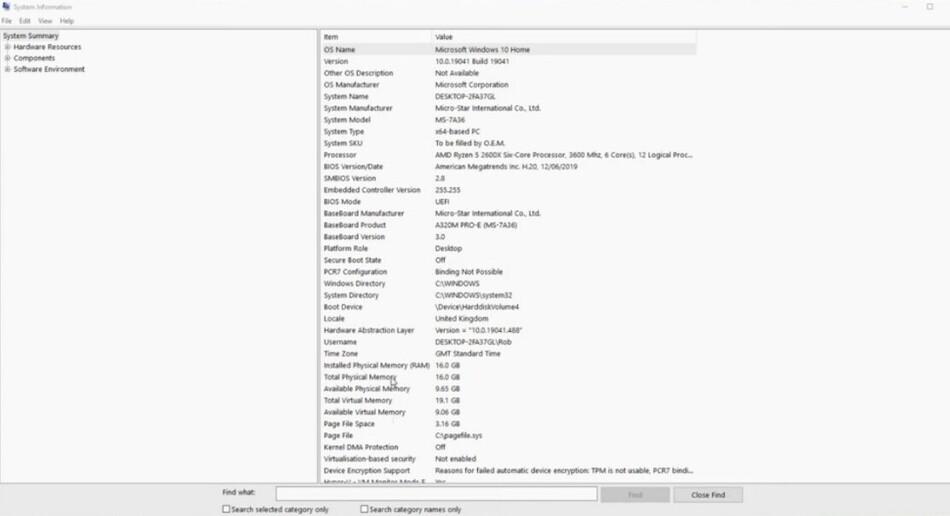
Check Your System Specification
Step 2: Launch the Minecraft Launcher
Open the Minecraft Launcher on your PC.
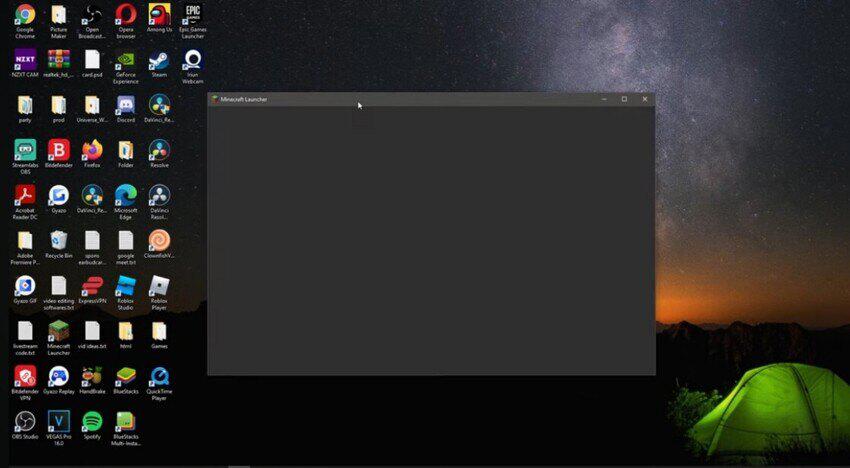
Launch Minecraft
Step 3: Access Installations Tab
In the Minecraft Launcher, navigate to the “Installations” tab. Here, you may manipulate extraordinary Minecraft installations and configurations.
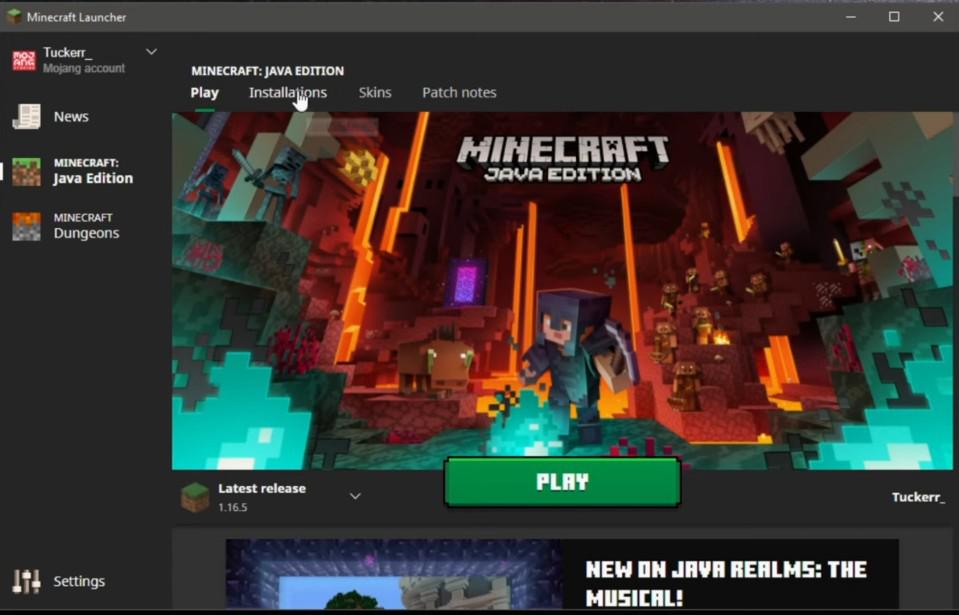
Click on Installation Tab
Step 4: Go to the Latest Release and Click the Three Dot Options
After clicking on the installation tab you will directed to a window where you click on three dots in the latest release section.
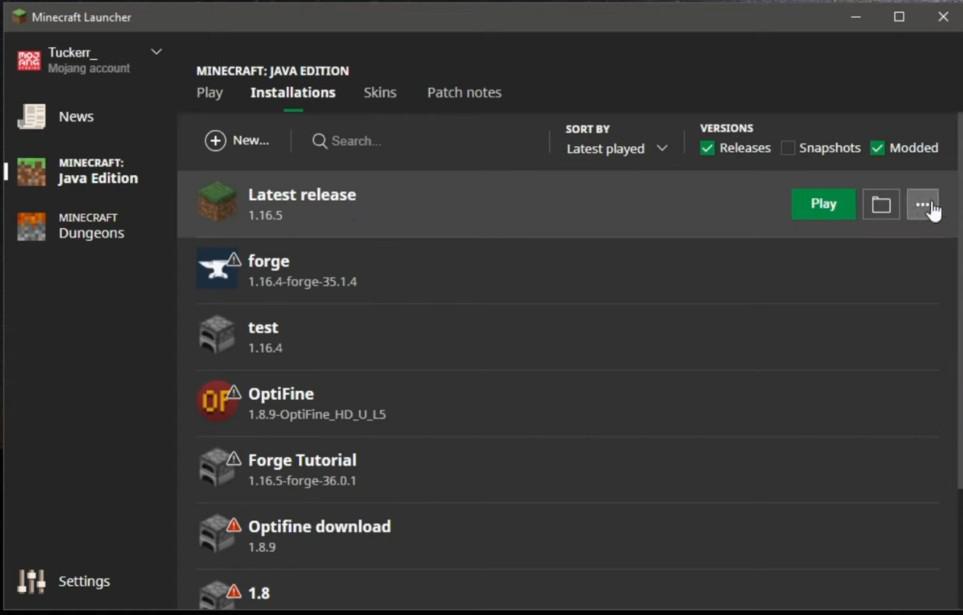
click on three dot
Step 5: Click on Edit
After, this click on the edit button.

click on edit
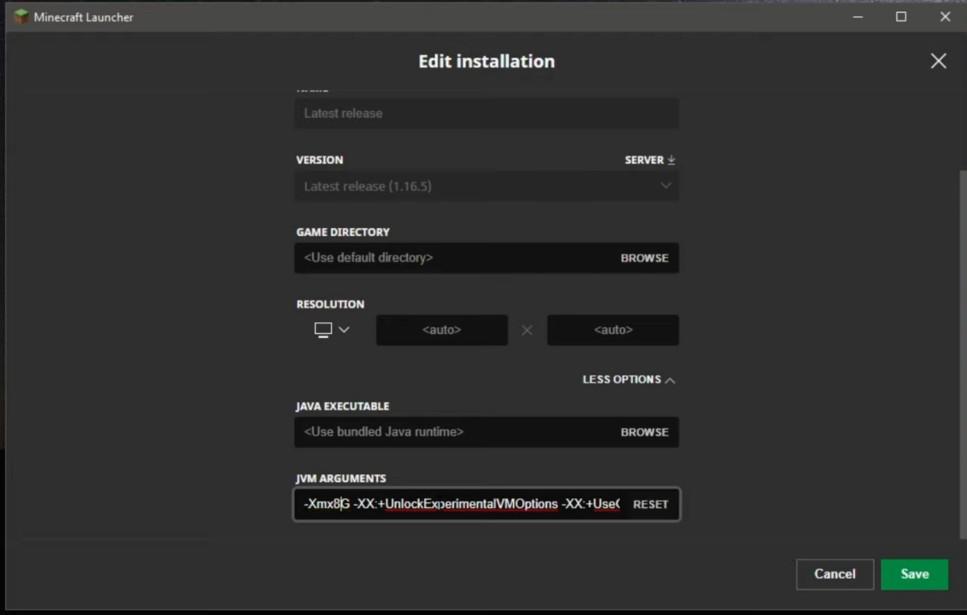
Step 6: Adjust RAM Allocation
Find the “JVM Arguments” or a similar putting. In the textual content container, you’ll see something like -Xmx2G (wherein 2G represents 2 gigabytes of RAM). Adjust this value to allocate the preferred amount of RAM (recommended – 8 GB). For instance, to allocate eight gigabytes, exchange it to -Xmx8G.
Adjust RAM Allocation
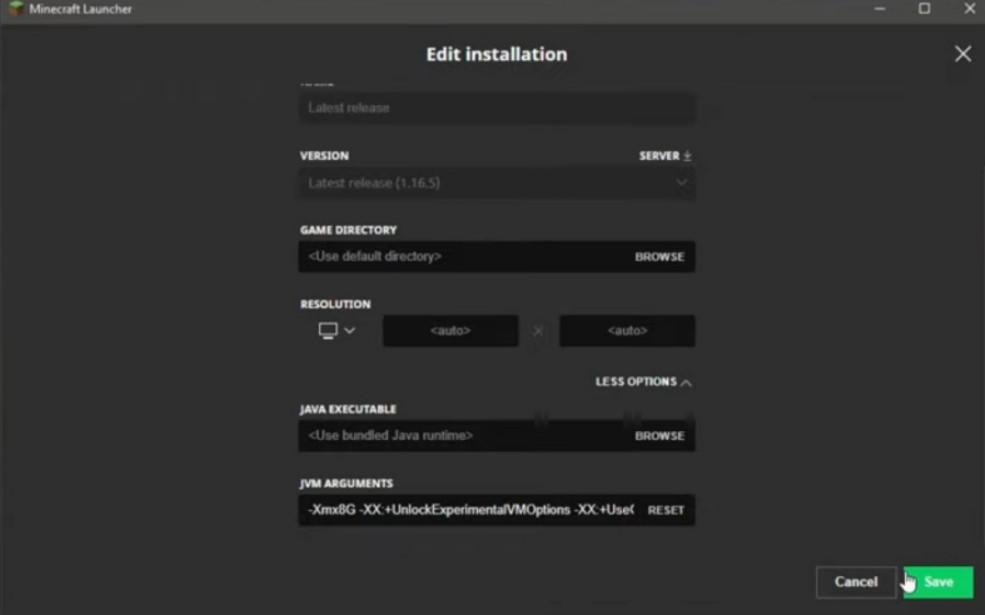
Step 7: Save Changes and Launch
Save your changes and release Minecraft with the modified setting. This will observe the new RAM allocation settings.
Click On save Tab
Step 8: Monitor Performance
While in-game, maintain a watch on the overall performance. If you face any problems, keep in mind adjusting the allotted RAM once more, locating the top-rated stability in your machine.
How to Allocate RAM to Minecraft through the ATLauncher?
ATLauncher is a convenient tool designed for Minecraft players, offering a quick and user-friendly way to handle and install modpacks. With its easy interface, users can easily browse and download modpacks while also adjusting settings such as memory allocation and Java versions. Beyond its convenience, ATLauncher comes equipped with tools to keep Minecraft installations and modpacks up to date, making it a preferred choice for players who love using mods. It’s essential to understand that ATLauncher isn’t an official Minecraft launcher but rather a third-party launcher developed by a community of dedicated Minecraft enthusiasts.
Step 1: Open ATLauncher and go to Settings
Open ATLauncher and go to the right hand side menu options, click on settings and browse the options.
Step 2: Navigate to RAM Settings
Navigate to the Settings menu and click on the Java/Minecraft tab. A new drop-down menu will appear, presenting you with multiple options. Look for the option labeled Maximum Memory/RAM and give it a click to select it.
Step 3: Modify or Change the RAM Input
Once you’ve chosen the “Maximum Memory/RAM” option, a new drop-down menu will pop up. In this menu, you’ll find two arrows that let you decrease or increase the allocated RAM. Simply use these arrows to select the desired amount of RAM you want to allocate. Congratulations! You’ve successfully learned how to allocate more RAM to Minecraft on ATLauncher!
Conclusion
Allocating extra RAM to Minecraft can significantly enhance your gaming experience, provided it is done judiciously based totally in your device’s capability. By following these steps, you could customize the allocation to suit your wishes and enjoy a smoother, lag-free Minecraft adventure. Experiment with specific RAM allocations to find the sweet spot that complements performance with out overburdening your system.
Frequently Asked Question(FAQs)
1. Can I allocate an excessive amount of RAM to Minecraft?
Yes, allocating excesss RAM can also cause overall performance troubles or even crashes. Ensure your device can manage the allocated amount.
2. How do I recognise the recomended RAM allocation for my device?
Check Minecraft’s machine necessities and recall your computer’s specifications. Allocating 4-8GB is generally appropriate for most setups.
3. Will allocating extra RAM clear up all Minecraft lag troubles?
While it is able to help, lag can result from different factors. Check graphic settings, update drivers, and ensure a stable internet connection for comprehensive troubleshooting.
4. Can I alternate RAM allocation while Minecraft is running?
No, changes to RAM allocation take effect upon launching the game. Save and exit Minecraft before adjusting settings inside the launcher.
Share your thoughts in the comments
Please Login to comment...