How can you Create a Kanban Board in Jira?
Last Updated :
18 Mar, 2024
Kanban, in project management, is an agile methodology that helps us to manage the tasks, their requirement, issues, responsible members, timeline, etc. using a visual card. It highlights the different actions, plans, activities, and their execution across the different phases of the project lifecycle. You can easily create and integrate it with your workspace to keep a check on how the different activities are going in terms of timelines and efficiency. This article will walk you through an easy guide to creating a Kanban Board. So, let us start without any delay.
Steps to Create a Kanban Board in Jira
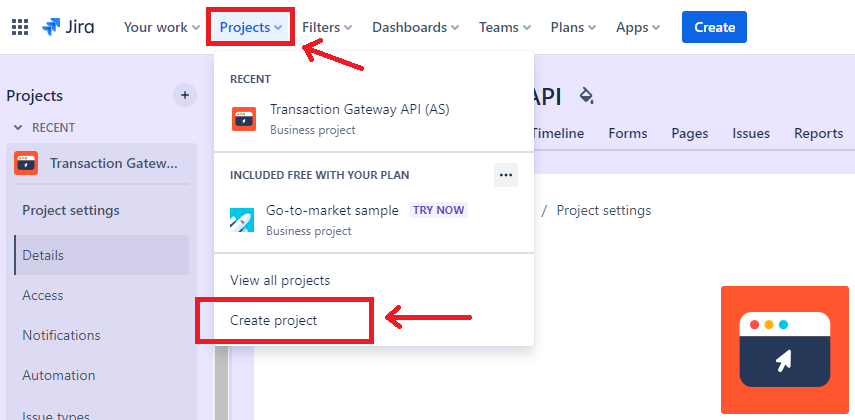
Step 1: After you open your JIRA Application, under the ‘Project’ dropdown, click on the ‘Create Project’ option as shown below:
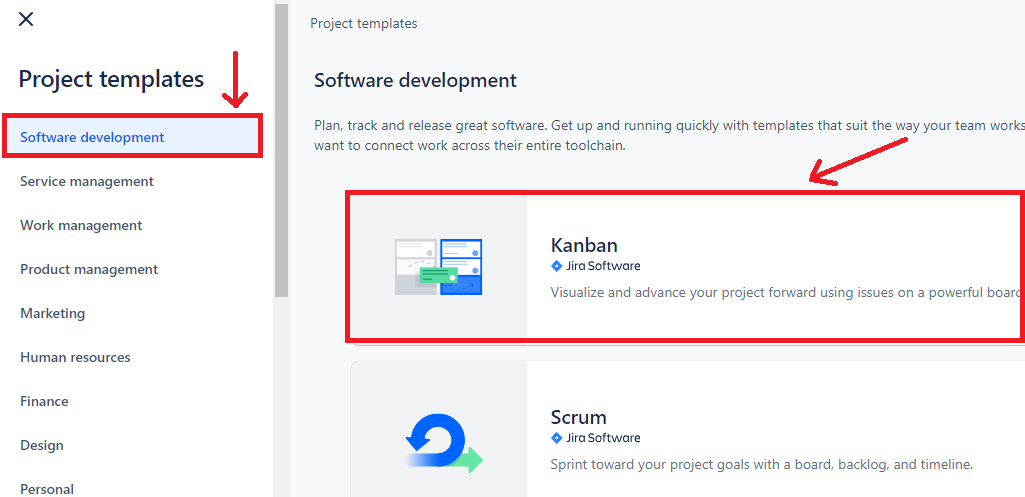
Step 2: Navigate to the ‘Software Development’ tab and select the ‘Kanban’ option as illustrated below:
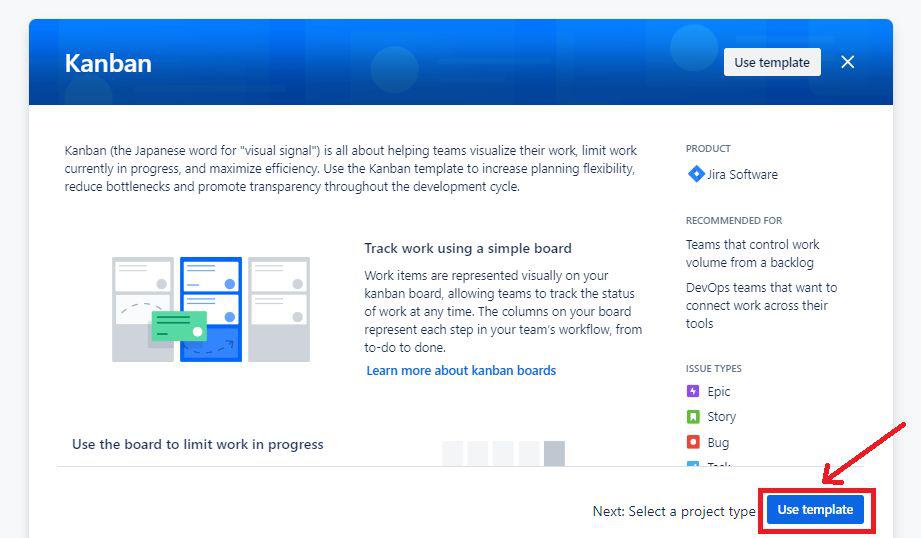
Step 3: The template options appear on the screen as shown below. Select the ‘Use Template’ option and continue.
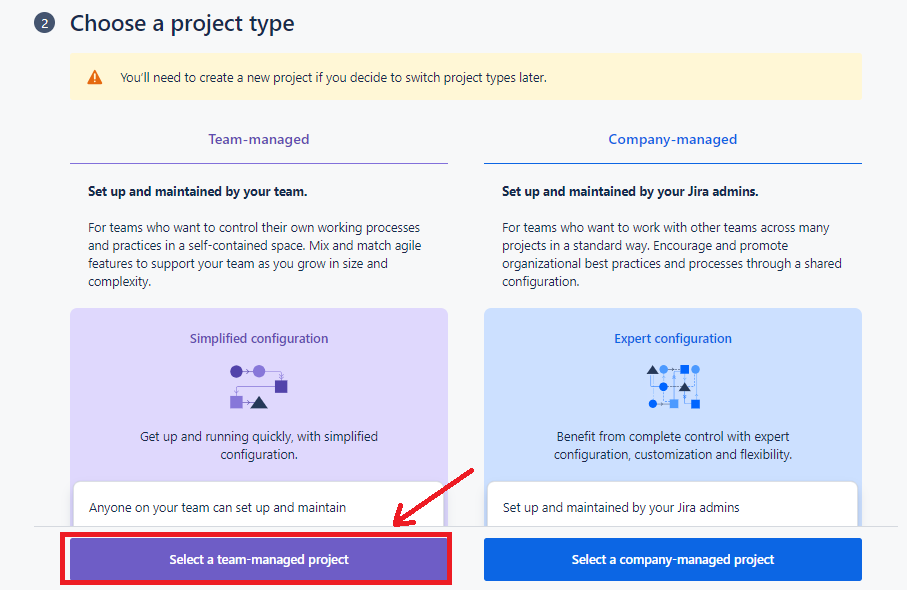
Step 4: Now, select the project type as per the requirement. Here, we are selecting the ‘Team-managed project.’
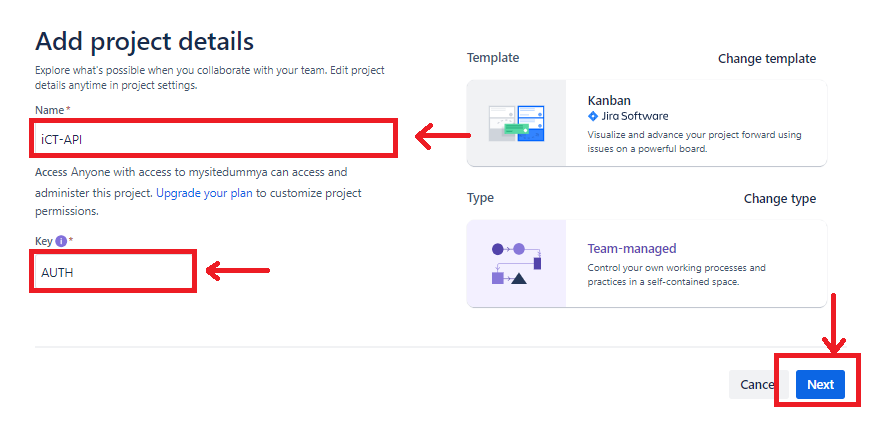
Step 5: Enter your Project or Team name and specify the ‘Key’ for your Project which will be used to denote the issues within your workflow. Then, click the ‘Next’ button.
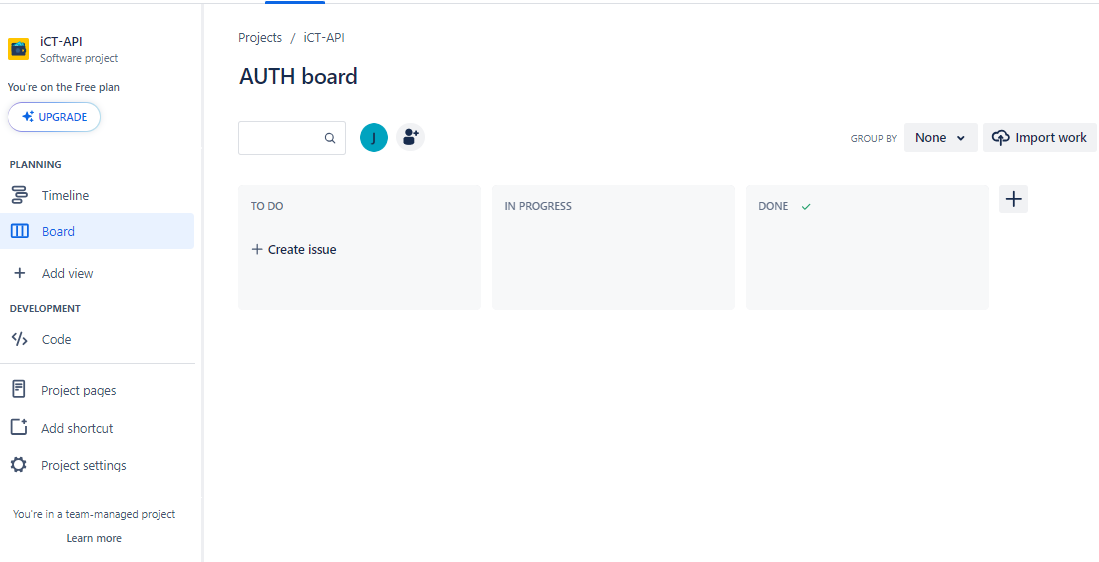
Step 6: The Kanban Board has been created successfully as shown below. It includes the sample Columns in the workflow with the option to create the issue.
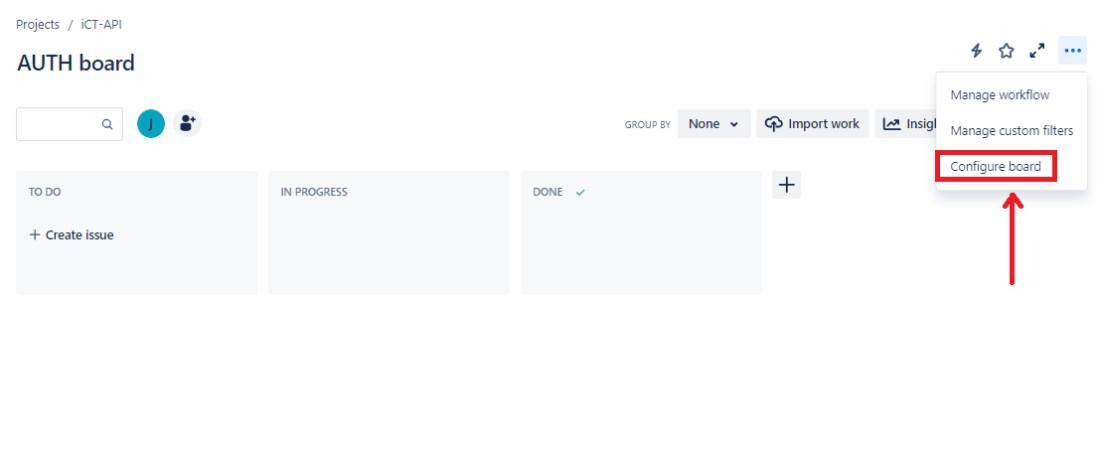
Step 7: Now, to configure the Kanban Board, you can add more columns as per the requirements. Click on the three-dots button on the top-right corner and select the ‘Configure Board’ option as shown below:
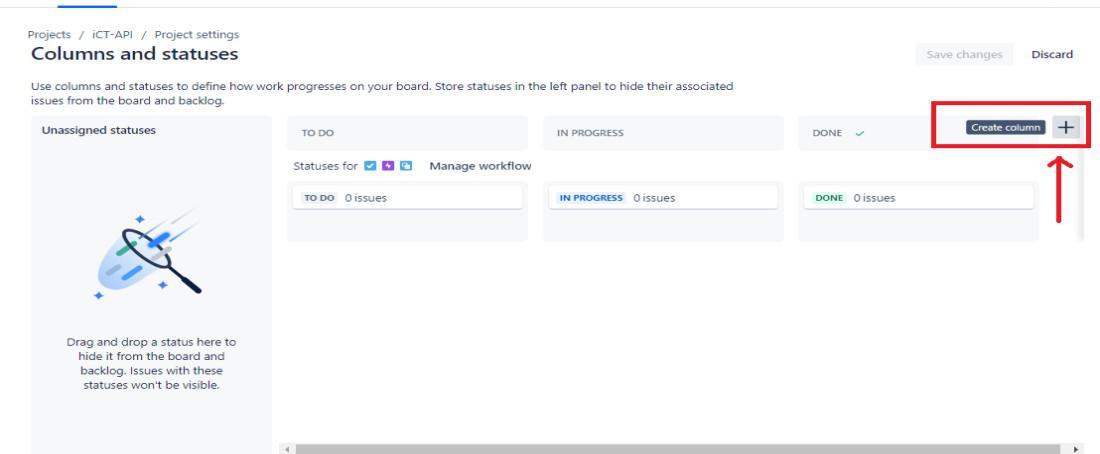
Step 8: Again on the top-right corner, click on the plus symbol to add new columns on the Kanban Board as shown below.
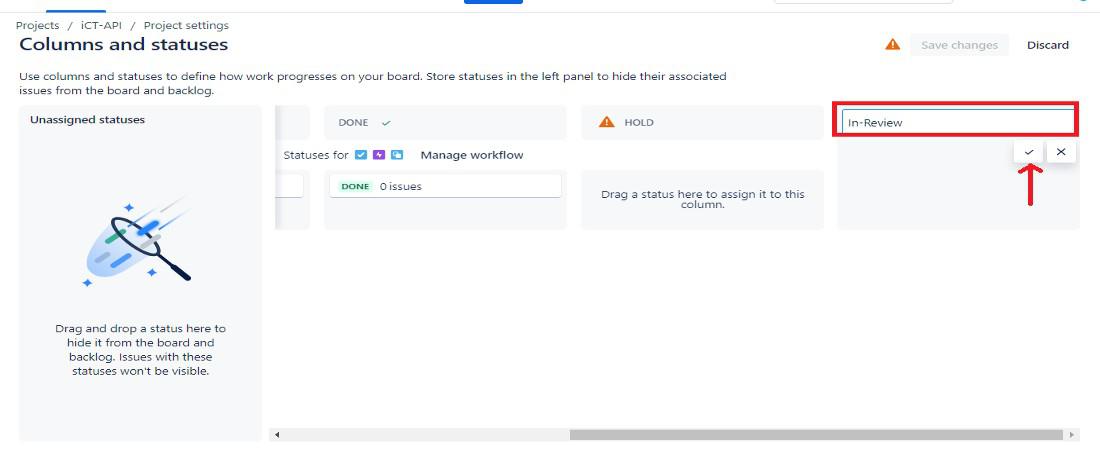
Step 9: Assign name of your column and press ‘Enter’ or click on the check symbol.
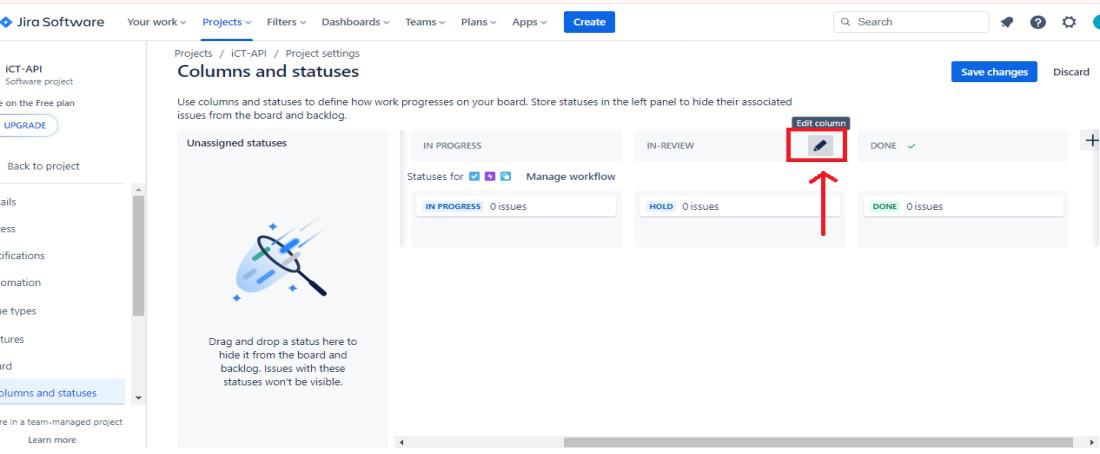
Step 10: To add the ‘Work-In-Progress’ limit on your column, select the edit option available to the right of the column name.
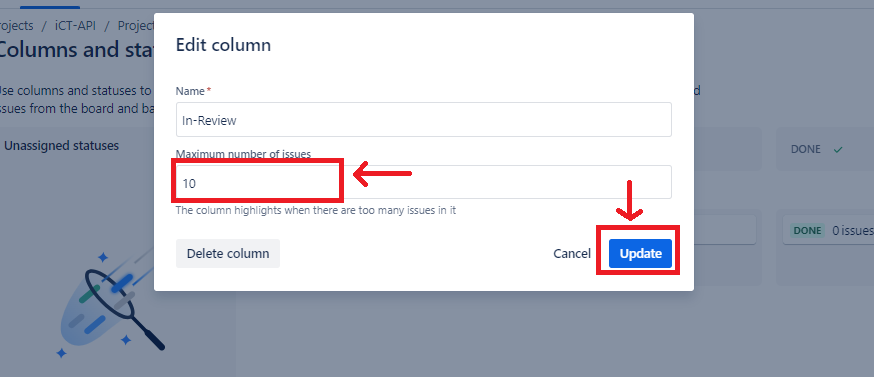
Step 11: Add the maximum number of issues or tasks that the Column can accommodate as illustrated below:
Step 12: To create any issue, select the ‘Create Issue’ option as depicted below:

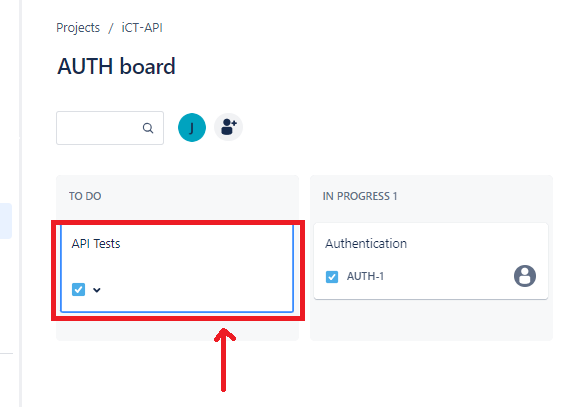
Step 13: The issues that are created are highlighted as shown below:
Conclusion
Kanban Boards are a useful tool for Project Management Professionals as they provide a simple way to practice agile methodology. After gaining hands-on experience in creating the Kanban Boards, you can easily get started with the agile methodology using Kanban and smoothen your project execution.
Share your thoughts in the comments
Please Login to comment...