Github Actions For Android
Last Updated :
03 Jan, 2022
GitHub Actions is a continuous integration and continuous delivery (CI/CD) platform that allows you to automate your build, test, and deployment pipeline. CI/CD methodology provides speed, accuracy, and reliability. It increases the release rates by detecting the failures faster. Android is a widely used mobile operating system and developing apps for Android with GitHub Actions can be a game-changer.
Advantages of using GitHub Actions for Android:
- Helps us to run tests
- Make sure that the application complies when merging new code
- Builds and Publishes the application.
So here we are going to discuss how we can use GitHub Action for developing Android Apps in a step-by-step manner.
Step 1 :
Open your GitHub Repository containing the source code of your Android app and navigate to the Actions tab.

Step 2:
Next, you will see a screen like this –
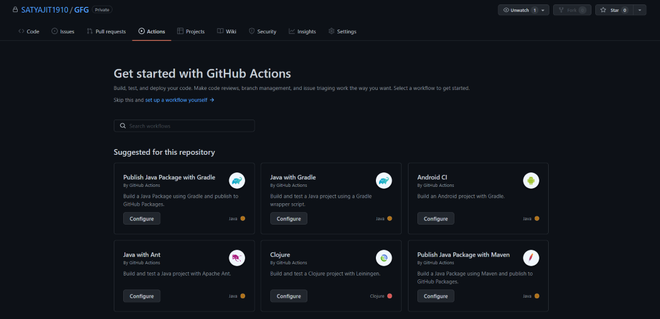
As we are using GitHub action for Android, so we will choose Android CI from here and click on Configure option.
Step 3:
After selecting Android CI, you will land on this page where a template will be given but we will replace the given code.
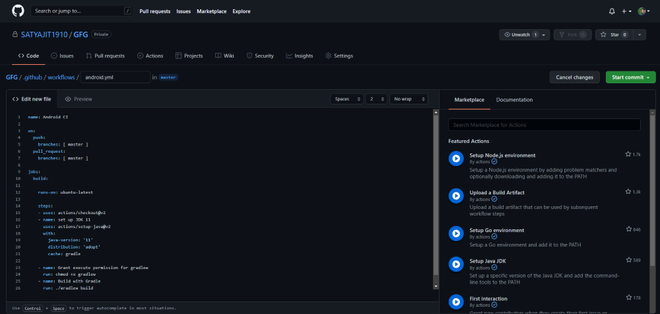
The given code we will replace with the following code –
name: Android CI

on:
  push:
    branches: [ master ]
  pull_request:
    branches: [ master ]

jobs:
  build:

    runs-on: ubuntu-latest

    steps:
    - uses: actions/checkout@v2
    - name: set up JDK 11
      uses: actions/setup-java@v2
      with:
        java-version: '11'
        distribution: 'adopt'
        cache: gradle
    - name: Grant execute permission for gradlew
      run: chmod +x gradlew
    - name: Build with Gradle
      run: ./gradlew build
    - name: Build debug APK
      run: bash ./gradlew assembleDebug --stacktrace
    - name: Upload APK
      uses: actions/upload-artifact@v1
      with:
          name: app
          path: app/build/outputs/apk/debug/app-debug.apk
After this, select the Start Commit option.
The explanation for the above code :
- The first line of code name: Android CI is to give a name to our workflow.
- Then we are setting up our workflow to run on the push events to the master branch and on the pull requests that target the master branch.
- Within the jobs section, we are defining it to run on the Ubuntu operating system.
- After that, we set up the JDK and grant the required execute permissions,
Next, we are using Gradle build to build our APK file and using predefined action which is actions/upload-artifcat@v1 to upload the APK file.
All this code for workflows is stored in a .yml or .yaml file under the project’s main folder in the path .github/workflows
Step 4:
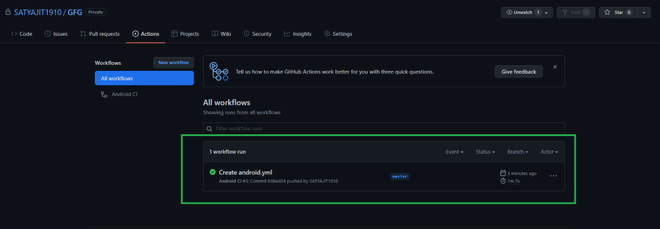
After committing, you can find the workflow on the Action Tab of your repository.
Step 5:
Now you can expand the details of your workflow results by clicking on it.
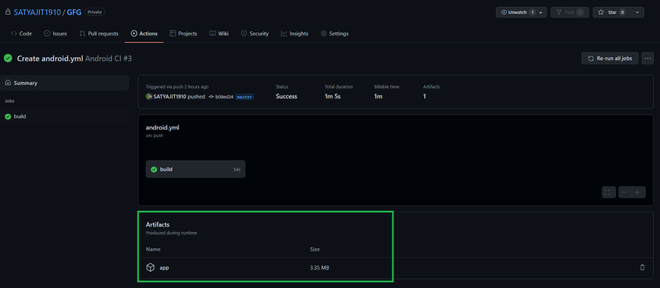
We can see the link named “App” under the Artifacts heading. If we click on it then a zip file will be downloaded which contains the APK.
Now every time any pull request or commit happens in this repository this workflow will run automatically and it will build the APK file and help us to identify any error in the build. We have taken a very simple code snippet here for the workflow but that can be further modified for unit testing and other specialized requirements of the development process. You can refer to the Official documentation for code syntax of GitHub Actions to learn more about it.
Share your thoughts in the comments
Please Login to comment...