Extract keywords from text with ChatGPT
Last Updated :
10 Jul, 2023
In this article, we will learn how to extract keywords from text with ChatGPT using Python.
ChatGPT is developed by OpenAI. It is an extensive language model based on the GPT-3.5 architecture. It is a type of AI chatbot that can take input from users and generate solutions similar to humans. ChatGPT is well trained AI that is trained on a large dataset, using that training it can able to perform a wide range of tasks. It is designed to simulate a conversation with a human, making it a valuable tool for customer service, personal assistants, and other applications where natural language processing is required. There are several applications of Chat GPT such as Content Creation, Customer Service, Assistance, and Automation.
Extract keywords from text with ChatGPT using Python
Here we are going to see all steps required to extract keywords from text with ChatGPT API in Python. Using ChatGPT API we are able to use the features of ChatGPT using Python code which means we can use ChatGPT to extract keywords from a text in Python program.
Step 1: Create an account on OpenAI and log into an account.
Step 2: After login click on ‘Personal‘ on the top-right side and then click on ‘View API keys‘ as seen in the below image.
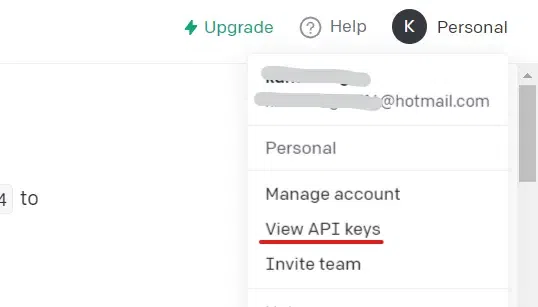
View API Keys
Step 3: After following step 2 a page of API keys is opened and we can see the button ‘Create new secret key’ click on that and a secret key is generated copy that key and save it on Notepad or anywhere else because it is required in upcoming steps.
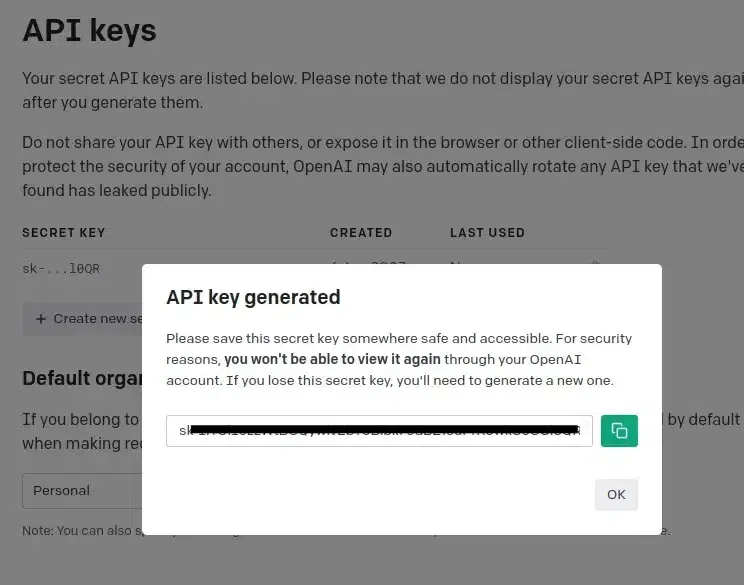
API key generated
Step 4: Now, open any code editor or online notebooks such as Google Colab or Jupyter Notebook. Here, we are using Google Colab notebook and installing the Open Ai library in Python using the below command.
!pip install -q openai
If you are using any other code editor you can install the openai library in Python by executing the below command in the terminal or command prompt.
pip install openai
Step 5: Import openai library and Store the key in a variable that we have generated in Step 3 as given below.
Python3
import openai
openai.my_api_key = 'YOUR_API_KEY'
|
Step 6: Set a context for the ChatGPT API that is used to tell the API what is it supposed to do using the JSON file. In this, we have defined the role as a system because we are creating this for users and this ChatGPT is a system and also defined the content.
Python3
messages = [ {"role": "system", "content": "You are a keyword extractor."} ]
|
Step 7: Here is the rest of the code where
- We are using an infinite while loop so that we can chat with the ChatGPT API repeatedly without executing the code again and again.
- In the second line we a taking input from the user and store it in a variable ‘message’.
- If a user inputs any question then only we enter the if condition and make a JSON of file and append it to the JSON file that we have created in step 6 after that generate the chat using openai.ChatCompletion.create()
- Store the answer in the variable ‘reply’ and print that reply using the print() function.
Python3
while True:
message = input("User : ")
if message:
messages.append(
{"role": "user", "content": message},
)
chat = openai.ChatCompletion.create(
model="gpt-3.5-turbo", messages=messages
)
reply = chat.choices[0].message.content
print(f"ChatGPT: {reply}")
messages.append({"role": "assistant", "content": reply})
|
Below is the Complete Implementation:
Python3
import openai
openai.api_key = 'YOUR_API_KEY'
messages = [ {"role": "system", "content":
"You are a intelligent assistant."} ]
while True:
message = input("User : ")
if message:
messages.append(
{"role": "user", "content": message},
)
chat = openai.ChatCompletion.create(
model="gpt-3.5-turbo", messages=messages
)
reply = chat.choices[0].message.content
print(f"ChatGPT: {reply}")
messages.append({"role": "assistant", "content": reply})
|
Output: After running the above code we have to input any query as in the below output.

Chatgpt Output:
We can also check the output from OpenAI (Chatgpt) it will same as our Python code output.

Share your thoughts in the comments
Please Login to comment...