Event-Driven Communication with Messaging Queues
Last Updated :
29 Apr, 2024
Event-driven communication with messaging queues is like having a virtual post office where system components can send and receive messages without waiting for each other. It’s a pattern that allows different parts of a system to talk to each other asynchronously, which means they don’t have to be in sync all the time. This setup is super useful for building systems that can handle lots of events happening at once, and it makes the whole microservices architecture more flexible and scalable.
Key Terminologies:
- Message Queue: It’s like a virtual mailbox where components can send and receive messages without having to wait for each other. It’s a buffer between senders and receivers.
- Producer: This is like the sender at the mailbox. It creates and sends messages to the mailbox based on certain events or triggers.
- Consumer: Think of this as the person who checks their mailbox. They subscribe to specific mailboxes and collect messages as they arrive.
- Queue: It’s like a waiting area in the mailbox. Messages wait here until someone comes to pick them up.
- Topic: It’s like a bulletin board where different topics are posted. Publishers post messages about specific topics, and subscribers choose which topics they’re interested in.
- Exchange: This is like the mail sorting room at the post office. It receives messages from publishers and decides where to send them based on predefined rules.
- Binding: It’s like a connection between the sorting room and the waiting area. It tells the sorting room where to send messages based on their content or topic.
Step-by-step Implementation of Event-Driven Communication with Messaging Queues
To demonstrate event-driven communication, we’ll develop a simple Spring Boot application that publishes messages to the RabbitMQ message broker, and consumers process those messages.
Step 1: Setup the RabbitMQ
We can install and run the RabbitMQ locally of the computer system.
Run the RabbitMQ:
rabbitmq-plugins.bat enable rabbitmq_management
Refer the image:
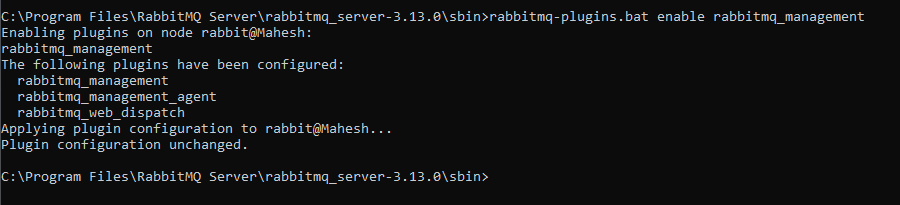
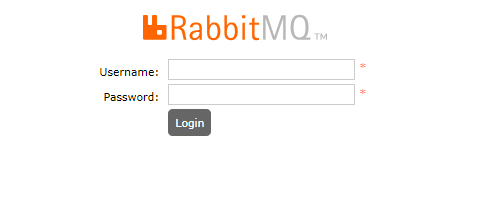
Once run the above command then the rabbitMQ runs on the localsystem at port number 15672. Default username and password are guest.
Step 2: Create the Spring Boot Project
Create the new Spring Boot project using Spring initializer on creating the project including the below dependencies into the project.
- Spring Web
- Spring for RabbitMQ
- Lombok
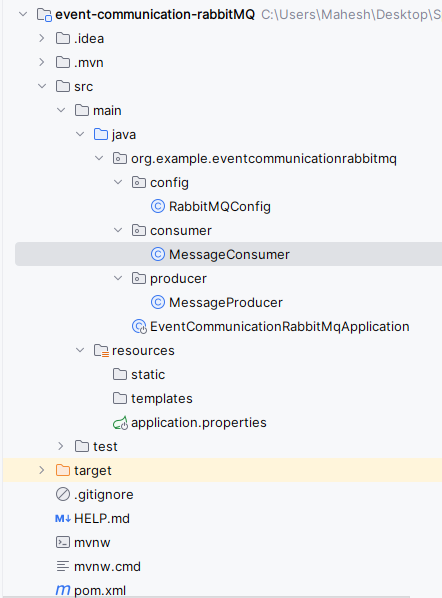
Once create the project then the file structure looks like the below image.
Step 3: Configure the RabbitMQ Connection
Open the application.properties file then add the RabbitMQ connection properties into the project.
spring.application.name=event-communication-rabbitMQ

# RabbitMQ connection properties
spring.rabbitmq.host=localhost
spring.rabbitmq.port=5672
spring.rabbitmq.username=guest
spring.rabbitmq.password=guest

# Queue name
spring.rabbitmq.queue=myQueue
Step 4: Create the Message Producer
We will create the component class to send the message to RabbitMQ
Go to src > org.example.eventcommunicationrabbitmq > producer > MessageProducer and put the below code.
Java
package org.example.eventcommunicationrabbitmq.producer;

import org.springframework.amqp.core.Queue;
import org.springframework.amqp.rabbit.core.RabbitTemplate;
import org.springframework.beans.factory.annotation.Autowired;
import org.springframework.stereotype.Component;

@Component
public class MessageProducer {

    @Autowired
    private RabbitTemplate rabbitTemplate;

    @Autowired
    private Queue queue;

    public void sendMessage(String message) {
        rabbitTemplate.convertAndSend(queue.getName(), message);
        System.out.println("Message sent: " + message);
    }
}
Step 5: Create the Message Consumer
We will create the component class to consume the message to RabbitMQ
Go to src > org.example.eventcommunicationrabbitmq > consumer > MessageConsumer and put the below code.
Java
package org.example.eventcommunicationrabbitmq.consumer;

import org.springframework.amqp.rabbit.annotation.RabbitListener;
import org.springframework.stereotype.Component;

@Component
public class MessageConsumer {
    @RabbitListener(queues = "${spring.rabbitmq.queue}")
    public void receiveMessage(String message) {
        System.out.println("Message received: " + message);
        // Process the message
    }

}
Step: 6 Configure the RabbitMQ Queue
We will define the queue in the Spring application and we can use the @Configuration class of the project.
Go to src > org.example.eventcommunicationrabbitmq > config > RabbitMQConfig and put the below code.
Java
package org.example.eventcommunicationrabbitmq.config;

import org.springframework.amqp.core.Queue;
import org.springframework.context.annotation.Bean;
import org.springframework.context.annotation.Configuration;

@Configuration
public class RabbitMQConfig {

    @Bean
    public Queue queue() {
        return new Queue("myQueue", false);
    }
}
Step 7: Test the Communication
Open the main class and inject the MessageProducer and send the message.
Go to src > org.example.eventcommunicationrabbitmq > EventCommunicationRabbitMqApplication and put the below code.
Java
package org.example.eventcommunicationrabbitmq;

import org.example.eventcommunicationrabbitmq.producer.MessageProducer;
import org.springframework.beans.factory.annotation.Autowired;
import org.springframework.boot.CommandLineRunner;
import org.springframework.boot.SpringApplication;
import org.springframework.boot.autoconfigure.SpringBootApplication;

@SpringBootApplication
public class EventCommunicationRabbitMqApplication implements CommandLineRunner {

    @Autowired
    private MessageProducer producer;

    public static void main(String[] args) {
        SpringApplication.run(EventCommunicationRabbitMqApplication.class, args);
    }

    @Override
    public void run(String... args) throws Exception {
        producer.sendMessage("Hello RabbitMQ!");
    }
}
Step 8: Run the Application
Once we run the application, then the project will run at port 8080. We can see the messages being sent and received in the console.
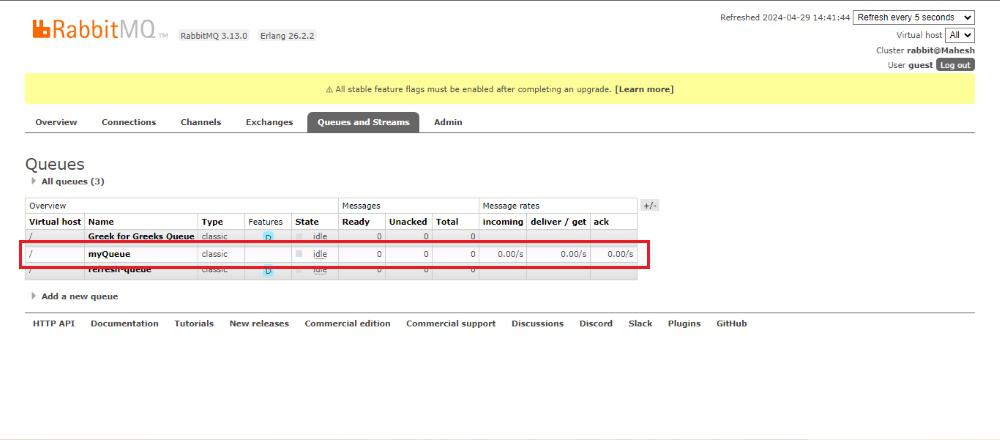
RabbitMQ Dashboard:
Output:
Below in the console, we can see the Message is successfully sent and received.
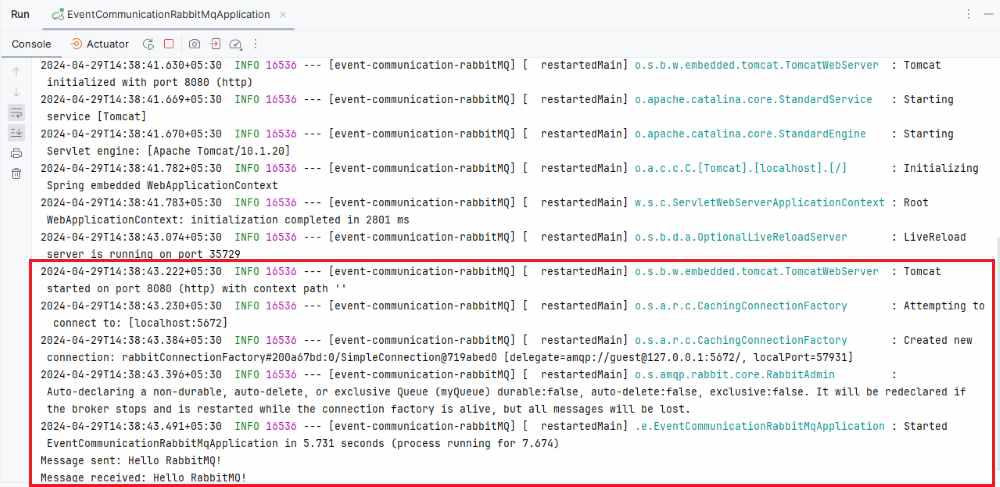
This project demonstrates a basic Spring Boot application that sends messages to RabbitMQ using a producer component and consumes them using a consumer component.
Share your thoughts in the comments
Please Login to comment...