Creating a Keras Callback to send notifications on WhatsApp
Last Updated :
21 Mar, 2024
Whenever, working on a research project, training a neural network takes a long amount of time. So we initiate the training process and leave the laptop alone peacefully for some time. Many times, the process stops in between due to a network error or any other issue. In these cases, One would want to be informed as soon as the training process stops (due to an error or after completing the specified number of epochs) so that one can take the next steps accordingly with minimal wastage of time.
In this tutorial, we will create a Keras callback that sends notifications about your deep learning model on your WhatsApp. This tutorial is broadly divided into 3 segments –
Sending messages to WhatsApp using Python
There are a number of methods for connecting the WhatsApp messenger with python. However, the simplest one is the one using Twilio. Twilio is a communications platform which allows developers to send notifications on different platforms such as vanilla text SMS, WhatsApp and even voice calls. It offers a very clean and concise API for connecting WhatsApp with python.
Step 1. Head over to this link and sign-up for Twilio.
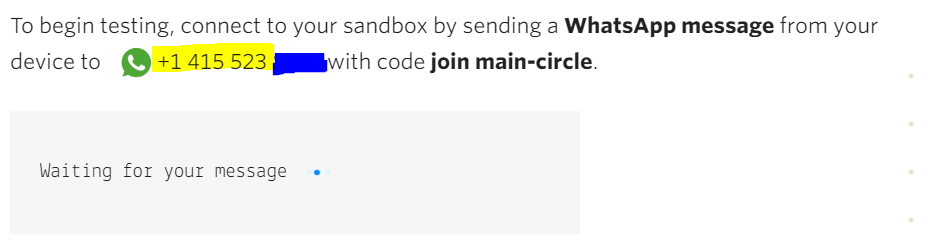
Step 2. Activate the Twilio Sandbox for WhatsApp by following this link. You will be able to see an interface like the one below. You can activate the sandbox by saving this number (highlighted) as a contact on your phone and sending the message ‘join main-circle’ to the saved contact. Wait for the interface to show you a confirmation message.
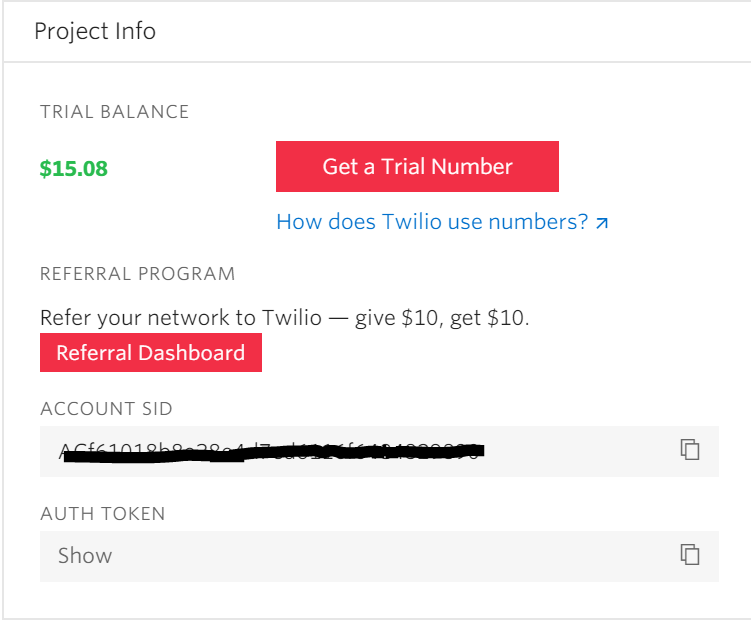
Step 3. Head over to your Twilio console by clicking on the Twilio logo on the top left corner of your screen or clicking this link. Here, you can find your Account ID and Auth Token which will be needed while setting up your Twilio client in Python.
Step 4. Setting up the Twilio Client in Python and Sending your first message. Open a code-editor and paste the following code in a python file. In the code snippet below, the account_sid and auth_token are the tokens obtained from the console as shown in Step 3. ‘Your_whatsapp_number’ is the number where you want to receive the text notifications. Finally, ‘From_number’ is the phone number you encountered while setting up the Twilio Sandbox for WhatsApp in Step 2. Note- Include the country code in the numbers. For eg – if your phone number is 112233445 and the country code is +91, you have to write +91112233445 in ‘Your_whatsapp_number’ field.
from twilio.rest import Client
account_sid = '<YOUR-ACC-ID-HERE>8'
auth_token = 'your_auth_token'
Your_whatsapp_number = ‘+911234567899’
From_number = ‘+1488*****’
client = Client(account_sid, auth_token)
message = client.messages.create(
body ='Hello there !',
from_= From_number,
to = Your_whatsapp_number
)
print(message.sid)
|
Upon executing this script, you will see a WhatsApp notification on your mobile from the number obtained in Step 2.
Creating a Keras Callback and Understanding how it works
According to the official Keras documentation, “a callback is a set of functions to be applied at given stages of the training procedure. You can use callbacks to get a view on internal states and statistics of the model during training”.
While training your deep neural networks, you might have faced situations where you want to record different metrics such as accuracy, loss to a file or changing the learning rate with epochs (adaptive learning rates). In these situations, we use an object of a class called Callbacks which allow you to retrieve, set values of different model parameters during different stages of training, testing or evaluation process. The official TensorFlow guide is an excellent resource for learning how to create your own Callback.
The TensorFlow team has done an excellent job in naming the methods in the Callback class which make it really simple to understand what each function is intended to do/ capable of doing. The naming convention used names each function in the form of on_{train/ test/ batch/ epoch}_{begin/ end}.
For our task, we want to know when a model stops training. This information could be obtained from the function on_train_end(). Hence, we can create a class ‘WhatappCallBack’ which extends the Callback class of Keras. Inside this class, we will overload the on_train_end() function to in order to know the information required.
First, we encapsulate the code that we wrote for sending a message using Twilio in a function named ‘send_message’. This function takes in the text that we want to send as a parameter.
account_sid = 'account_ID'
auth_token = 'auth_token'
client = Client(account_sid, auth_token)
message = client.messages \
.create(
from_='whatsapp:+14155238886',
body = text,
to ='whatsapp:+918*********'
)
|
Next, we define our Callback and overload the on_train_end() function.
class WhatsappCallBack(Callback):
def on_train_begin(self, logs = None):
self.losses = []
send_message("The training has started")
def on_epoch_begin(self, epoch, logs = None):
pass
def on_epoch_end(self, epoch, logs = None):
self.losses.append(logs['loss'])
def on_train_end(self, logs = None):
send_message("The training has ended")
send_message(self.losses)
|
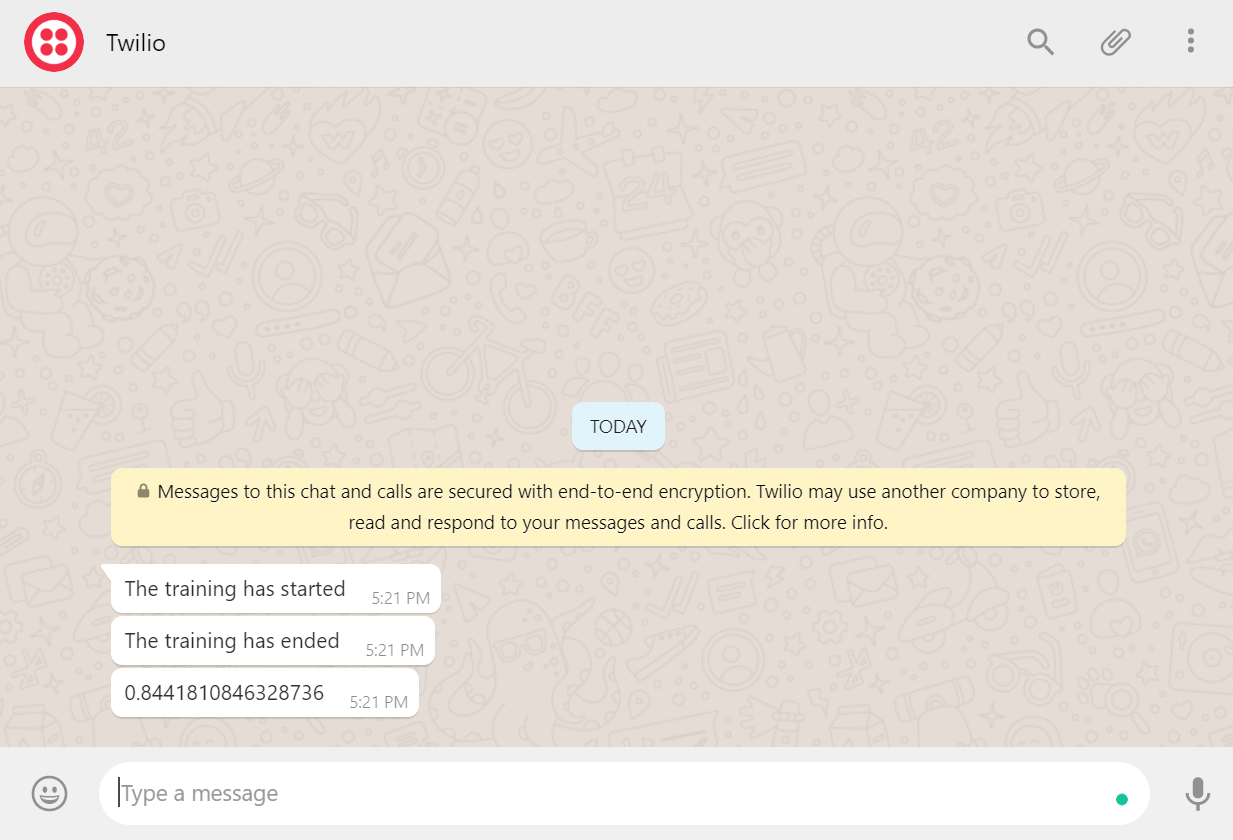
As we can see here, we are sending messages at the beginning and at the end of the training process. We also send the training loss via our callback.
Tying it all together
In order to put our function to test, we need to define a simple feed-forward network and create a dummy dataset. This will be demonstrated in the next steps.
Step 1. We use sklearn library’s make_classification method to generate 1000 random sample data points and a very simple ANN.
x, y = make_classification(n_samples = 1000, n_classes = 2, n_features = 20)
x_train, x_test, y_train, y_test = train_test_split(x, y, test_size = 0.3)
def create_model():
model = Sequential()
model.add(Dense(60, input_dim = 20, activation ='relu'))
model.add(Dense(1, activation ='sigmoid'))
model.compile(loss ='binary_crossentropy', optimizer ='adam', metrics =['accuracy'])
return model
model = create_model()
|
Step 2. We create an instance of the ‘‘WhatappCallBack’ ’ class and pass this instance in the callbacks argument while fitting our model.
cb2 = WhatsappCallBack()
model.fit(x_train, y_train, batch_size = 32, epochs = 20, callbacks =[cb2], verbose = 1)
|
Step 3. Enjoy the results
Share your thoughts in the comments
Please Login to comment...