How to Create AWS Billing Alarm ?
Last Updated :
17 Apr, 2024
In this article, we will see how to create an billing alarm. We can create alarm to estimate the AWS charges by using Amazon CloudWatch. The AWS account’s estimated costs are computed and provided to CloudWatch as metric data multiple times a day after activating the monitoring of estimated charges.
The alarm gets triggered when the account billing exceeds the threshold value specified during the configuration. Only when the current billing surpasses the threshold does it activate. It doesn’t make use of estimates derived from your consumption for the current month.
What Is Amazon Cloudwatch?
CloudWatch is a tool for gathering and monitoring metrics, or variables, related to the applications and resources. Real-time monitoring of your Amazon Web Services (AWS) resources and applications is provided via Amazon CloudWatch.
Metrics for each AWS service used are immediately shown on the CloudWatch page. Additionally, we can also make custom dashboards to show analytics about our applications as well as groupings of metrics of our choice.
Creating Billing Alarm
Before creating an alarm for the estimated charges,it is required to enable billing alerts first, so that we can monitor the AWS charges and create an alarm using billing data. After enabling the billing alerts, data collection can not be disabled. However, we can delete any billing alarm created.
Enable Billing Alerts: A Step-By-Step Guide
Please follow below steps to enable billing alerts for estimated AWS charges:
Step 1: Open the AWS Billing console at https://console.aws.amazon.com/billing/.
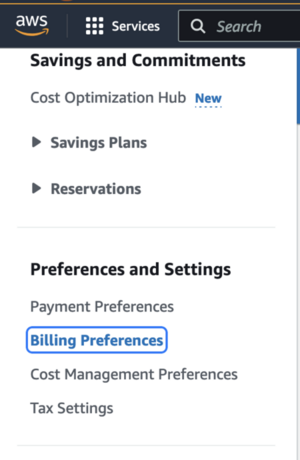
Step 2: In the navigation pane, choose Billing Preferences.
Step 3: In Alert preferences choose Edit.

Step 4: Select “Receive CloudWatch Billing Alerts”
.png)
Step 5: Select Update.
How to Create Billing Alarm: A Step-By-Step Guide
Now we can follow below given steps to create a billing alarm using the CloudWatch console :
Step 1: Open the CloudWatch console at https://console.aws.amazon.com/cloudwatch/
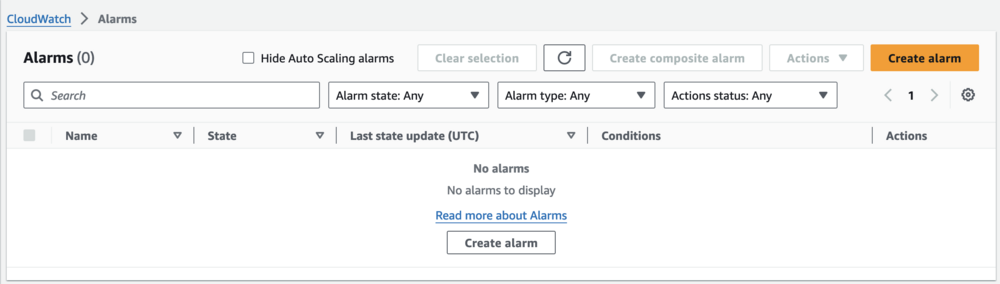
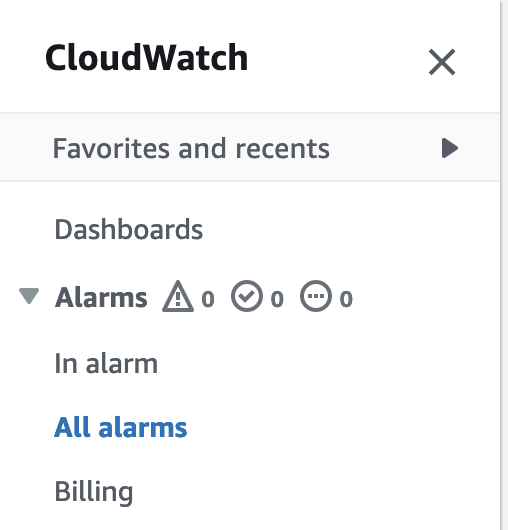
Step 2: In the navigation pane, choose Alarms, and then choose All alarms.

Step 3: Select Create alarm.
Step 4: Choose Select metric. In Browse option, choose Billing, and then choose Total Estimated Charge.
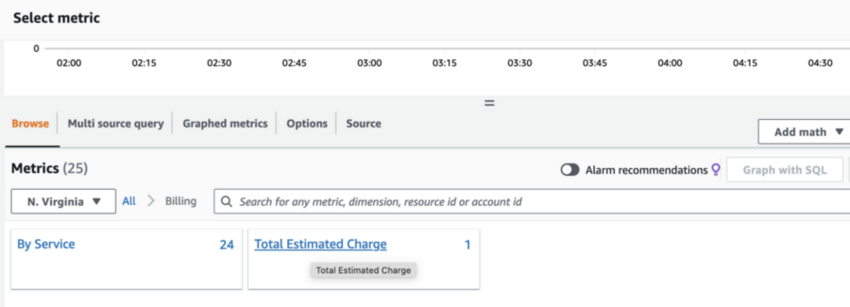
Step 5: Select the box for the EstimatedCharges metric, and then choose Select metric.
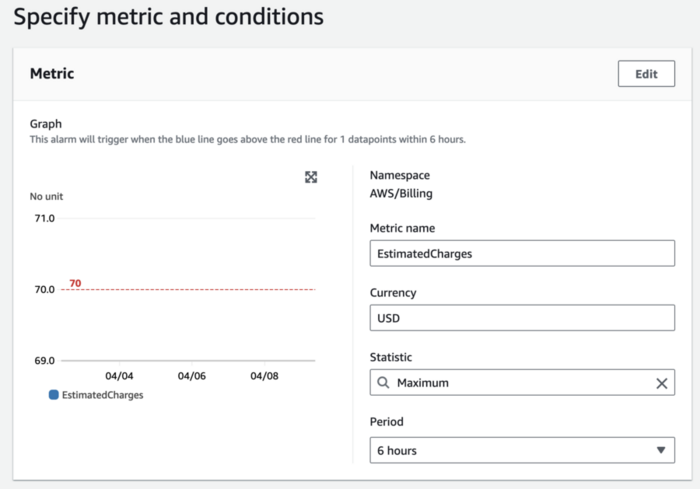
Step 6: Fill the requested details on “Specify metric and conditions” page:
- For Statistic, choose Maximum.
- For Period, choose 6 hours(or choose any specified period as per your use case).
- For Threshold type, choose Static.
- For Whenever EstimatedCharges is . . ., choose Greater.
- For than . . ., define the value that you want to cause your alarm to trigger. For example, 200 USD.
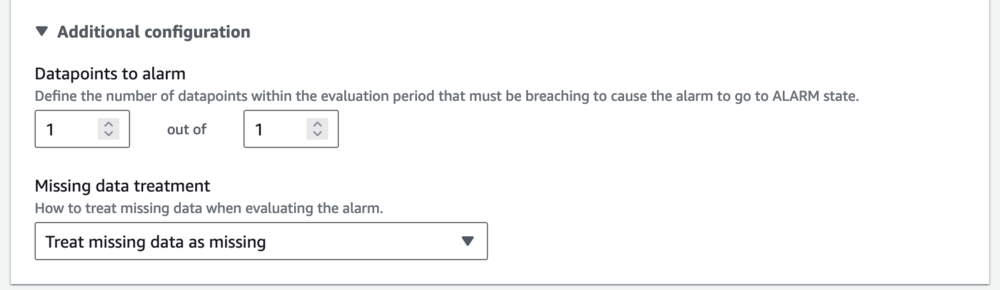
Step 7: Choose Additional Configuration and do the following:
- For Datapoints to alarm, specify 1 out of 1.
- For Missing data treatment, choose Treat missing data as missing.
Step 8: Select Next.
Step 9: Under Notification, ensure that In alarm is selected. Then specify Amazon SNS topic to be notified when your alarm is in the ALARM state. The topic can include the email address so that user receive email when the billing amount crosses the threshold value.

Step 10: Select Next.
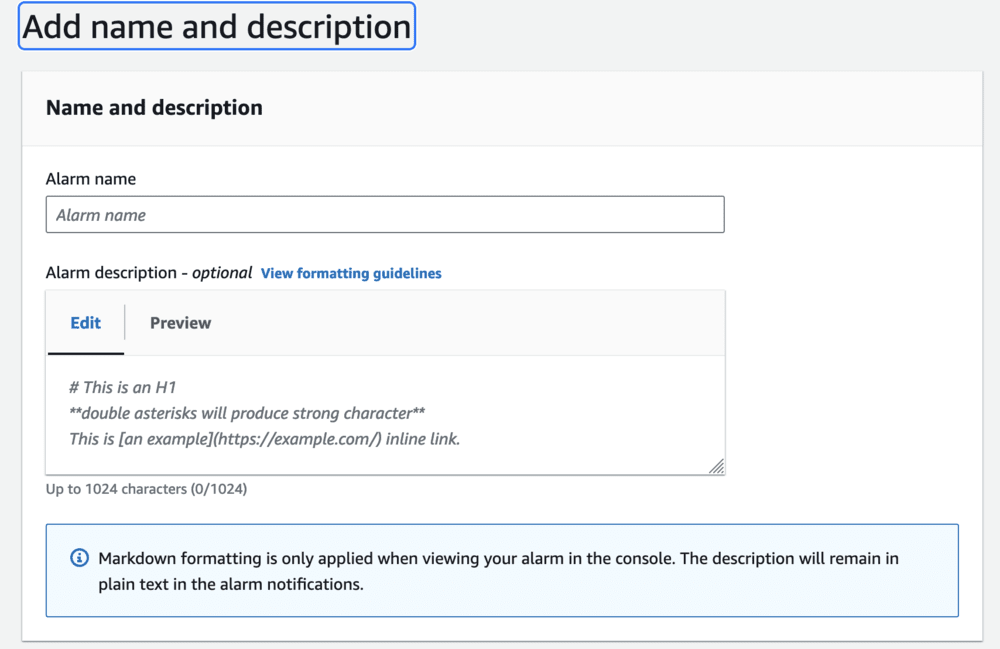
Step 11: Under Name and description, enter a name for your alarm.
Step 12: Under Preview and create, make sure that your configuration is correct, and then choose Create alarm.
The above steps will successfully create Billing alarm.
There are few points you need to consider regarding billing alarm:
- If the alarm is created when the prices have already surpassed the threshold, the alarm goes to the ALARM state immediately.
- Before creation of the billing alarm, make sure to set the Region to US East (N. Virginia). Billing metric data gets stored in this Region and represents worldwide charges.
If you don not need the billing alarm, you can delete it. To delete it, you can follow below given procedure:
How to Delete a Billing Alarm: A Step-By-Step Guide
Step 1: Open the CloudWatch console at https://console.aws.amazon.com/cloudwatch/.
Step 2: Make sure, you are in N.Virginia Region.
Step 3: In the navigation pane, choose Alarms, All alarms.
Step 4: Select the check box next to the alarm that you want to delete and choose Actions, Delete.
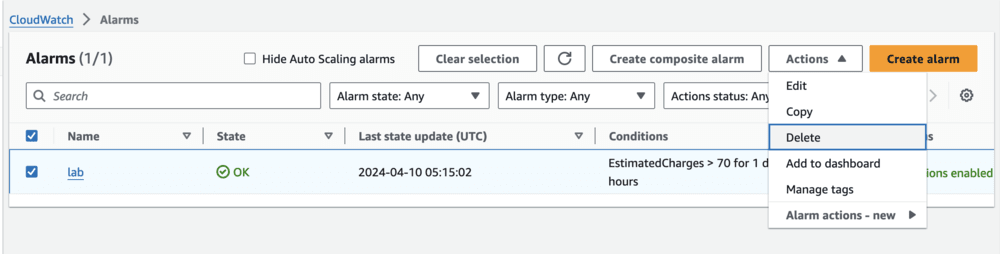
Step 5: Choose ‘Delete’ when prompted.

Create AWS Billing Alarm – FAQs
Can we create AWS Billing Alarm in ap-southeast-2 (Sydney) Region?
No. It must be created in N.Virginia region only as billing metric data is stored in the US East (N. Virginia) Region and represents worldwide charges.
Can we disable the Billing Alert for Data Collection?
No. You can’t disable data collection, but you can delete any billing alarms that you created.
Can I Create Billing Alarm if I am logged in as IAM user?
Yes, you can create billing alarm as an IAM user but the IAM user must have permissions to view billing details.
Can we create Billing alarm in APN (Amazon Partner Network) accounts?
No. Billing metrics aren’t posted to CloudWatch for APN accounts. Therefore, alarm can not be created for these accounts.
Share your thoughts in the comments
Please Login to comment...