Build an App Using AWS Copilot
Last Updated :
01 May, 2023
AWS Copilot is a command line tool provided by amazon web services, which helps developers to focus on creating and improving the application, without always worrying about the infrastructure details. It helps in deploying the application code, scales if required and also monitor the application health.
Prerequisite
- Install Docker.
- Install AWS CLI (Command Line Interface).
- Create an IAM user to configure aws cli
Install Docker
The first necessary thing which you have to installed in your system is Docker. if, you have already installed docker then move to next point. We have to first check and enable virtualization from BIOS. Then, follow these steps to install docker in the windows system.
- Click on this link to download the Docker Desktop. Once downloaded, Click on it to open and install.
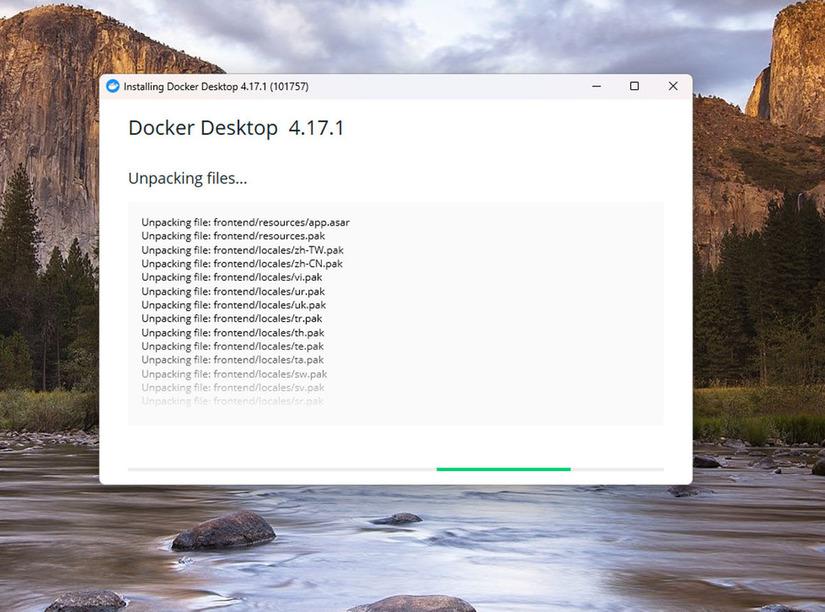
docker is installing
- In a few minutes, Docker Desktop is installed in the system.
- Launch the Docker Desktop in the system, it will ask to accept the Docker subscription service agreement for the first time. Click on Accept.
- In the next step, we have to login through the docker credentials.
- As soon as the credentials are verified it will launch the docker desktop app which shows the docker engine is running.
- Sometimes, some error also occurred during the installation like WSL 2 installation is incomplete.
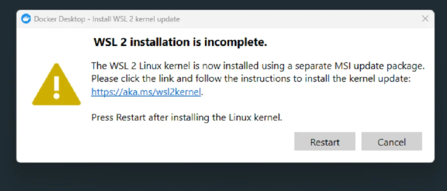
WSL 2 error
- To fix this error click on the link given in the error and download the WSL 2 Linux kernel update package.
- After downloading install it in your system.
- After installing this kernel package again relaunch the Docker Desktop. It will work fine and shows the docker engine is running.
Install AWS CLI (Command Line Interface)
The next prerequisite is to install AWS CLI, because AWS Copilot is a CLI tool. In this demo we are installing the AWS CLI V2 in windows command prompt. Follow these steps to install AWS CLI in your system.
- Open the command prompt of windows and run the given command. `msiexec.exe /i https://awscli.amazonaws.com/AWSCLIV2.msi`
- It will start the installation process of AWS CLI. Click Next for couple of times and then click on Install to start the installation.
- After few minutes, click on Finish to finish the AWS CLI installation.
- Now, our next step is to set the path of the AWS CLI to the environmental variable to access aws cli from any directory. First, Open the folder where we install this AWS CLI and copy the path.
- Next open the Environment variable and add the copied path to it and click on OK.
- We successfully set up the aws cli in the system. check it by using the `aws -version` command in command prompt.
We successfully installed aws cli in the system let’s move to the next part to create IAM user which will help in to configure the aws cli.
Create an IAM User to Configure AWS CLI
AWS CLI requires access key and secret key to configure it and to use the aws services on command line. So let’s create a new user in the aws account to get the access key and secret key. Follow these steps to create an IAM user to configure aws cli.
- Login to the AWS management console and search IAM in the search bar and click on Users section.
- Click on Add Users to create a new user.
- Provide the user name, here we have the username as `cli_user`. Then click on Next.
- We need to fill the details in the Set permissions tab. Here select the policy name as `AdministratorAccess` and then click on next.
- Now, we need to review the provided details and finally click on `Create User` button.
- Now you can see that our `cli_user` is created and listed under the list of IAM users. Now, click on the username we created, here `cli_user`.
- Now, under the Security Credentials tab, we will find the Create access Key button, click on it.
- You are redirected to new page, here select the Command Line Interface option, and then click on Next.
- Add a description tag on the next page and click the Create Access Key button.
- A green notification message confirms the successful creation of Access Key. Copy the Access key ID and the Secret Access Key we will be using this while connecting our command line to the AWS account.
- Open your command prompt and run the command `aws configure`. When prompted, paste the copied AWS Access Key ID and the Secret Access Key, and other things can be left as default by just hitting enter.
- Now, you can easily run aws commands in your local command prompt.
Build an Application
Step 1: Download & Configure AWS Copilot
- Now that we have installed AWS copilot in the system, we can run copilot commands like `copilot –help`.
- To check the version of copilot run command `copilot -v`.
- Now, our next step is to set the path of the AWS copilot to the environmental variable to access copilot from any directory. First, Open the folder where we install this AWS CLI and copy the path.
- Next open the Environment variable and add the copied path to it and click on OK.
Step 2: Download some code to deploy
If you already have code to deploy, simply open your terminal and cd into the directory where your Dockerfile is present. In this demo, we cloning a sample repository.
- Open the command prompt and clone the repository using `git clone https://github.com/Ayumilan/AWS_Sample_app.git Demo_app` in your system.
- This sample code deploy a sample static website using AWS Copilot with a Dockerfile.
Step 3: Set up our app
- Let’s set up the app and run the `copilot init` command. It will ask for set up the name of the application.
Step 4: Answer a few questions
Next, it will ask few questions to configure the best AWS infrastructure for the application.
- It will ask to choose the workload type. Here we choose Load Balanced Web Service.
- Next, it asked to provide a name to the service. We set the service name as `api`.
- Next, you need to provide the path of the Dockerfile used.
- Also, you need to provide the port number to send the network traffic. Here, we want to redirect the traffic to port 80.
After this, AWS Copilot will begin configuring the AWS infrastructure to administer the service.
Step 5: Deploy your service
When the infrastructure set up is completed, it will ask to deploy the appliaction.
- Type yes or y to deploy a test environment.
- Your application gets deployed, and the public service URL appears. Copy this URL.
- Open the copied URL in the browser, and our application gets rendered.
- Now, you can see the list of services running based on the Dockerfile provided.
- Run the command `copilot app ls` to see the list of apps running.
- Run the command `copilot svc ls` to see the services running.
- Run the command `copilot env ls` to see the environments being used.
- Run the command `copilot svc status` to see the status of the service running here on our demoapp.
Step 6: Clean up
Run `copilot app delete` command to delete the ECS Service and ECR Repository, as well as all the other resources Copilot has created for the application. After running the command, It will again ask to confirm if you want to delete, provide `y` as input, and your app gets deleted.
In this article, we learn to build a sample app using AWS Copilot successfully.
Share your thoughts in the comments
Please Login to comment...