Blogging Platform using Django
Last Updated :
09 Oct, 2023
Django, a high-level Python web framework, provides a powerful and flexible foundation to build upon. In this article, we will explore the process of building a blogging platform using Django, covering key concepts and steps along the way.
Blogging Platform using Django
A blogging platform using Django is a web application built with the Django framework that allows users to create, publish, and manage blog posts on a website, providing a user-friendly content management system for bloggers.
Setting Up the Project Folder
django-admin startproject <project_name>
cd <project_name>
python manage.py startapp gallery
model.py: Here we have created a Product table with name, description, image, created_at, and updated_at fields in the table.
Python3
from django.db import models
class Product(models.Model):
name = models.CharField(max_length=255)
description = models.TextField()
image = models.ImageField(upload_to='products/')
created_at = models.DateTimeField(auto_now_add=True)
updated_at = models.DateTimeField(auto_now=True)
def __str__(self):
return self.name
def edit(self, name, description, image):
self.name = name
self.description = description
self.image = image
self.save()
def short_description(self):
words = self.description.split()
if len(words) > 50:
return ' '.join(words[:30]) + '...'
else:
return self.description
|
admin.py: Here we are registering our table in the admin.
Python3
from django.contrib import admin
from .models import Product
admin.site.register(Product)
|
views.py: Here’s a brief explanation of each part:
- product_list(request): This view retrieves a list of all products from the database using the Product model and renders a template named ‘index.html’, passing the list of products to the template.
- product_detail(request, pk): This view retrieves a specific product by its primary key (pk) from the database and renders a template named ‘index2.html’, passing the product data to the template.
- edit_product(request, pk): This view handles editing a product. It retrieves the product to edit, processes a submitted form to update the product’s information, and redirects to the product list if the form is valid. Otherwise, it displays the form for editing.
- delete_product(request, pk): Similar to the edit view, this view handles product deletion. If a POST request is made, it deletes the product and redirects to the product list. Otherwise, it displays a confirmation page for deleting the product.
Python3
from django.shortcuts import render
from .models import Product
from django.http import HttpResponse
from django.shortcuts import render, redirect, get_object_or_404
from .models import Product
from .forms import ProductForm
def product_list(request):
products = Product.objects.all()
return render(request, 'myapp/index.html', {'products': products})
def product_detail(request, pk):
product = Product.objects.get(pk=pk)
return render(request, 'myapp/index2.html', {'product': product})
def edit_product(request, pk):
product = get_object_or_404(Product, pk=pk)
if request.method == 'POST':
form = ProductForm(request.POST, instance=product)
if form.is_valid():
form.save()
return redirect('product_list')
else:
form = ProductForm(instance=product)
return render(request, 'myapp/edit.html', {'form': form})
def delete_product(request, pk):
product = get_object_or_404(Product, pk=pk)
if request.method == 'POST':
product.delete()
return redirect('product_list')
return render(request, 'myapp/delete.html', {'product': product})
def home(request):
return HttpResponse('Hello, World!')
|
form.py: Here we created a form to edit the blog when a user requests.
Python3
from django import forms
from .models import Product
class ProductForm(forms.ModelForm):
class Meta:
model = Product
fields = ['name', 'description', 'image']
|
Image Gallery GUI
In the product list template, it loops through the products queryset and displays each product’s name, description, and an image. The blog detail template shows detailed information about each blog and provides a link to go back to the blog home page.
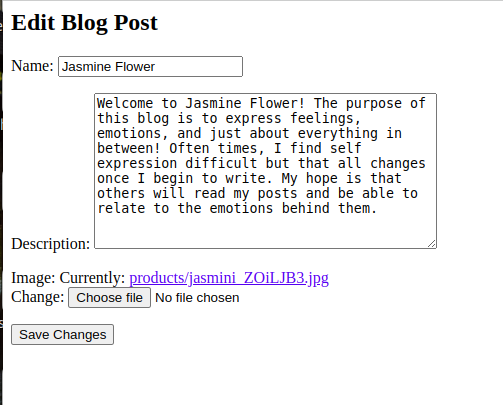
edit.html: HTML file to edit the Blog.
HTML
<h2>Edit Blog Post</h2>
<form method="post">
{% csrf_token %}
{{ form.as_p }}
<button type="submit">Save Changes</button>
</form>
|
delete.html: HTML file to delete the Blog.
HTML
<h2>Delete Blog Post</h2>
<p>Are you sure you want to delete "{{ product.name }}"?</p>
<form method="post">
{% csrf_token %}
<button type="submit">Yes, Delete</button>
</form>
|
index.html: HTML file to show all the list of the Blog.
Python3
<!DOCTYPE html>
<html lang="en">
<head>
<meta charset="UTF-8">
<meta name="viewport" content="width=device-width, initial-scale=1.0">
<title>Blog Website</title>
<!-- Add Bootstrap CSS link here -->
</head>
<body>
<div class="container mt-5">
<h1>Today's New Blogs</h1>
<div class="row">
{% for product in products %}
<div class="col-md-4 mb-4">
<div class="card">
<a href="{% url 'product_detail' product.pk %}">
<img src="{{ product.image.url }}" alt="{{ product.created_name }}" class="card-img-top">
</a>
<div class="card-body">
<h5 class="card-title">{{ product.name }}</h5>
<p class="card-text">{{ product.short_description }}</p>
<a href="{% url 'edit_product' product.pk %}">Edit</a>
<a href="{% url 'delete_product' product.pk %}">Delete</a> <br>
<small class="card-text">Created at: {{ product.created_at }}</small> <br>
<small class="card-text">Updated at: {{ product.updated_at }}</small>
</div>
</div>
</div>
{% endfor %}
</div>
</div>
<!-- Add Bootstrap JS and jQuery scripts here (if needed) -->
</body>
</html>
|
index2.html: HTML file to show the full details of the Blog.
Python3
<!DOCTYPE html>
<html lang="en">
<head>
<meta charset="UTF-8">
<title>{{ product.name }} - Blog Detail</title>
</head>
<body>
<h1>{{ product.name }} - Blog </h1>
<div>
<img src="{{ product.image.url }}" alt="{{ product.name }}" width="200">
</div>
<h2>{{ product.name }}</h2>
<p>{{ product.description }}</p>
<a href="{% url 'edit_product' product.pk %}">Edit</a>
<a href="{% url 'delete_product' product.pk %}">Delete</a> <br>
<a href="{% url 'product_list' %}">Back to Blogs Home Page</a>
</body>
</html>
|
urls.py: Define the URL patterns in the urls.py file of the catalog app to map views to URLs.
Python3
from django.urls import path
from . import views
urlpatterns = [
path('/home', views.home, name='home'),
path('', views.product_list, name='product_list'),
path('<int:pk>/', views.product_detail, name='product_detail'),
path('<int:pk>/edit/', views.edit_product, name='edit_product'),
path('<int:pk>/delete/', views.delete_product, name='delete_product'),
]
|
urls.py: Add the necessary URL patterns in your project’s urls.py.
Python3
from django.contrib import admin
from django.urls import path, include
urlpatterns = [
path('admin/', admin.site.urls),
path('', include('gallery.urls')),
]
|
Deploy the Project
Create a super user to add data into the data base by the following command:
python manage.py createsuperuser
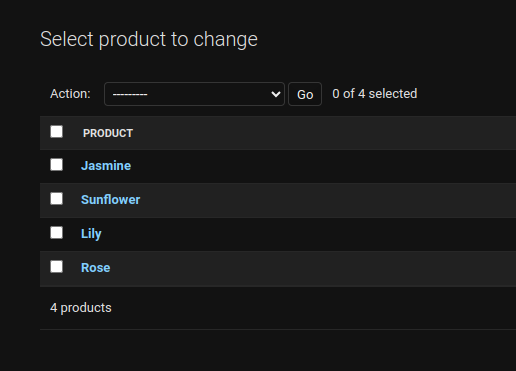
Now, Go to the http://127.0.0.1:8000/admin/ and add the Images, name and its description.
Migrate the data into the database.
python manage.py makemigrations
python manage.py migrate
Deploy the project
python manage.py runserver
Output:
.png)


Share your thoughts in the comments
Please Login to comment...