Angular PrimeNG Table Custom Form Elements
Last Updated :
29 Mar, 2024
Angular PrimeNG is an open-source UI component library for Angular applications. It provides a set of high-quality, cross-browser-compatible UI components that can be easily integrated into Angular applications to create modern and responsive user interfaces. PrimeNG offers a wide range of components, including form elements, data displays, dropdowns, calendars, Custom Form Elements, and various other UI elements.
In this article, we will see the Custom Form Elements in Angular PrimeNG Tables, along with understanding its basic implementation through the examples.
Custom Form Elements are specialized input components that expand beyond the abilities of standard HTML form controls. They allow developers to tailor the user experience to particular requirements by way of introducing more desirable interactivity. Using integrating custom form elements into PrimeNG tables, you may create a greater attractive and intuitive user interface.
Creating Angular Application & Module Installation
Step 1: Create an Angular application using the following command.
ng new myapp
Step 2: After creating your Angular application i.e. myapp, move to it using the following command.
cd myapp
Step 3: To use the Custom form elements in our Angular application, we need to install the PrimeNG library using the following command.
npm install primeng --save
npm install primeicons --save
Step 4: Create a new component using the following command
ng generate component <Component-name>
Step 5: To run the app use the following command
ng serve --open
Project Structure
The project structure will look like the following:
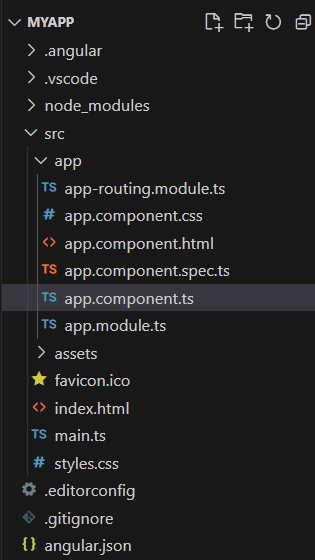
project structure
Example: In this example, we will create an interactive data table with dropdowns using Angular and PrimeNG, allowing users to update and save status information for employees. Here, we will create a new component named employee.
HTML
<p-table [value]="data">
<ng-template pTemplate="header">
<tr style="text-align: left;">
<th>Name</th>
<th>Role</th>
<th>Status</th>
<th>Action</th>
</tr>
</ng-template>
<ng-template pTemplate="body" let-rowData>
<tr>
<td>{{ rowData.name }}</td>
<td>{{ rowData.role }}</td>
<td>
<p-dropdown [options]="statusOptions"
[(ngModel)]="rowData.status"
[style]="{ 'z-index': 10000, 'max-height':
'200px', 'overflow-y': 'auto' }">
</p-dropdown>
</td>
<td>
<button pButton type="button"
label="Save"
(click)="saveRow(rowData)">
</button>
</td>
</tr>
</ng-template>
</p-table>
|
HTML
<div class="app-container" style="width: 30%;">
<h1 style="color:green">
GeeksforGeeks
</h1>
<h3>
Table Custom Form Elements
</h3>
<app-employee></app-employee>
</div>
|
Javascript
import { Component, OnInit } from '@angular/core';
import { SelectItem } from 'primeng/api';
interface Employee {
name: string;
role: string;
status: string;
}
@Component({
selector: 'app-employee',
templateUrl: './employee.component.html',
styleUrls: ['./employee.component.css']
})
export class EmployeeComponent
implements OnInit {
data: Employee[] = [
{ name: 'Pratyush', role: 'Developer', status: 'Active' },
{ name: 'Shubham', role: 'Designer', status: 'Inactive' },
{ name: 'Rohit', role: 'Developer', status: 'Active' },
{ name: 'Rishabh', role: 'Manager', status: 'Inactive' },
{ name: 'Piyush', role: 'Designer', status: 'Active' },
{ name: 'Aayush', role: 'Manager', status: 'Inactive' },
];
statusOptions: SelectItem[] = [
{ label: 'Active', value: 'Active' },
{ label: 'Inactive', value: 'Inactive' }
];
constructor() { }
ngOnInit(): void { }
saveRow(rowData: Employee): void {
const rowIndex =
this.data.findIndex(item => item === rowData);
if (rowIndex !== -1) {
this.data[rowIndex].status = rowData.status;
console.log('Row data saved:', this.data[rowIndex]);
} else {
console.log('Row data not found:', rowData);
}
}
}
|
Javascript
import { NgModule }
from '@angular/core';
import { BrowserModule }
from '@angular/platform-browser';
import { BrowserAnimationsModule }
from '@angular/platform-browser/animations';
import { TableModule }
from 'primeng/table';
import { DropdownModule }
from 'primeng/dropdown';
import { ButtonModule }
from 'primeng/button';
import { FormsModule }
from '@angular/forms';
import { AppComponent }
from './app.component';
import { EmployeeComponent }
from './employee/employee.component';
@NgModule({
declarations: [
AppComponent,
EmployeeComponent
],
imports: [
BrowserModule,
BrowserAnimationsModule,
FormsModule,
TableModule,
DropdownModule,
ButtonModule
],
providers: [],
bootstrap: [AppComponent]
})
export class AppModule { }
|
Output:
Example 2: In this example, we are building a dynamic table with customizable form elements, including an interactive dropdown status field. Here, we will create a new component called custom-form-table, which will contain our custom form elements integrated with the PrimeNG Table.
HTML
<h1 style="color:green">
GeeksforGeeks
</h1>
<h3>
Table Custom Form Elements
</h3>
<form [formGroup]="dataForm"
(ngSubmit)="onSubmit()">
<div class="form-group">
<label for="name">Name:</label>
<input type="text"
id="name"
formControlName="name"
class="form-control" />
</div>
<div class="form-group">
<label for="age">Age:</label>
<input type="number"
id="age"
formControlName="age"
class="form-control" />
</div>
<div class="form-group">
<label>Status:</label>
<div>
<label>
<input type="radio"
[value]="'active'"
formControlName="status" />
Active
</label>
<label>
<input type="radio"
[value]="'inactive'"
formControlName="status" />
Inactive
</label>
<label>
<input type="radio"
[value]="'pending'"
formControlName="status" />
Pending
</label>
</div>
</div><br>
<button type="submit"
class="btn btn-primary">
Add Data</button>
</form><br>
<div class="p-table" style="width: 30%;">
<p-table [value]="data">
<ng-template pTemplate="header">
<tr>
<th *ngFor="let col of columns"
style="text-align: left;">
{{ col.header }}
</th>
</tr>
</ng-template>
<ng-template pTemplate="body" let-rowData
let-rowIndex="rowIndex">
<tr>
<td *ngFor="let col of columns; let colIndex = index">
<ng-container *ngIf="col.field !== 'status';
else statusDropdown">
{{ rowData[col.field] }}
</ng-container>
<ng-template #statusDropdown>
<p-dropdown *ngIf=
"col.field === 'status'"
[options]="statusOptions"
[(ngModel)]="data[rowIndex].status"
(ngModelChange)=
"onStatusChange($event, rowIndex)">
</p-dropdown>
</ng-template>
</td>
</tr>
</ng-template>
</p-table>
</div>
|
HTML
<app-custom-form-table></app-custom-form-table>
|
Javascript
import { Component, OnInit } from '@angular/core';
import { FormBuilder, FormGroup, Validators }
from '@angular/forms';
import { SelectItem } from 'primeng/api';
@Component({
selector: 'app-custom-form-table',
templateUrl: './custom-form-table.component.html',
styleUrls: ['./custom-form-table.component.css']
})
export class CustomFormTableComponent implements OnInit {
data: any[] = [
{ id: 1,
name: 'Shrutin',
age: 28,
status: 'active' },
{ id: 2,
name: 'Rishabh',
age: 24,
status: 'inactive' },
{ id: 3,
name: 'Nkhil',
age: 32,
status: 'pending' }
];
columns: any[] = [
{ field: 'name', header: 'Name' },
{ field: 'age', header: 'Age' },
{ field: 'status', header: 'Status' }
];
statusOptions: SelectItem[] = [
{ label: 'Active', value: 'active' },
{ label: 'Inactive', value: 'inactive' },
{ label: 'Pending', value: 'pending' }
];
dataForm!: FormGroup;
constructor(private fb: FormBuilder) { }
ngOnInit(): void {
this.dataForm = this.fb.group({
name: ['', Validators.required],
age: ['', Validators.required],
status: ['active']
});
}
onSubmit() {
if (this.dataForm.valid) {
const formData = this.dataForm.value;
const newId = this.data.length + 1;
this.data.push({
id: newId,
name: formData.name,
age: formData.age,
status: formData.status
});
this.dataForm.reset();
}
}
onStatusChange(event: any, rowIndex: number) {
this.data[rowIndex].status = event.value;
}
}
|
Javascript
import { BrowserModule }
from "@angular/platform-browser";
import { NgModule }
from "@angular/core";
import { ReactiveFormsModule, FormsModule }
from "@angular/forms";
import { HttpClientModule }
from "@angular/common/http";
import { BrowserAnimationsModule }
from "@angular/platform-browser/animations";
import { TableModule }
from "primeng/table";
import { DropdownModule }
from "primeng/dropdown";
import { AppComponent }
from "./app.component";
import { CustomFormTableComponent }
from "./custom-form-table/custom-form-table.component";
@NgModule({
declarations: [AppComponent, CustomFormTableComponent],
imports: [
BrowserModule,
ReactiveFormsModule,
FormsModule,
HttpClientModule,
BrowserAnimationsModule,
TableModule,
DropdownModule,
],
providers: [],
bootstrap: [AppComponent],
})
export class AppModule { }
|
Output:

Reference: https://www.primefaces.org/primeng-v14-lts/table
Share your thoughts in the comments
Please Login to comment...