Using Tags in Git
Last Updated :
08 Jun, 2020
Tagging in GIT refers to creating specific points in the history of your repository/data. It is usually done to mark the release points.
Two main purposes of tags are:
- Make Release point on your code.
- Create historic restore points.
You can create tags when you want to create a release point for a stable version of your code. You can also create tags when you want to create a historic point for your code that you can refer to in the future to restore your data.
To create a tag we need to go through the following steps:
Step 1: Checkout to the branch you want to create the tag.
git checkout {branch name}

Step 2: Create a tag with some name
git tag {tag name}
There are many more ways in which we create tags.
Annotated Tags
git tag -a {tag name} -m {some message}

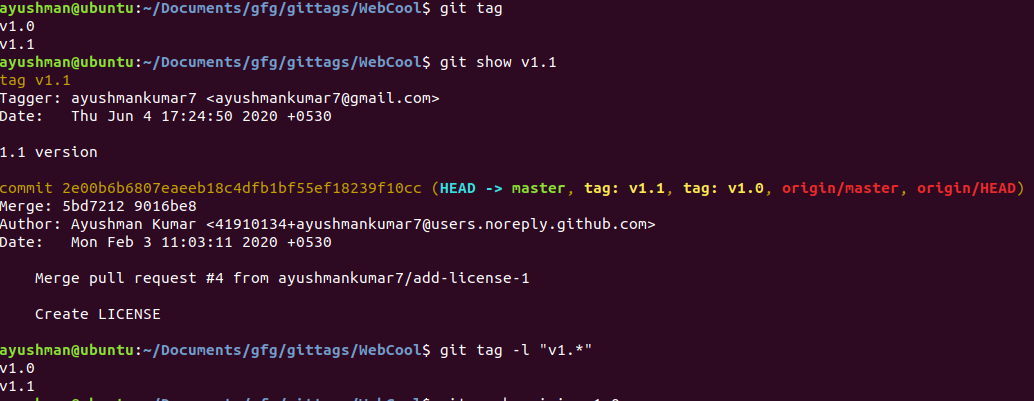
Step 3: See all the created tags.
git tag
To see the details of the tag we can use
git show {tag name}
To see tags starting with some letters
git tag -l "v2.*"
Step 4: Push tags to remote.
git push origin {tag name}
git push --tags
“git push –tags” will push all tags at once.
Before

After

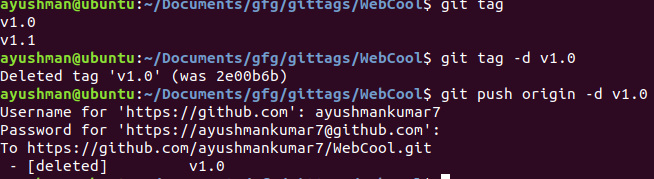
Step 5: Delete Tags. (locally)
git tag -d {tag name}
git tag --delete {tag name}
Step 6: Delete tags from remote
git push origin -d {tag name}
git push origin --delete {tag name}
git push origin :{tag name}
“git push origin -d {tag name}” can also delete tag locally and remote at the same time.
Share your thoughts in the comments
Please Login to comment...