Produce XML Response with Spring WebMVC Controller
Last Updated :
17 Dec, 2023
In this article, we will explore the mechanisms and aspects of Spring WebMVC – producing XML responses with controllers. And also guides Java developers through the steps of configuring a Spring WebMVC controller to produce XML responses.
There are three main approaches to configuring Spring MVC controllers to produce XML responses:
- JAXB Marshalling
- Manual XML Building
- Jackson XML DataFormat
JAXB Marshalling
JAXB (Java Architecture for XML Binding) is a standard Java library that handles conversion between XML and Java objects. With JAXB, the controller method returns a POJO and Spring uses JAXB to convert it to XML. This is the most common approach.
Manual XML Building
For simple cases with minimal XML, developers can manually build up XML strings or documents in the controller method. While allowing full customization, this bypasses object mapping and requires string manipulation that is error-prone and less maintainable.
Jackson XML DataFormat
The Jackson library provides an XML data format that can be used as an alternative to JAXB. It supports binding Java objects to XML similarly to JAXB but with additional features. The controller returns a POJO and Jackson converts it.
How to Produce XML Response with Spring WebMVC Controller
- Add the required dependencies in pom.xml file.
- Create a Java class to represent the XML structure you want to return. This will be your XML model.
- Annotate the model class with @XmlRootElement and @XmlAccessorType(XmlAccessType.FIELD)
- Autowire XmlMapper in your controller:
- In your controller method, create an instance of your XML model, populate it, and return it.
- Spring will automatically convert the model to XML using the XmlMapper and return it with the content type “application/xml”.
The @XmlRootElement and @XmlAccessorType annotations are used for XML serialization and deserialization using JAXB (Java Architecture for XML Binding).
Steps to Setup a Project
Step 1: Create a Project
- Use a tool like Spring Initializr (https://start.spring.io/) to generate a basic project with the following dependencies:
- Spring web
- Thymeleaf
- Jackson-Data-Format
Step 2: Add Jackson XML Dependency
XML
<?xml version="1.0" encoding="UTF-8"?>
<modelVersion>4.0.0</modelVersion>
<parent>
<groupId>org.springframework.boot</groupId>
<artifactId>spring-boot-starter-parent</artifactId>
<version>3.2.0</version>
<relativePath/>
</parent>
<groupId>com.spring</groupId>
<artifactId>Jackson_Format</artifactId>
<version>0.0.1-SNAPSHOT</version>
<name>Jackson_Format</name>
<description>Demo project for Jackson_Format</description>
<properties>
<java.version>17</java.version>
</properties>
<dependencies>
<dependency>
<groupId>org.springframework.boot</groupId>
<artifactId>spring-boot-starter-thymeleaf</artifactId>
</dependency>
<dependency>
<groupId>org.springframework.boot</groupId>
<artifactId>spring-boot-starter-web</artifactId>
</dependency>
<dependency>
<groupId>org.springframework.boot</groupId>
<artifactId>spring-boot-starter-test</artifactId>
<scope>test</scope>
</dependency>
<dependency>
<groupId>com.fasterxml.jackson.dataformat</groupId>
<artifactId>jackson-dataformat-xml</artifactId>
</dependency>
</dependencies>
<build>
<plugins>
<plugin>
<groupId>org.springframework.boot</groupId>
<artifactId>spring-boot-maven-plugin</artifactId>
</plugin>
</plugins>
</build>
</project>
|
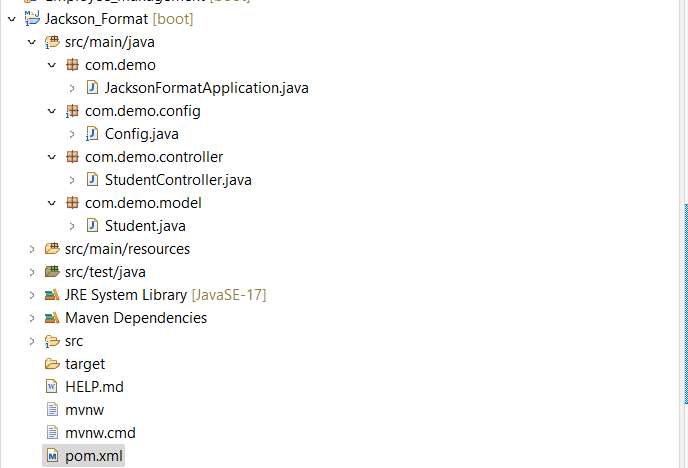
Project Structure:
Step 3: Create Entity Class: Student.java
Java
package com.demo.model;
import com.fasterxml.jackson.dataformat.xml.annotation.JacksonXmlProperty;
import com.fasterxml.jackson.dataformat.xml.annotation.JacksonXmlRootElement;
@JacksonXmlRootElement(localName = "student")
public class Student {
@JacksonXmlProperty private String name;
@JacksonXmlProperty private int age;
private String course;
private boolean feesPaid;
public Student()
{
super();
}
public Student(String name,int age,String course,boolean feesPaid)
{
super();
this.name = name;
this.age = age;
this.course = course;
this.feesPaid = feesPaid;
}
public String getName() {
return name;
}
public void setName(String name) {
this.name = name;
}
public int getAge() {
return age;
}
public void setAge(int age) {
this.age = age;
}
public String getCourse() {
return course;
}
public void setCourse(String course)
{
this.course = course;
}
public boolean isFeesPaid() {
return feesPaid;
}
public void setFeesPaid(boolean feesPaid)
{
this.feesPaid = feesPaid;
}
}
|
Note: In this, Example Jackson is being used for XML serialization/deserialization instead of JAXB.
Step 4: Create Controller: StudentController.java
Java
package com.demo.controller;
import com.demo.model.Student;
import org.springframework.stereotype.Controller;
import org.springframework.web.bind.annotation.GetMapping;
import org.springframework.web.bind.annotation.RequestMapping;
import org.springframework.web.bind.annotation.ResponseBody;
@Controller
@RequestMapping("/api")
public class StudentController {
@GetMapping(value = "/student",
produces = "application/xml")
@ResponseBody
public Student
getStudent()
{
Student student = new Student();
student.setName("ABC");
student.setAge(21);
student.setCourse("Java-DSA");
student.setFeesPaid(false);
return student;
}
}
|
Step 5: Run the Application
- Now, you can run the Spring Boot application from IDE or by using the command-line tool provided by Spring Boot.
mvn spring-boot:run
Output:

Share your thoughts in the comments
Please Login to comment...