Java AWT Button
Last Updated :
26 Nov, 2023
Abstract Window Toolkit, also known as AWT is a library for creating Graphical User Interfaces (GUIs) in Java applications. Within the Java AWT library, you’ll find a collection of classes and methods designed to develop windows and essential user interface elements. The Button class is a control component in AWT, that triggers an event when it is clicked.
Button in Java AWT
The ‘Button’ class is a part of the ‘java.awt’ package which has a collection of classes and methods for creating GUI components. Java AWT Buttons can be used to perform several actions like saving a file, closing a window, submitting a form, or triggering any specific action.
When we press a button, AWT creates an instance of ActionEvent and delivers it by calling processEvent on the button. The processEvent method of the button accepts all events and then sends an action event to its own function processActionEvent. The ActionListener interface must be implemented if one wants to execute an action when a button is pressed.
Syntax of Java AWT Button
public class Button extends Component implements Accessible
Constructors of Button
There are 2 types of Constructors in the AWT Button class.
- Button(): Creates a new button with the label as an empty string.
- Button(String label): Creates a new button with the label as the specified string as a parameter.
Java AWT Button Class methods
List of all the methods associated with the AWT button and its Description
|
void addActionListener(ActionListener l)
|
The action listener is added to receive action events from this button.
|
|
void addNotify()
|
Creates the peer of the button.
|
|
AccessibleContext getAccessibleContext()
|
The method returns the AccessibleContext associated with this Button.
|
|
String getActionCommand()
|
The method returns the command name of the action event triggered by this button.
|
|
ActionListener[] getActionListeners()
|
The method returns an array of all the action listeners that have been registered on this button.
|
|
String getLabel()
|
Retrieves the label of this button.
|
|
<T extends EventListener> T[] getListeners(Class<T> listenerType)
|
The method returns an array of all the objects that are currently registered as FooListeners on this Button.
|
|
protected String paramString()
|
Returns a string that represents the status of this Button.
|
|
protected void processActionEvent(ActionEvent e)
|
Sends action events to any registered ActionListener objects in order to process them when they occur on this button.
|
|
protected void processEvent(AWTEvent e)
|
Processes events on this button.
|
|
void removeActionListener(ActionListener l)
|
The specified action listener is removed from the button.
|
|
void setActionCommand(String command)
|
Configures the action event by setting the command name.
|
|
void setLabel(String label)
|
Sets the button’s label to be the specified string.
|
Inherited Methods
The Methods included with AWT button are inherited by:
- java.awt.Component
- java.lang.Object
Examples of Java AWT Button
Let us understand the AWT Button class and their methods with some examples given below:
Example 1 (Basic Button):
The example given below is a simple implementation of a Button with a label.
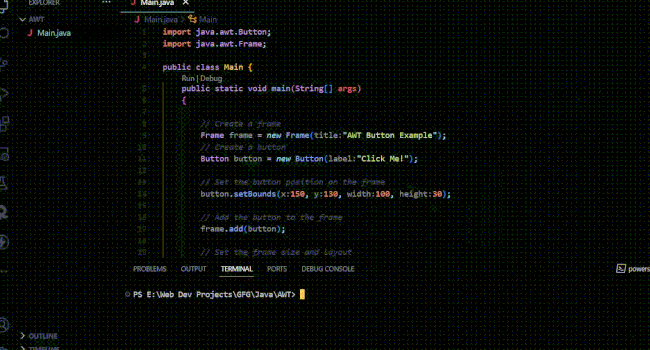
Java
import java.awt.Button;
import java.awt.Frame;
public class Main {
public static void main(String[] args)
{
Frame frame = new Frame("AWT Button Example");
Button button = new Button("Click Me!");
button.setBounds(150, 130, 100, 30);
frame.add(button);
frame.setSize(400, 300);
frame.setLayout(null);
frame.setVisible(true);
}
}
|
Run the code using the following commands:
javac Main.java
java Main
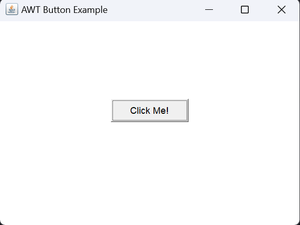
Output:
Final Output Created:
Example 2 (Adding Multiple Properties):
In the below example, there are multiple buttons each having different properties and attributes.
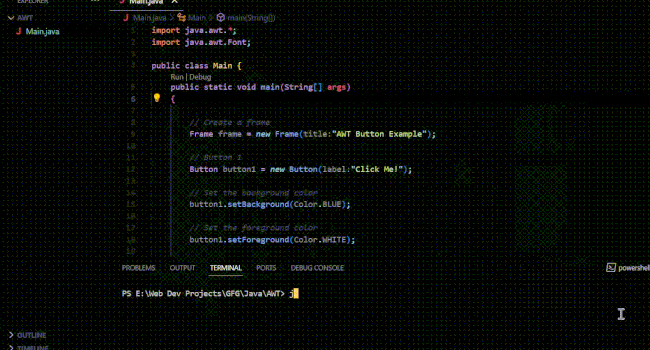
Java
import java.awt.*;
import java.awt.Font;
public class Main {
public static void main(String[] args){
Frame frame = new Frame("AWT Button Example");
Button button1 = new Button("Click Me!");
button1.setBackground(Color.BLUE);
button1.setForeground(Color.WHITE);
button1.setFont(new Font("Arial", Font.BOLD, 14));
button1.setBounds(150, 50, 100, 50);
Button button2 = new Button("Press Me!");
button2.setBackground(Color.GREEN);
button2.setForeground(Color.BLACK);
button2.setFont(new Font("Times New Roman", Font.PLAIN, 16));
button2.setBounds(150, 140, 80, 30);
Button button3 = new Button("Tap Me!");
button3.setBackground(Color.RED);
button3.setForeground(Color.WHITE);
button3.setFont(new Font("Verdana", Font.ITALIC, 16));
button3.setBounds(130, 220, 150, 80);
frame.add(button1);
frame.add(button2);
frame.add(button3);
frame.setBackground(Color.LIGHT_GRAY);
frame.setSize(400, 400);
frame.setLayout(null);
frame.setVisible(true);
}
}
|
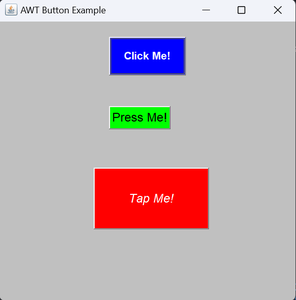
Output:
Final Output Created:
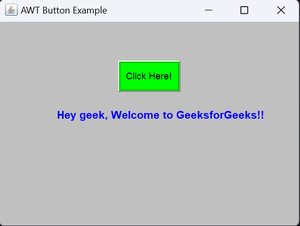
Example 3 (ActionListener):
In this example, an ActionListener is called when the button is clicked. It triggers an event and the label is displayed on the screen.
Java
import java.awt.*;
import java.awt.event.*;
public class Main {
public static void main(String[] args)
{
Frame frame = new Frame("AWT Button Example");
Button b = new Button("Click Here!");
b.setBounds(160, 80, 80, 40);
b.setBackground(Color.GREEN);
Label label = new Label();
label.setBounds(80, 140, 280, 20);
label.setForeground(Color.BLUE);
label.setFont(new Font("Arial", Font.BOLD, 14));
b.addActionListener(new ActionListener() {
public void actionPerformed(ActionEvent e)
{
label.setText(
"Hey geek, Welcome to GeeksforGeeks!!");
}
});
frame.add(b);
frame.add(label);
frame.setBackground(Color.LIGHT_GRAY);
frame.setSize(400, 300);
frame.setLayout(null);
frame.setVisible(true);
}
}
|
Output:
Final Output Created:
Share your thoughts in the comments
Please Login to comment...