How to Use Docker For Local Development and Testing?
Last Updated :
22 Jul, 2023
Whenever you want to start a project you first check for the requirement i.e. we do the requirement analysis then we look for prerequisites dependencies. We install those dependencies and prerequisites and we simply built our project.
Suppose you are the person who built the project and you want to make your project open source. So there is another person who wants to contribute to your open source project first he/she will need to go through all dependencies and prerequisites for your project and that’s a lot of work.
That’s where docker comes into play, Docker is basically a text file that contains all the needed dependencies and prerequisites for a given project. You will simply share the docker file with your project so people can use that docker file to contribute to your project without even installing the dependencies and prerequisites.
How To Install Docker in Your System?
- Visit the official Docker website and simply download the Docker for Desktop latest version
- Install the Docker desktop on your system
- If you facing any issues (Docker not starting, Stuck while loading the start page) download the lower versions of Docker which might fix the issues. If you still facing the issue check the docker official documentation.
- Now open your IDE (Visual Studio Code is recommended)and install the Docker extension
- Once you’ve installed the extension you’ll see the docker icon on the left side which means docker is successfully installed in your IDE
Fundamental Pillars of Docker
- Docker Image: It’s a simple template that contains the required information for creating a Docker Container.
- Docker Container: Imagine a container that contains dependencies, packages, and code.
- Dockerfile: Contains instructions for installing packages and dependencies.
Local Development and Testing Using the Docker
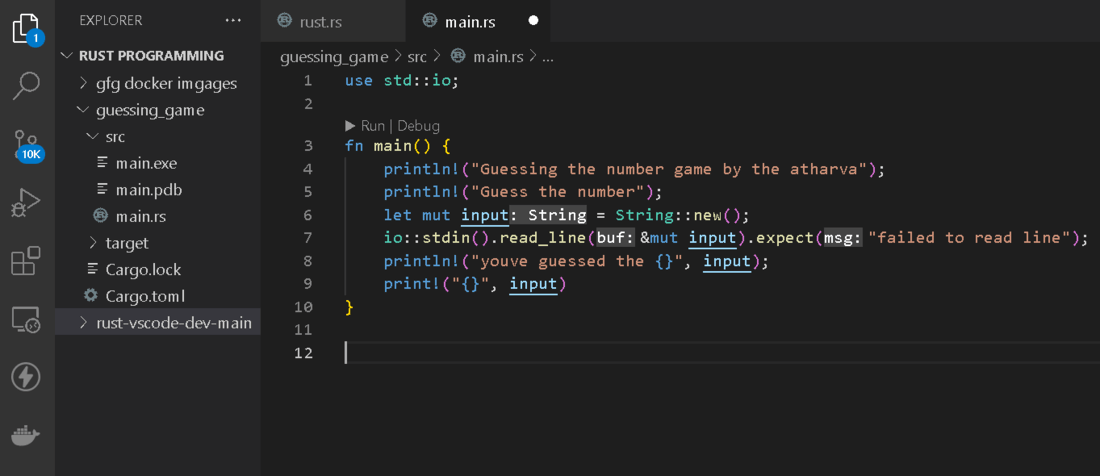
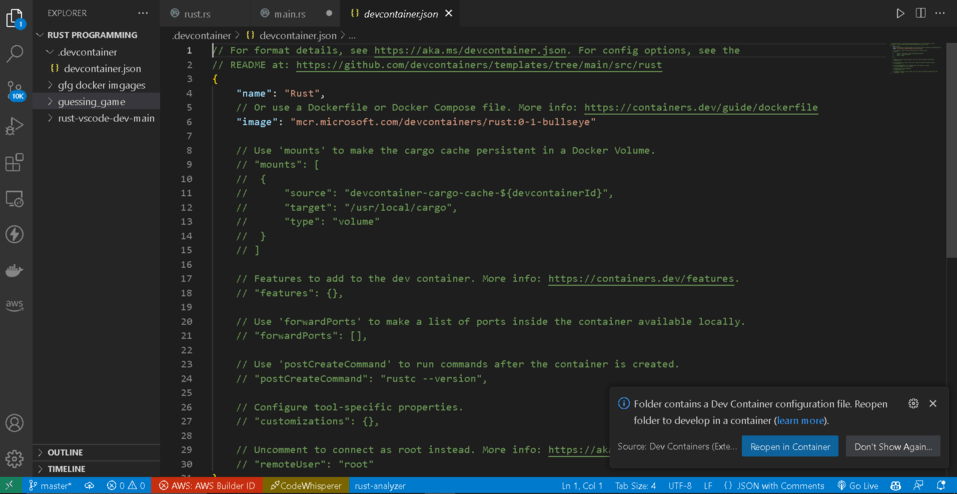
- Open your project in VS code.
- Project is in Rust language as you can see here running this project inside a container.
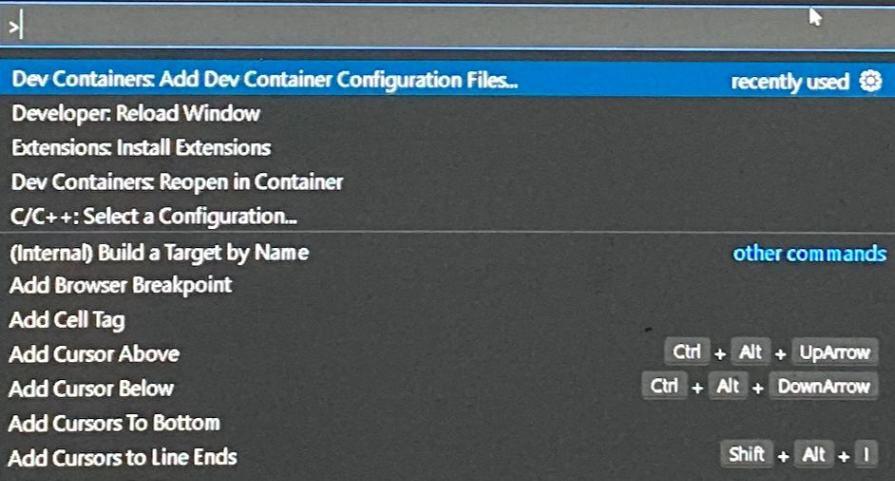
- Press F1 and the below pop-up will occur.
- Click on Dev Containers and Add Dev Container Configuration Files.
- Click on Show all Definitions i.e. it will show you all the pre-defined Docker Containers for all types of programming languages.
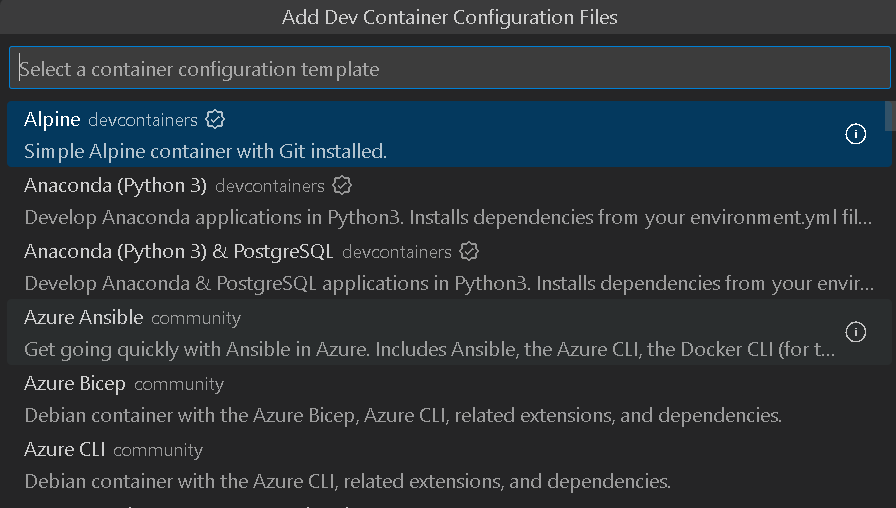
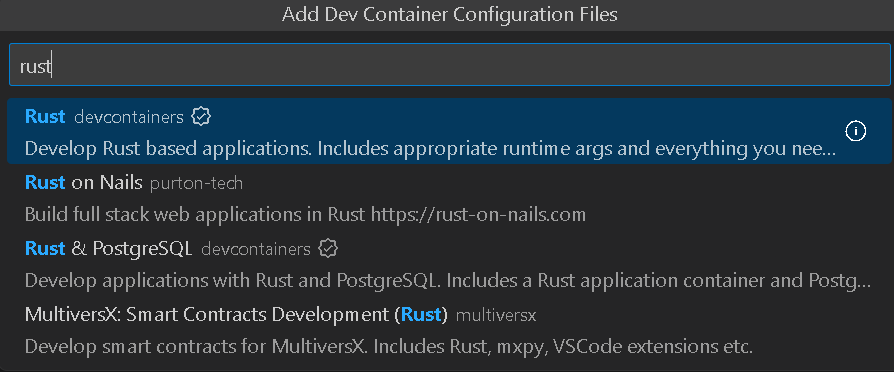
- Now choose the appropriate pre-defined container, I’ll be choosing the Rust dev container
- Click on bullseye
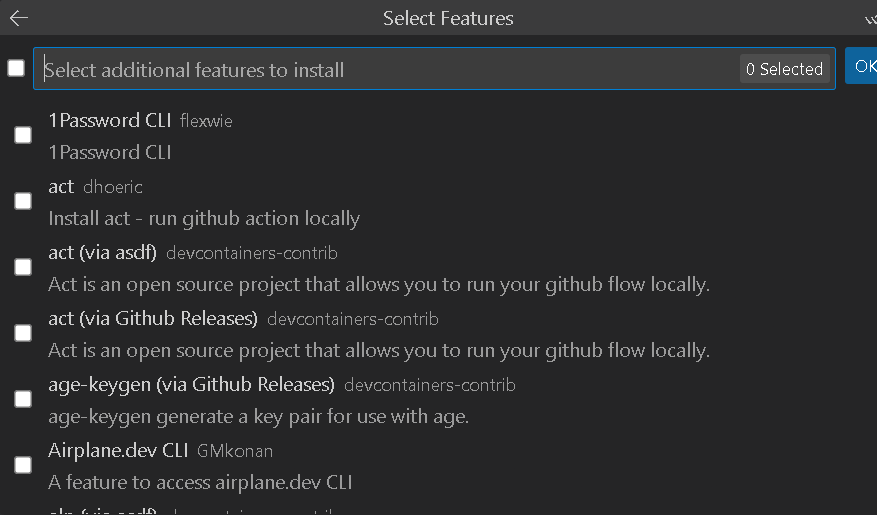
- Select the additional extra features according to your project and click on ‘OK’
- After clicking ‘OK’ it will create a devcontainer.json file and click re-open in the container
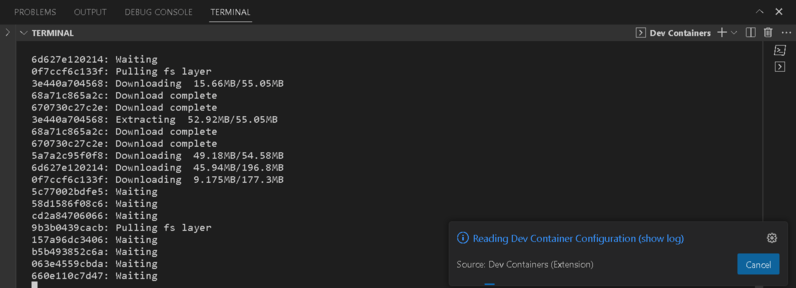
Now your project is running inside a container.
Creating a Custom Docker Image
- Until now we’ve used a pre-defined docker container in VS code let’s implement a custom docker image and run our program inside the container
- Create a docker file: Dockerfile is a simple text file that contains dependencies and pre-requisites

- Implement all dependencies on that docker file(I’m using different project which is not running inside a container)

- Create your devcontainer.json file inside the .devcontainer folder in your source directory and run command docker build command
-(1)nigg.png)
- Press again F1 on your keyboard and reopen inside a container.
- Now congrats your program is running inside a custom container.
Share your thoughts in the comments
Please Login to comment...