How To Use Azure Logic Apps For Workflow Automation ?
Last Updated :
12 Feb, 2024
We often encounter scenarios where we need to automate various tasks by integrating them with various services. For instance, automating email or automating the social media feed, etc. We can also automate these tasks by integrating various storage and other services. In Microsft Azure, there is one such service that helps automate tasks by integrating with other services, and that service is called Logic Apps. This article lets us understand how to use Azure Logic Apps for workflow automation.
What Are Azure Logic Apps?
Azure Logic Apps are Enterprise Integration Services, which means their main purpose is the orchestration, integration, and scheduling of tasks in a simple way. With an easy-to-use user interface, no coding design, and powerful extensibility you can easily integrate services in minutes.
Working On a Logic App
Logic app contains a series of tasks, let’s call them Actions. Each set of actions is interlinked and the output of one step of action can be an input for another. The first action of a logic app is called a Trigger. This trigger is the first step that sets up the entire workflow of the logic app. It can be called by multiple resources like Blob storage, HTTP requests, etc. There are over 200+ connectors in Azure to call this trigger.
Imagine, the source of the trigger is an HTTP request. A simple logic app can be designed in such a way that it automates the app to give the response instantly.
Now, let us create a logic app to understand the concept of workflow automation using Azure Logic Apps.
A step-by-step Approach To Creating Workflow Automation Using Logic App
Step 1: Create the Logic app instance
- Navigate to your “Azure” portal which has an active subscription.
- Click on “Create a resource” and in the “Marketplace” search for “Logic apps” and click on the Azure Logic App service.
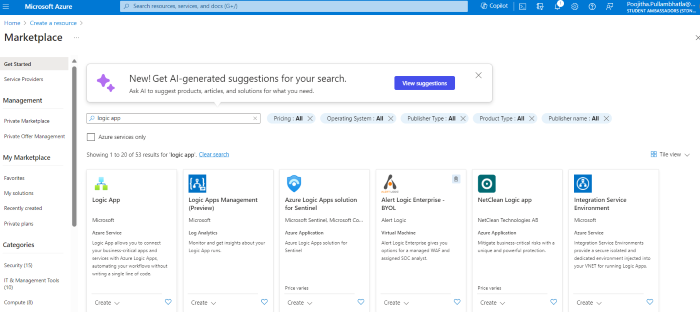
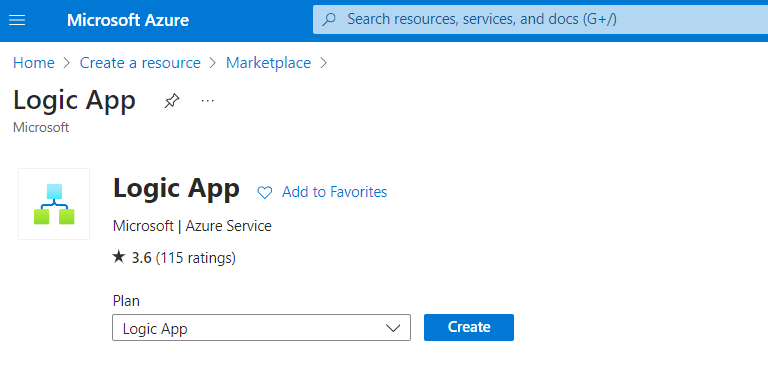
- Click on “Logic App” and click on “create“
- Follow the below instructions to create the logic app.
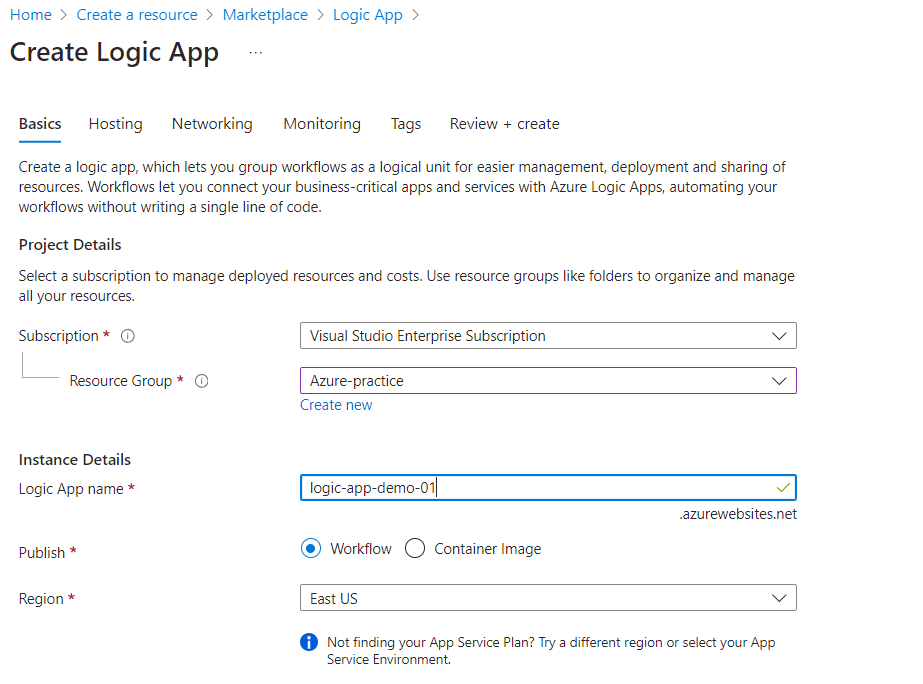
- Navigate to the Basics tab and under the Project Details, mention the subscription and Resource Group. Either you can create a new resource group or use the exisiting resource group for your logic app.
- Under the Instance Details, mention the name of your logic app.
- You may leave the other details as default or you can customize them according to your requirements.
- Click on “Review + create” and “create“.
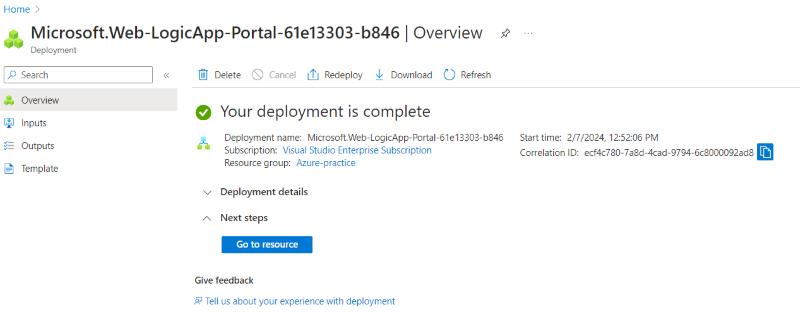
- It will take upto ten seconds for provisioning the resources and once your instance is deployed, Click on “Go to resource” button. Now, you will navigate to your instance.
Step 2: Design the Work-flow of Logic App
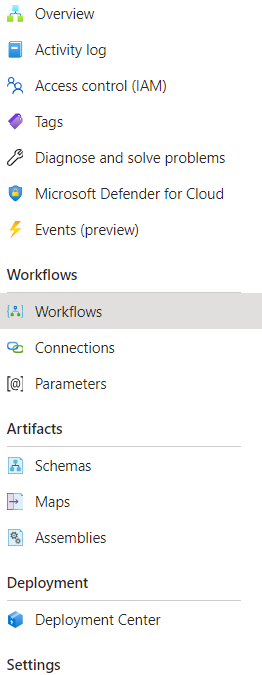
- Once, you navigate to your logic app instance, click on “workflows” option on the left-menu.
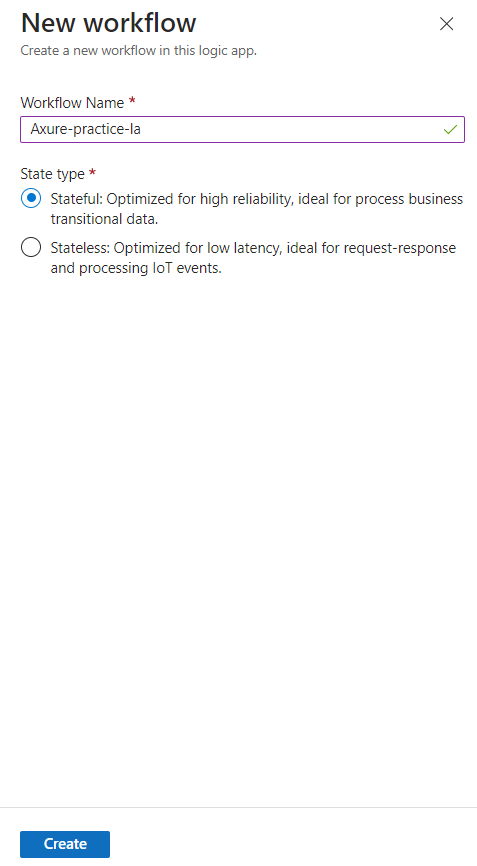
- click on “+ Add” option to create a new workflow for your logic app.

- Mention the workflow name and state type. For better results, choose “Stateful“. Click on “create“
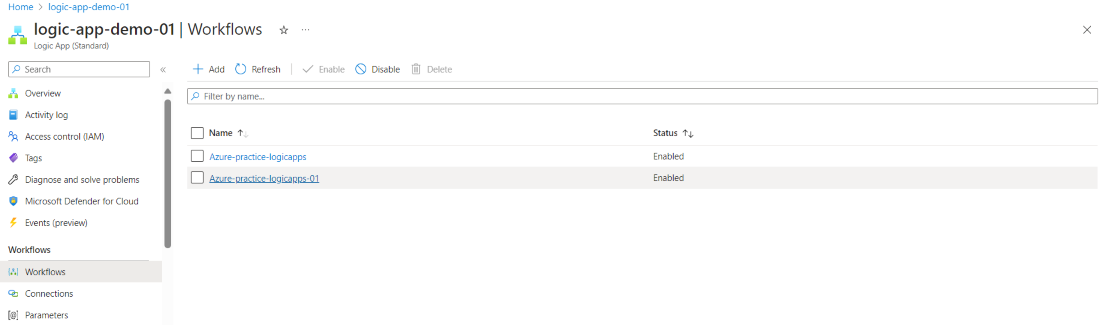
- once the workflow is created, click on the newly created workflow.
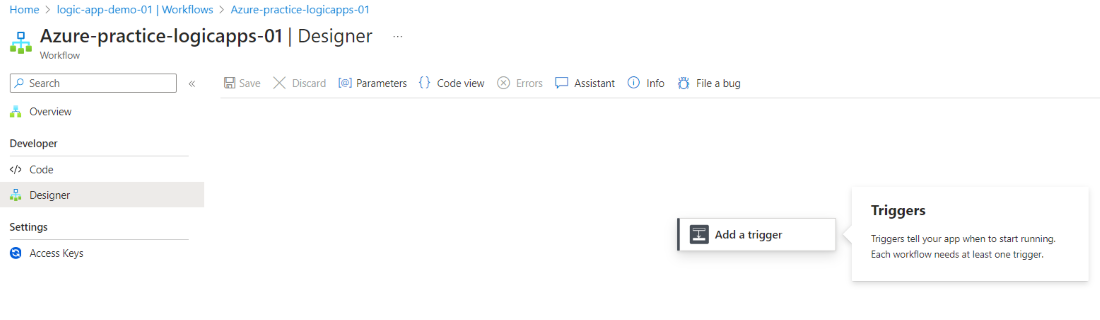
- Once you navigated to your workflow, under the “Developer” section, click on “Designer” to design to your workflow.

Step 3: Designing the workflow
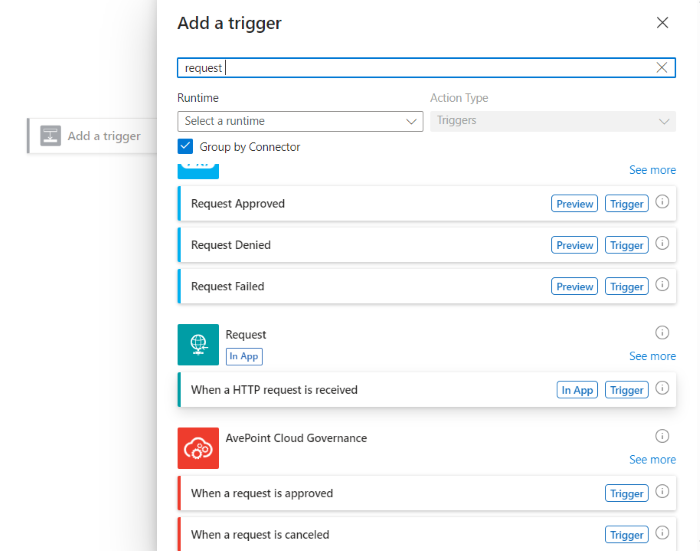
- In the “Designer“, you will see the option “Add a trigger“. Trigger refers to first action of your logic app. Let’s add a HTTP request trigger. This logic app automates the process of fetching the response based on HTTP requests. Follow the below instructions in order to design the workflow.
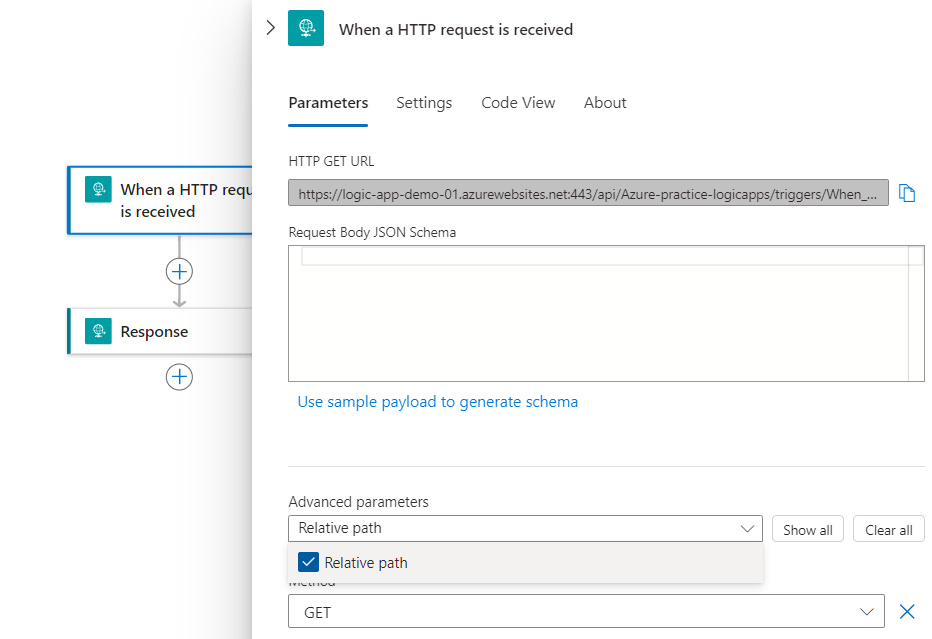
- Search for HTTP request trigger and click “when a HTTP request is received“
- Navigate to the Advanced options section, there select the “Method” option to mention the specific HTTP method.
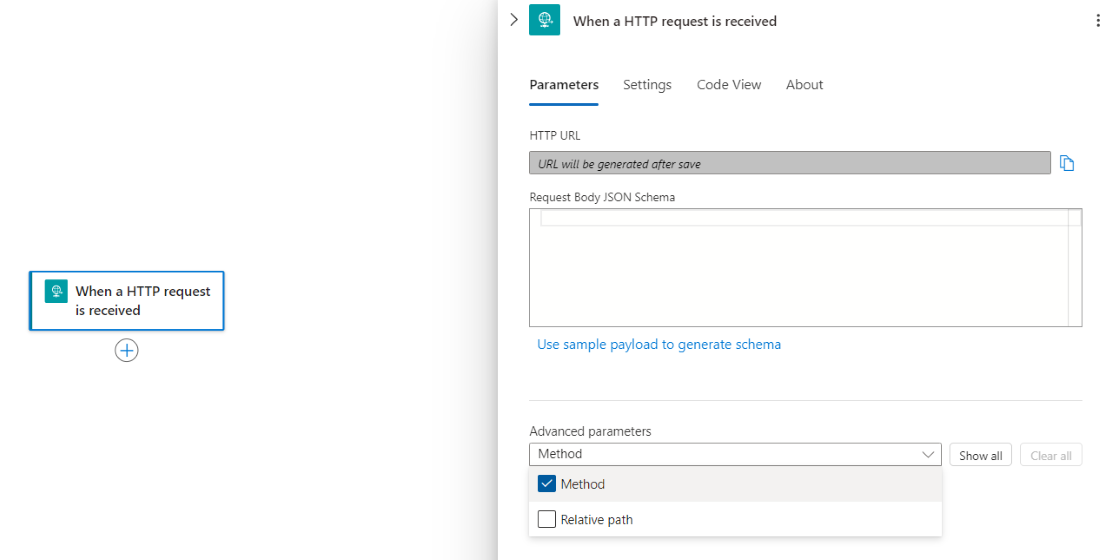
- You can see the Method input filed with the drop-down list of all the HTTP methods. Let’s choose “GET” method.
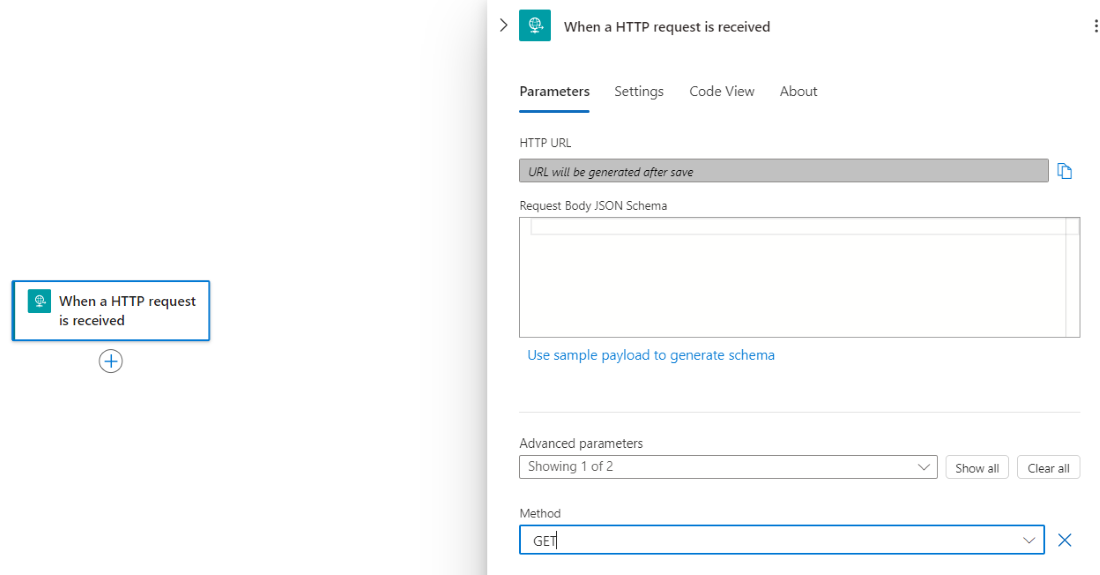
- click the “Save” option in order to save the changes of your workflow.

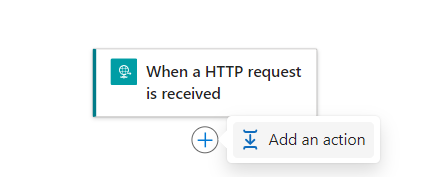
Let’s create next action in the workflow. Hover on the + icon, it suggests to insert a new step which will execute when a HTTP request is received.
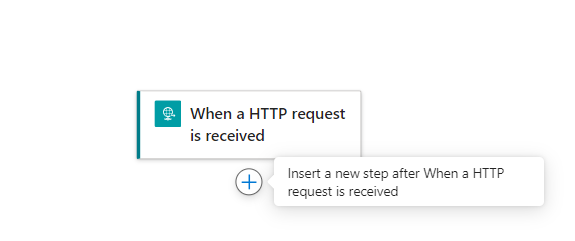
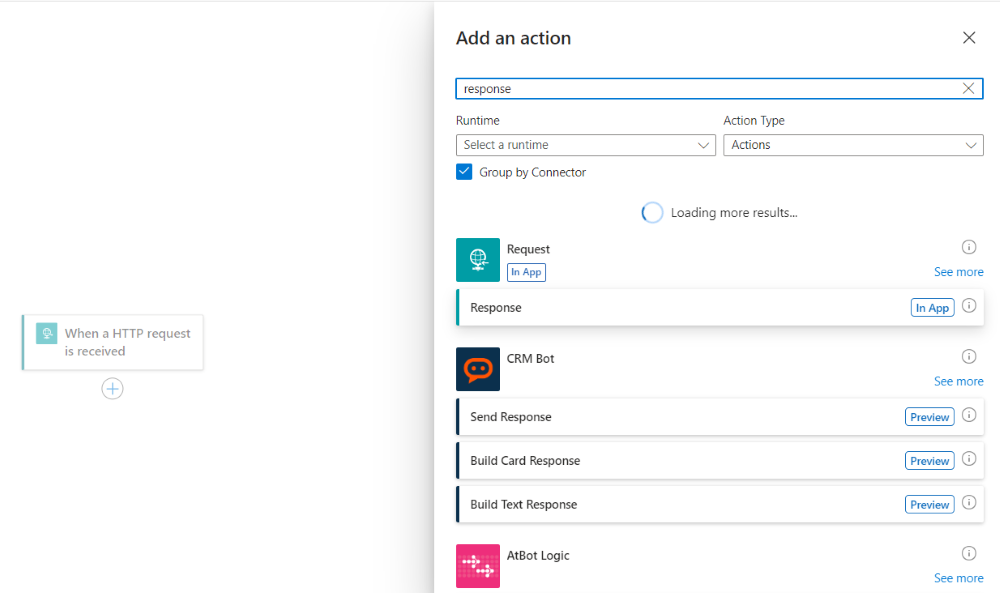
- click on the + icon to add a new action. Click on “Add an action“.
- To automate the workflow such that when ever the HTTP “GET” request is made, it will responds with an output. Search and choose the HTTP response.
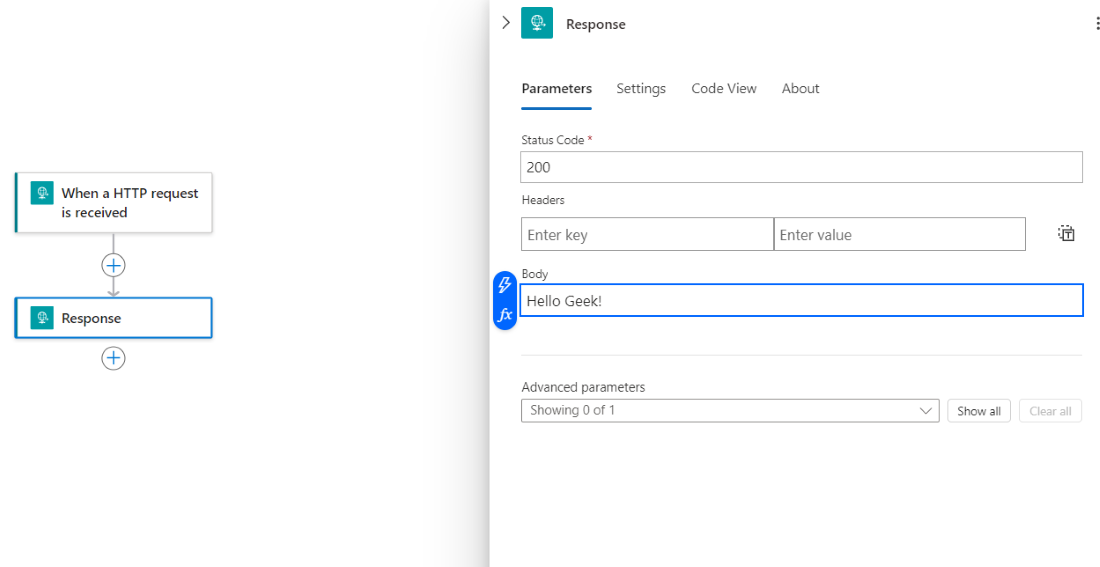
- For now, to keep it simple, let’s add the body with a static content and save the changes.
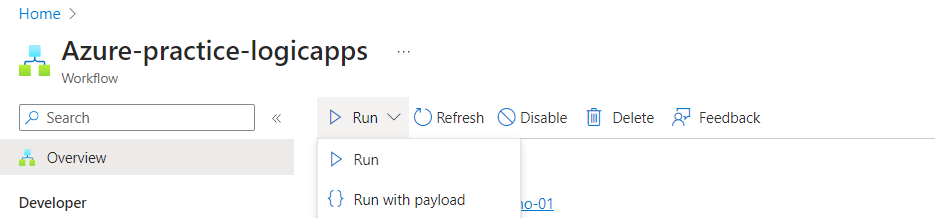
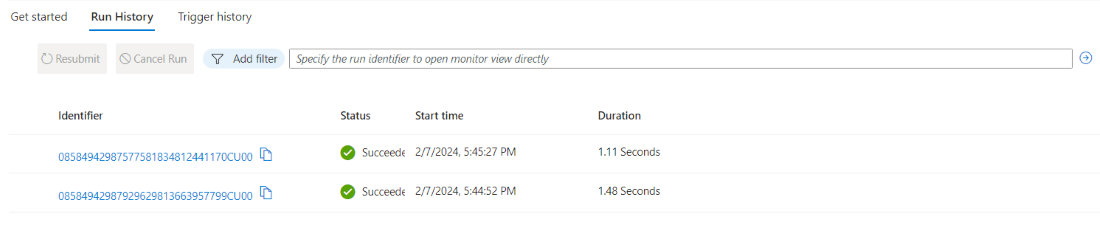
- Go back to the Overview tab and click on the Run button.
- You can see the logs under the Run Activity section.
- Copy the “workflow URL” from the “Essentials” section.

- Paste the URL in the browser to see the automated triggered HTTP response.

Step 4: Using dynamic parameters in the workflow URL
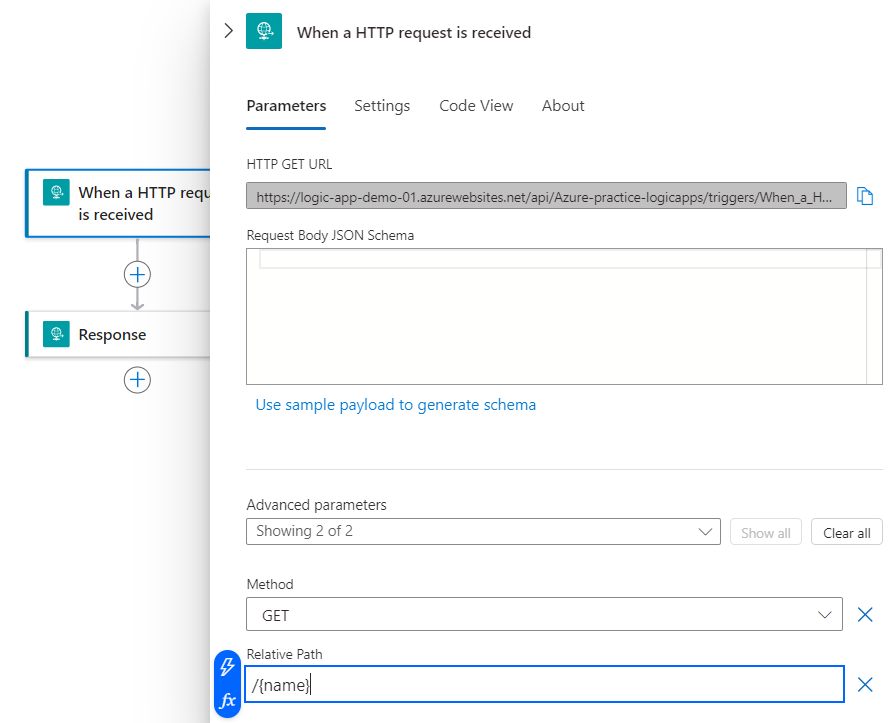
- Navigate to the logic app design and in the request trigger, choose the “Relative Path” under the “Advanced options“.
- Add the name of the dynamic parameter which you want to pass in the URL dynamically. Make sure you use “forward slash” followed enclosed parameter in “curly braces“.
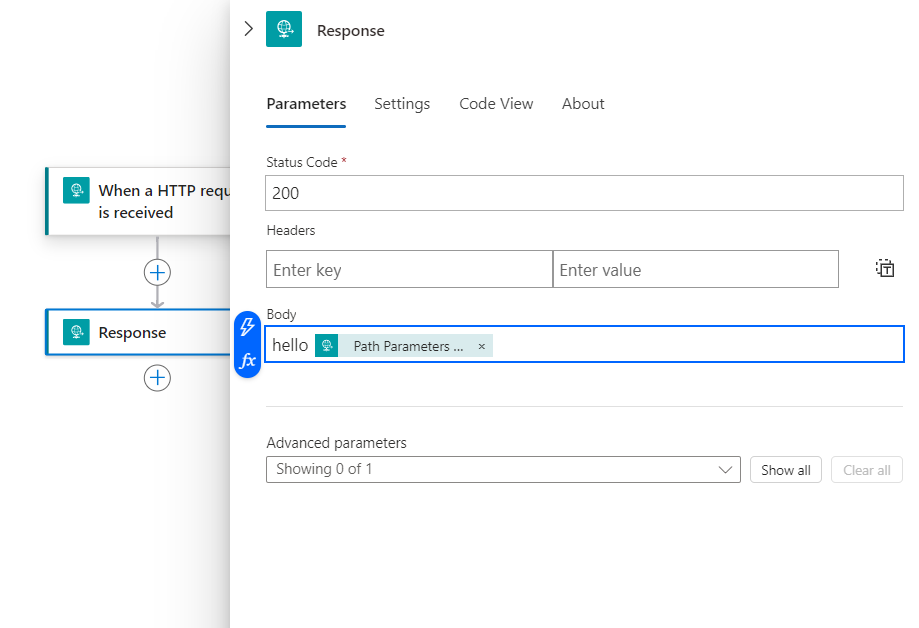
- Save the changes and navigate to HTTP response step. In the body, click on the “spark” icon inorder to add the dynamic parameters.
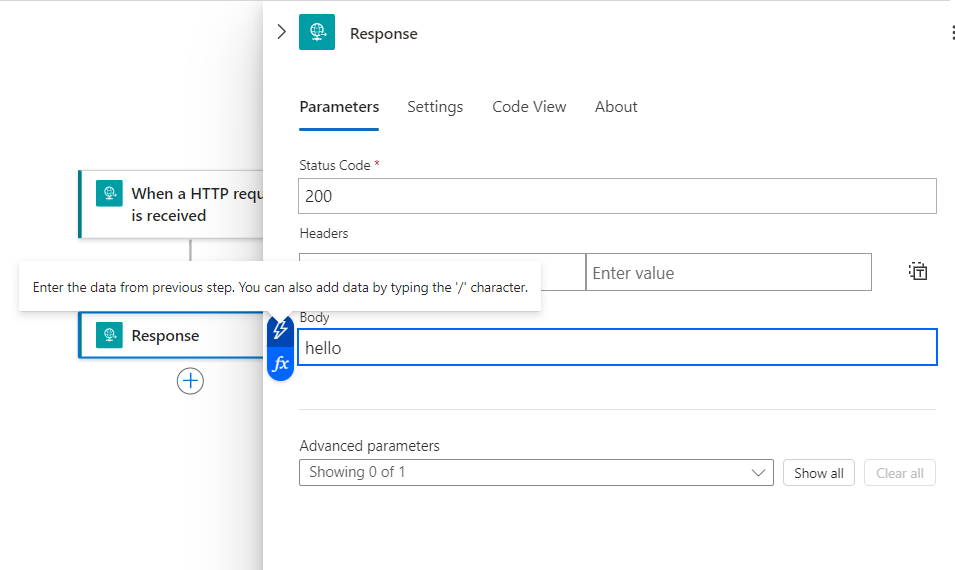
- We may find the list of options we can pass dynamically into the body. In that, find the name of the parameter which we used in the relative path while creating the HTTP request.
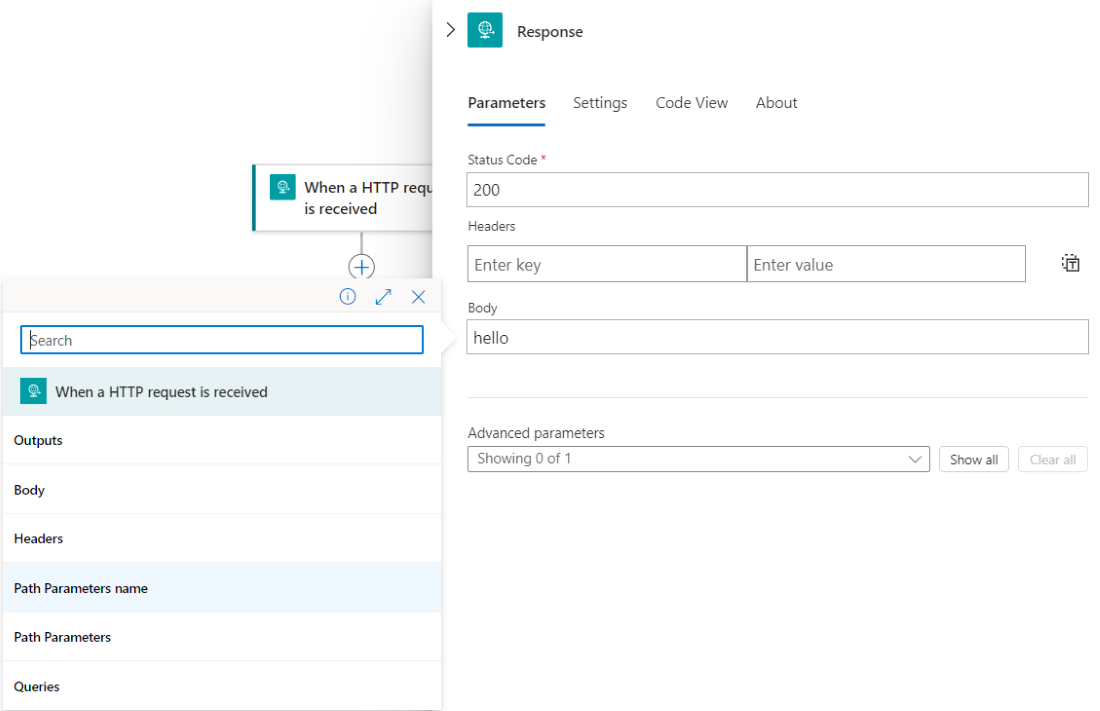
- Click on that name to add it into the body. Save the changes.
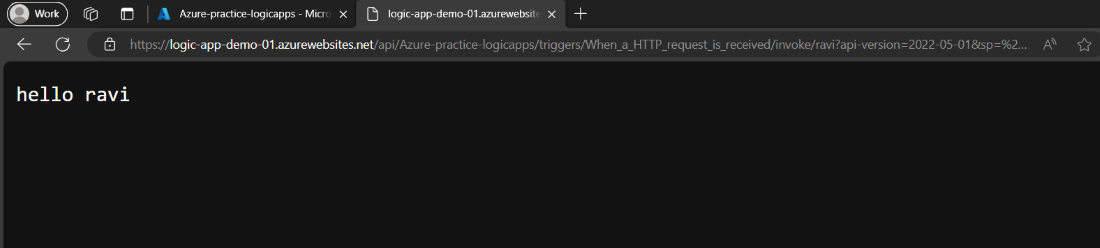
- Navigate to the overview option in the left-menu and copy the update workflow URL from the “Essentials” and paste it into the browser.

- Select the name parameter path as mentioned in the above image and replace it with your input.

- Now, you can see the dynamic response in the browser.
This is how we can automate the workflow of HTTP requests using Azure Logic Apps.
Azure Logics App -FAQ’s
Which tasks can I automate with Azure Logic Apps?
using Azure Logic Apps, we can automate tasks which contains repetitive tasks or business process that has multiple steps can be automated with Azure Logic Apps. For instance, tasks like data synchronization, notifications, approvals, file transfers etc.
What are connectors in Azure Logic Apps?
Connectors in Azure Logic apps helps to integrate your logic app instance with various other Azure services like Blob Storage, Microsoft Office 365, Salesforce and many more.
Can I customize the Logic Apps workflows?
Yes, we can tailor the Logic Apps workflows according to our requirements. we can also include conditional statements, loops, branch statements etc.
Can I schedule Logic Apps to run at specific times?
Yes, Azure Logic Apps supports scheduling workflows to run at specific times or intervals using the built-in recurrence trigger. You can specify the recurrence pattern and set the start time for the schedule.
Share your thoughts in the comments
Please Login to comment...