How to set position of tooltip in a button in Bootstrap ?
Last Updated :
13 Aug, 2021
A Tooltip is used to provide interactive textual hints to the user about the element when the mouse pointer moves over. For Example, in the below image GeeksForGeeks is a button and when the user mouse moves over it, the additional information “A computer Science Portal” popup will display. We are going to learn how to create a tooltip and how to position the tooltip at different positions.
Step-by-step Guide to Implement Tooltip:
Step 1: Include all the bootstrap libraries in the head section of your code.
<link rel=”stylesheet” href=”https://cdn.jsdelivr.net/npm/bootstrap@4.6.0/dist/css/bootstrap.min.css”>
<script src=”https://code.jquery.com/jquery-3.6.0.slim.js”></script>
<script src=”https://cdn.jsdelivr.net/npm/bootstrap@4.6.0/dist/js/bootstrap.min.js”> </script>
<script src=”https://cdn.jsdelivr.net/npm/bootstrap@4.6.0/dist/js/bootstrap.bundle.min.js”> </script>
Step 2: To implement the tooltip in the button control of HTML, apply data-toggle property as shown below:
<button type="button" data-toggle="tooltip"
        data-placement="bottom" title="title of the button">
    Hover over me
</button>
Step 3: To implement the tooltip in bootstrap, just follow the syntax in the script part of the code.
$(function(){
    $('[data-toggle="tooltip"]').tooltip();
})
Example 1: The following demonstrates the tooltip feature of bootstrap. This shows “top” and “bottom” tooltip.
HTML
<!DOCTYPE html>
<html>
<head>
<meta charset="utf-8" />
<meta name="viewport" content="width=device-width" />
<link rel="stylesheet" href=
</script>
<script src=
</script>
<script src=
</script>
<script>
$(function() {
$('[data-toggle="tooltip"]').tooltip();
});
</script>
</head>
<body>
<h2 style="color: green">GeeksforGeeks</h2>
<p><b>Tooltip tutorial</b></p>
<button type="button" class="btn btn-secondary"
data-toggle="tooltip" data-placement="top"
title="This is top tooltip">
Hover over me to see top tooltip
</button>
<br /><br />
<button type="button" class="btn btn-secondary"
data-toggle="tooltip" data-placement="bottom"
title="This is bottom Tooltip">
Hover over me to see bottom tooltip
</button>
</body>
</html>
|
Output:
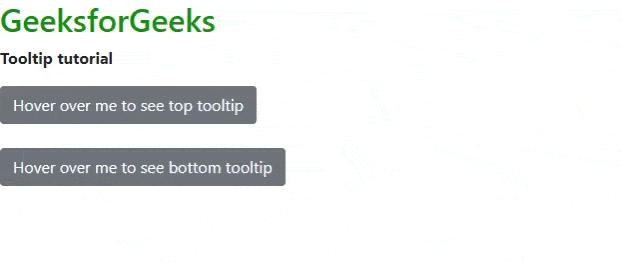
Top Bottom tooltip
Example 2: Change the above code with the snippet given above for the bottom tooltip. You can also change the data-placement as left or right to place the tooltip place left and right respectively.
HTML
<!DOCTYPE html>
<html>
<head>
<meta charset="utf-8" />
<meta name="viewport" content="width=device-width" />
<link rel="stylesheet" href=
</script>
<script src=
</script>
<script src=
</script>
<script>
$(function() {
$('[data-toggle="tooltip"]').tooltip();
});
</script>
<style>
.btn {
margin: 10px;
}
</style>
</head>
<body>
<h2 style="color: green">GeeksforGeeks</h2>
<p><b>Tooltip tutorial</b></p>
<button type="button" class="btn btn-secondary"
data-toggle="tooltip" data-placement="right"
title="This is right Tooltip">
Hover over me to see RIGHT tooltip
</button>
</body>
</html>
|
Output:

Right tooltip
Conclusion: We have learned how to place the tooltip in any direction. You can use the same for links or div containers and the results will be the same.
Share your thoughts in the comments
Please Login to comment...