How to Reset Forgotten Password on Kali Linux
Last Updated :
08 Jan, 2024
Kali Linux is a Linux distribution used in the Cybersecurity domain. It is maintained and funded by Offensive Security. Kali Linux is Debian based and it uses the Debian repository for most of its packages. This Linux distribution is designed for digital forensics and penetration testing. It has 600+ Penetration testing and network security tools pre-installed. It is completely free and open source. So you can use it for free and even contribute to its development.
Now forgetting login credentials is an annoying thing in the case of any operating system. Resetting forgotten passwords often comes with the risk of data loss and requires a lot of effort if you are not a technology enthusiast. This article will be a simple step-by-step guide on resetting forgotten passwords on Kali Linux.
How to Reset Forgotten Password on Kali Linux?
In this section, we will see how we can Reset Forgotten Passwords on Kali Linux. So follow the below steps along with proper command execution to Reset the Password on Kali Linux:
Step 1: Open the boot screen
Whether you are using a dual-boot system, a standalone Kali Linux machine, or a virtual box running Kali Linux, the first step is to access the boot options. This involves restarting or turning on your device and waiting for the boot screen to appear. During the boot process, you need to interrupt it to access the GRUB (Grand Unified Bootloader) menu, which is responsible for managing the boot options.
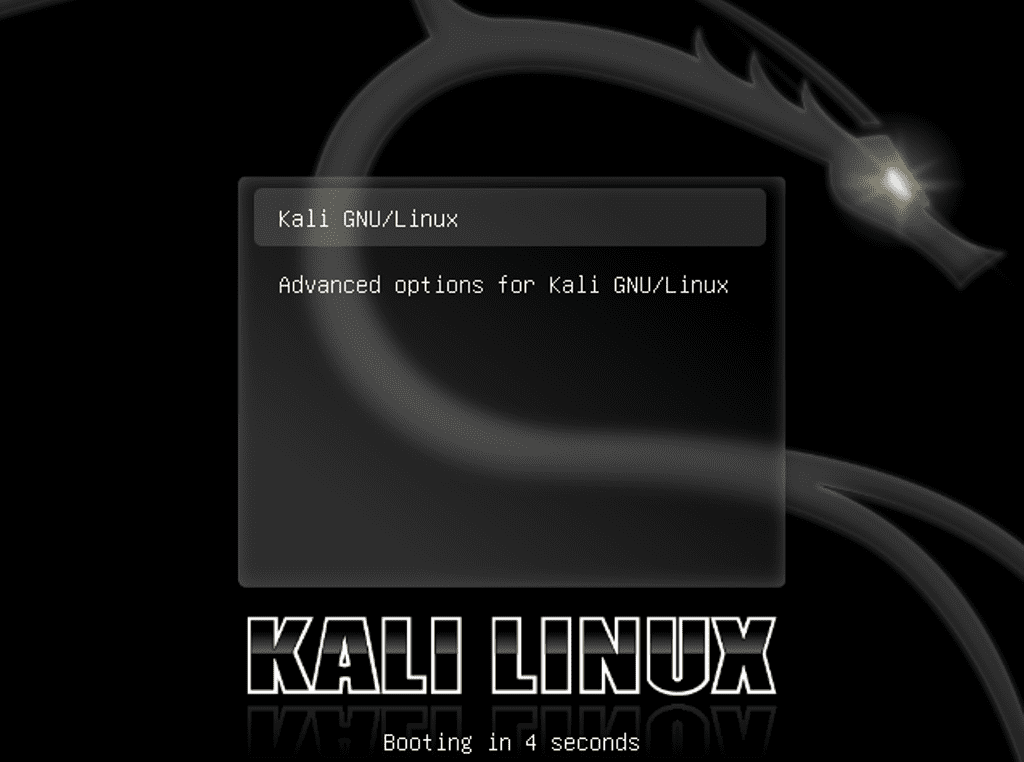
Opening Boot Screen
Step 2: Open GRUB Options
GRUB, the boot-loader responsible for initiating the operating system during startup, is where you’ll make modifications to access the root shell. Once you’re on the boot menu options screen, press the letter ‘e’ to enter the GRUB editor. This action allows you to temporarily edit the kernel command line, enabling you to make adjustments to the boot parameters.
press e
.jpg)
Opening GRUB Options
Step 3: Modify boot parameters
The GRUB (GRand Unified Bootloader) menu contains entries for different kernels and operating systems. Each entry has a line that specifies the kernel parameters for booting. In the grub menu locate the line starting with Linux and ending with a quiet splash. (use arrow keys on your keyboard as you will not be able to use the mouse here)
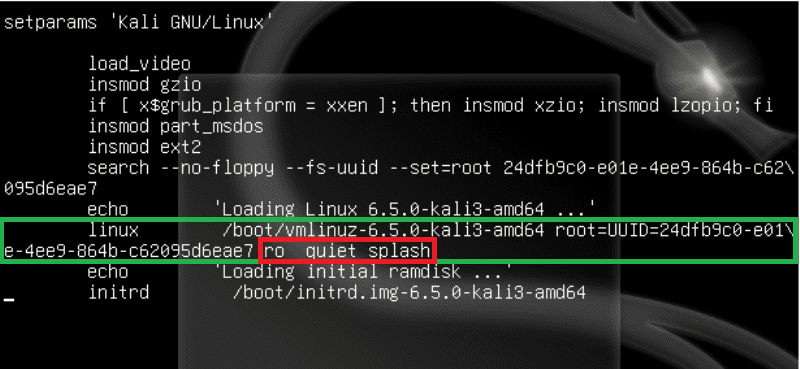
Before Modifying Boot Parameters
Now change the ro (read-only) quiet splash with the following line to give read-write permission and enter into single-user mode.
rw init=/bin/bash
rw gives read and write permission. init=/bin/bash specifies the path to the shell binary that will be executed as the system’s initial process, which is the bash shell.
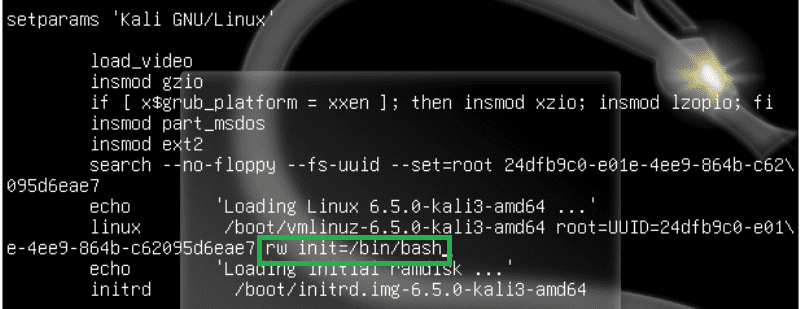
After Modifying the Boot Parameters
These changes are to gain access to a root shell with read-write permissions, allowing us to make changes to the system. Now press “CTRL + X” to exit the GRUB Menu.
Step 4: Adding new password
After you exit the Grub menu, the root shell prompt ( A terminal interface where the user has obtained superuser or root privileges) will open on your screen as shown in below output screenshot below.
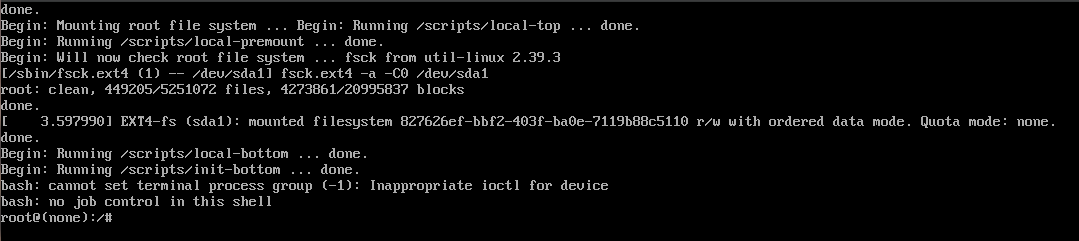
Root Privileges Terminal
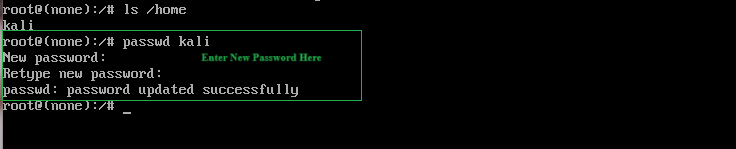
Now if you don’t remember your username, you can type the following command here to check for your username
ls /home
The ls /home command is used to list the contents of the /home directory on Linux. The /home directory is commonly used to store user home directories, corresponding to a user account on the system.

Listing Contents of /home Directory
To add a new password simply type, (replace username with your username)
passwd username
Now enter your new password and re-enter the new password again and you will be able to see your password updated successfully.
Entering New Password
Now reboot your system by typing the following command. The -f option stands for “force” reboot.
reboot -f
Step 5: Login to Kali Linux
Once your system is rebooted, type your username and the new password you added just now and you should be able to log into your Kali Linux system.
.png)
Logging into the System using the Updated Password
After entering the updated password, we can successfully log into the system.

Kali Linux Home Screen
Conclusion
In conclusion, resetting a forgotten password on Kali Linux involves accessing the GRUB menu during boot, entering the GRUB editor, modifying the kernel command line to initiate a root shell, and finally changing the password using the ‘passwd’ command. This process allows users to regain access to their Kali Linux system in the event of a forgotten password. However, it’s essential to exercise caution and ensure that such actions comply with applicable security policies, as manipulating the boot parameters and accessing the root shell pose potential risks. Users should always prioritize the security of their systems and employ these techniques responsibly. Additionally, it’s advisable to keep track of passwords securely to avoid the need for such interventions and to maintain the integrity of the system.
Share your thoughts in the comments
Please Login to comment...