How to Enforce Referential Integrity using Foreign Keys in JDBC?
Last Updated :
26 Apr, 2024
Enforcing referential integrity is the fundamental aspect of maintaining data consistency and integrity in a relational database. Referential integrity ensured that the relationships between the tables remained valid, preventing orphaned or inconsistent data. The use of the foreign key is one of the mechanisms for enforcing referential integrity in a database management system (DBMS). In Java Database Connectivity (JDBC), java API is used for interacting with the databases, enforcing the referential integrity using the foreign keys involved the defining and managing these constraints programmatically in your application.
Prerequisites
The following are prerequisites to enforce referential integrity using foreign keys in JDBC:
- Knowledge of Relational Databases
- Knowledge of Java Programming
- Understanding the fundamentals of JDBC (Java Database Connectivity)
- Database Management System
- Integrated Development Environment (IDE)
Note: If you met above prerequisites, you can easily enforce referential integrity using foreign keys in JDBC .
Enforce Referential Integrity using Foreign Keys in JDBC
Step 1: Create Database Schema
Create two tables in your database, and name it as “Customers” and “Orders“.
The below figure shows the tables of Customers and Orders.

The above tables doesn’t contain any rows.
Step 2: Set Up Eclipse Project
- Open Eclipse and create one new Java Project.
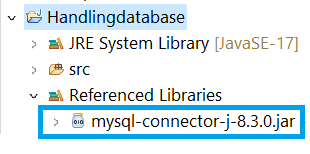
- Add JDBC driver library into your Java project’s build path. If you are using the MySQL, make sure you would add the MySQL JDBC driver jar file.
Here is the path for JDBC driver library that means MySQL JDBC driver jar file.
Step 3: Create Java Classes and implement the code
Create a Customer.java class file in src folder in your Java project, write below code in it.
Java
public class Customer {
    private int id;
    private String name;
    public int getId() {
        return id;
    }
    public void setId(int id) {
        this.id = id;
    }
    public String getName() {
        return name;
    }
    public void setName(String name) {
        this.name = name;
    }
    public Customer(int id, String name) {
        super();
        this.id = id;
        this.name = name;
    }
    public Customer()
    {

    }
}
Create a Order.java class file in src folder in your Java project, write below code in it.
Java
public class Order {
    private int id;
    private int customerId;
    public int getId() {
        return id;
    }
    public void setId(int id) {
        this.id = id;
    }
    public int getCustomerId() {
        return customerId;
    }
    public void setCustomerId(int customerId) {
        this.customerId = customerId;
    }
    public Order(int id, int customerId) {
        super();
        this.id = id;
        this.customerId = customerId;
    }
    public Order()
    {

    }
}
Create a DatabaseConnector.java class file in src folder in your Java project, write below code in it.
Java
import java.sql.Connection;
import java.sql.DriverManager;
import java.sql.SQLException;

public class DatabaseConnector {
    private static final String URL = "jdbc:mysql://localhost:3307/work";
    private static final String USERNAME = "root";
    private static final String PASSWORD = "tiger";

    public static Connection getConnection() throws SQLException {
        return DriverManager.getConnection(URL, USERNAME, PASSWORD);
    }
}
Note: Make sure that you have to change the database url, username, password according to your database.
Create a CustomerDAO.java class file in src folder in your Java project, write below code in it.
Java
import java.sql.Connection;
import java.sql.PreparedStatement;
import java.sql.SQLException;

public class CustomerDAO {
    public void insert(Customer customer) {
        String sql = "INSERT INTO Customers (CustomerID, Name) VALUES (?, ?)";
        try (Connection conn = DatabaseConnector.getConnection();
             PreparedStatement pstmt = conn.prepareStatement(sql)) {
            pstmt.setInt(1, customer.getId());
            pstmt.setString(2, customer.getName());
            pstmt.executeUpdate();
        } catch (SQLException e) {
            e.printStackTrace();
        }
    }
}
Create a OrderDAO.java class file in src folder in your Java project, write below code in it.
Java
import java.sql.Connection;
import java.sql.PreparedStatement;
import java.sql.SQLException;

public class OrderDAO {
    public void insert(Order order) {
        String sql = "INSERT INTO Orders (OrderID, CustomerID) VALUES (?, ?)";
        try (Connection conn = DatabaseConnector.getConnection();
             PreparedStatement pstmt = conn.prepareStatement(sql)) {
            pstmt.setInt(1, order.getId());
            pstmt.setInt(2, order.getCustomerId());
            pstmt.executeUpdate();
        } catch (SQLException e) {
            e.printStackTrace();
        }
    }
}
Create a TestApplication.java class file in src folder in your Java project, write below code in it. This code is used to insert the data into the database.
Java
public class TestApplication {
    public static void main(String[] args) {
        // Inserting a customer
        Customer customer = new Customer();
        customer.setId(1);
        customer.setName("John Doe");
        CustomerDAO customerDAO = new CustomerDAO();
        customerDAO.insert(customer);

        // Inserting an order for the customer
        Order order = new Order();
        order.setId(101);
        order.setCustomerId(1); // Assuming John Doe has CustomerID 1
        OrderDAO orderDAO = new OrderDAO();
        orderDAO.insert(order);
        System.out.println("Your data is Successfully inserted...");
    }
}
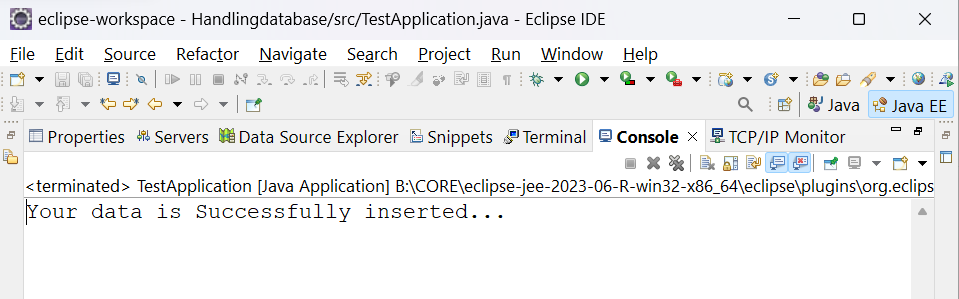
Step 4: Run the Application
- Run the above code, right click on the Java project in Project Explore.
- Select Run As > Java Application.
The output will be shown in console window in your Eclipse as shown below:
Step 5: Verification
If you want to check the data is successfully inserted or not. you can check the tables in your database. If the data is present in the table, it is successfully inserted into your table, otherwise it is not inserted into your table.
Example:

The above two tables are inserted the rows successfully.
Share your thoughts in the comments
Please Login to comment...