How to Develop Android Apps with Ionic and Capacitor?
Last Updated :
26 Dec, 2023
Ionic is an open-source UI toolkit for building performant, high-quality mobile apps that work across multiple platforms, such as native iOS, Android, and the web as a Progressive Web App. Ionic uses web technologies — HTML, CSS, and JavaScript — with integrations for popular frameworks like Angular, React, and Vue. Ionic focuses on the front-end UX and UI interaction of an app — UI controls, interactions, gestures, and animations. It provides numerous amount of pre-built components. We just have to use them in our application and make changes wherever needed.
Prerequisites:
- HTML
- CSS
- JS
- REACTJS
- TYPE-SCRIPT
Tools & Technologies Required
- VSCode
- NodeJS
- Android Studio
Installation
Install the Ionic CLI with npm:
npm install -g @ionic/cli
Creating Ionic App:
Create an Ionic app using one of the pre-made app templates, or a blank one to start fresh.
ionic start
type ‘n’ for Use the app creation wizard?front-end

Install manually
Select the framework you are comfortable with
Pick a framework!

Please select the JavaScript framework to use for your new app. To bypass this prompt next time, supply a value for the
--type option.

? Framework: (Use arrow keys)
  Angular | https://angular.io
>  React   | https://reactjs.org
  Vue     | https://vuejs.org
We are selecting React in this tutorial.
- Enter Project name : greetings_app (enter any suitable name).
- Select the starter template.
Starter templates are ready-to-go Ionic apps that come packed with everything you need to build your app. To bypass this
prompt next time, supply template, the second argument to ionic start.

? Starter template:
  blank        | A blank starter project
 > list         | A starting project with a list
  my-first-app | A template for the "Build Your First App" tutorial
  sidemenu     | A starting project with a side menu with navigation in the content area
  tabs         | A starting project with a simple tabbed interface
We are selecting “sidemenu” in this project.
Note: Give it some time to for setup and install the dependencies.
After the installation go to greetings_app (your project folder) is completed run :
ionic serve
This will start a server for frontend, go to http://localhost:8100. The folder structure is similar to that of React.
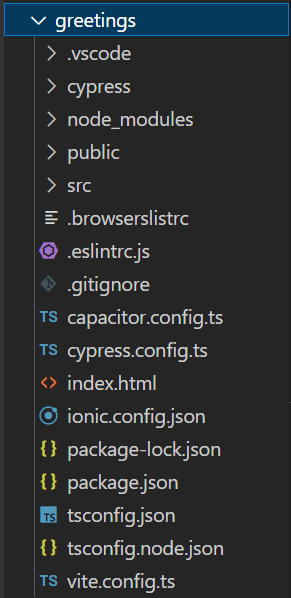
Ionic folder structure
Go to src folder there you see components, pages and other relevant folders. you can do necessary changes as required.
Building Android Application
We are using capacitor for converting into android app. First, install the @capacitor/android package.
npm install @capacitor/android
Then, add the Android platform.
npx cap add android
An new folder named android is created in the project directory. Every time you perform a build (e.g. ionic build) that updates your web directory (default: www), you’ll need to copy those changes into your native projects:
ionic cap copy
Note: After making updates to the native portion of the code (such as adding a new plugin), use the sync command:
ionic cap sync
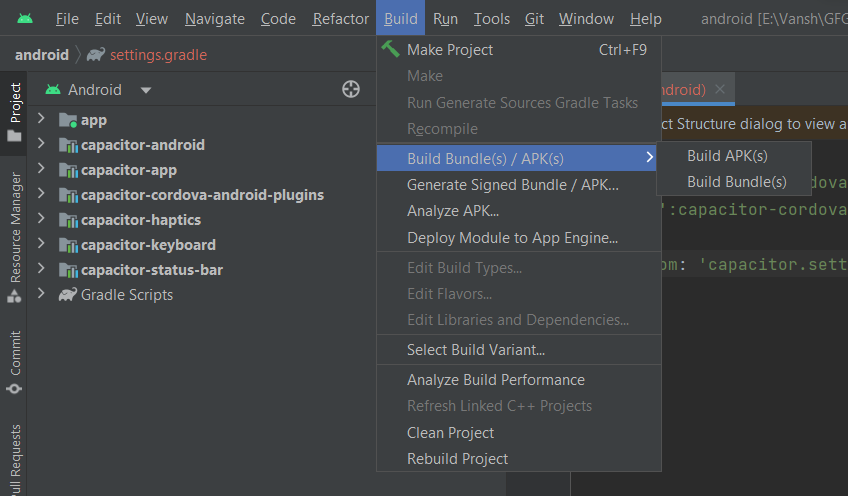
To open the project in Android Studio, run:
npx cap open android
Wait while the project is loading this will take upto 5 minutes (for first time). After the project is completely loaded, go to Build > Build_Bundle > Build Apk.
After the build is completed a popup appear click on locate appliation to locate your apk.
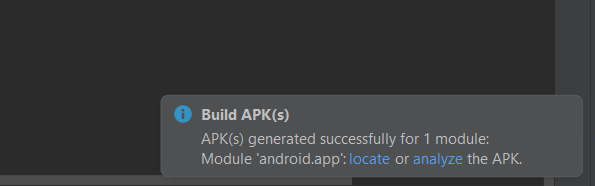
locate apk
You will find an apk name app-debug. Share it on android phone and install it. You can change the app logo and app name as your choice.
Share your thoughts in the comments
Please Login to comment...