In this article, we will learn how to create a .exe file from a Java program. Java is a platform-independent language, which works on the philosophy of “write Once, Run Anywhere”. It simply means that if we write a Java program, we can run it on any device that has a JVM(Java Virtual Machine). Now if we want to share the Java application standalone for the windows, then we need the “.exe” file. In this article first, we will create a Java program then we will see the various methods to create a “.exe” file from that file.
Java applications are generally shared and distributed as “.jar” files. These files contain all the required files, to run a .jar file we must need the JVM installed on the system we are trying to run. So what is the need for the “.exe” file, If a system does not have a JVM then we need a “.exe” file to run our application.
Steps to create a .exe file
Before creating the “.exe” file, we need to create a Java program, So let’s create a simple Java program that says hello world. Follow these steps to create and run the Java program:
Step 1: Create a file hello.java
Step 2: Open the file in any IDE, and write the following code.
Java
import java.util.Scanner;
public class Hello {
public static void main(String[] args) {
Scanner scanner = new Scanner(System.in);
System.out.println("Hello, World!");
System.out.println("Press Enter to exit...");
scanner.nextLine();
scanner.close();
}
}
|
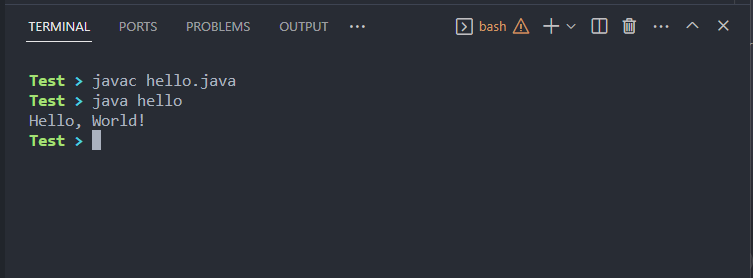
Step 3: Now to compile this program run the following command:
javac hello.java
Step 4: Now there will generate a file called hello.java which means that you successfully compiles, to run this program, run the following command:
java hello
Step 5: See the output in the command prompt:
Creating .exe file
There are several methods to convert a Java application to an .exe file. Some popular methods are listed and explained below.
Now before creating the .exe file, there is one file that we need the .jar file, now when you initially create a java program it generally contains the .java and .class files, use the following commands to create the .jar file.
jar cvfe Hello.jar Hello Hello.class
Now there will be a .jar file, and we will be using that .jar file to create the .exe file using various tools that are discussed below.
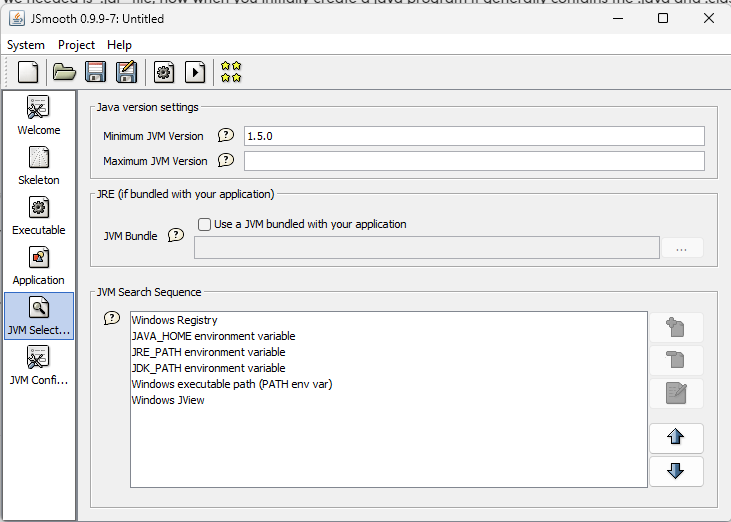
1. Using JSmooth
File checks to if a suitable JVM is installed in the system or not and runs the app.
Step 1: Go to the official website of Jsmooth and download the application.
Step 2: Install the application on the system.
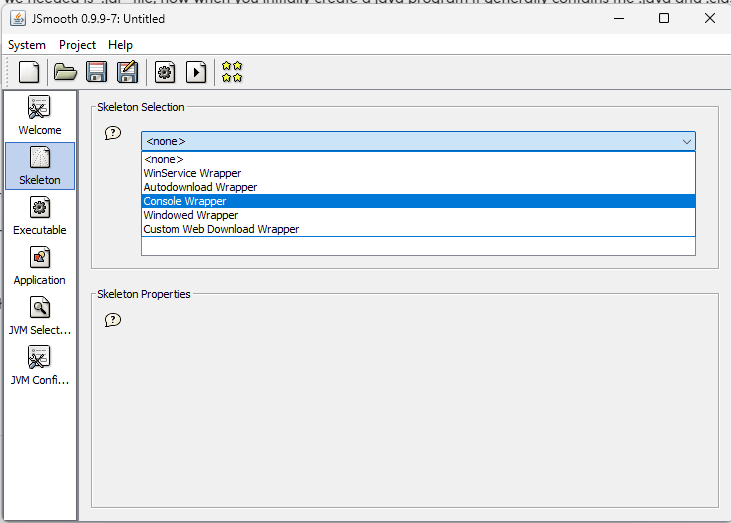
Step 3: Open the application, go to sell, auction, and choose the console wrapper.
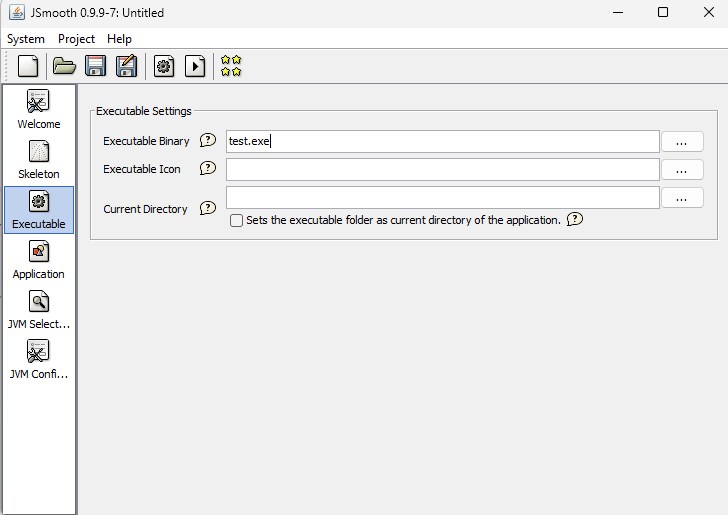
Step 4: Now go to the executable and give the file name that you want to create.
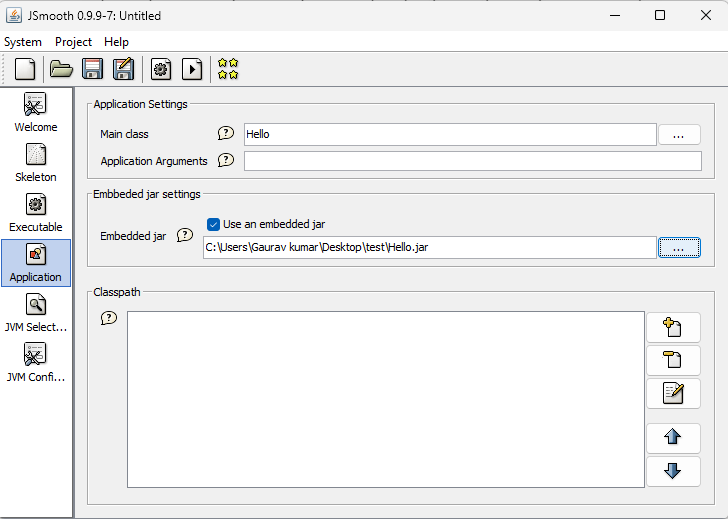
Step 5: Now go to the application first give the class name and choose the location of the .jar file
Step 6: Here choose the minimum JRE version, go for 1.5.0
Step 7: Now click on the Gear icon on the top and the .exe file will be created in chosen directory.

Step 8: Now double-click on the .exe file that was created, and see the output.
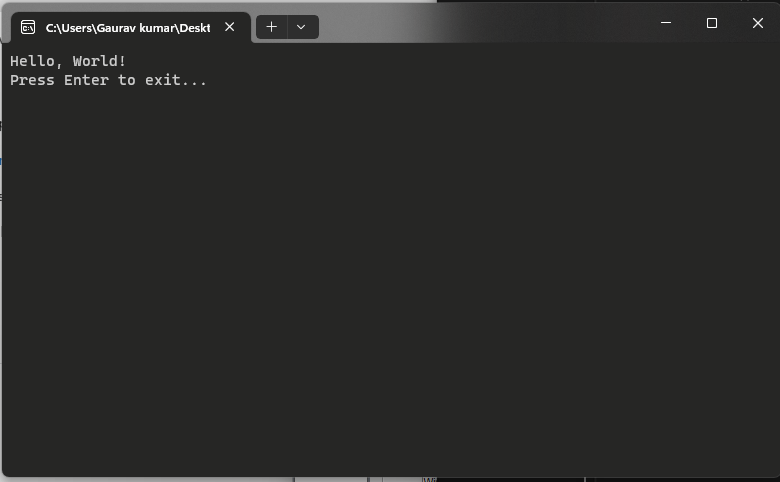
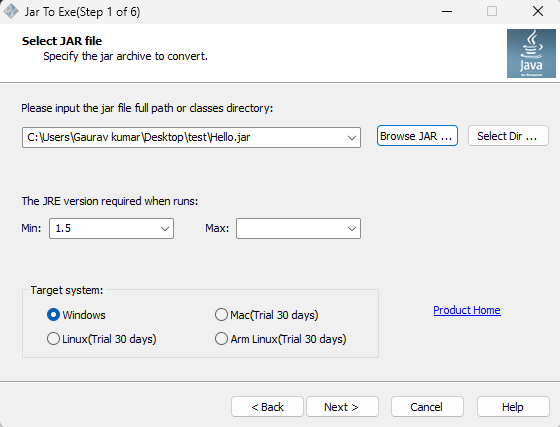
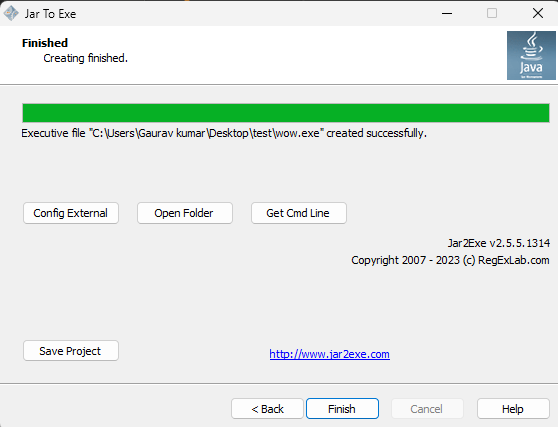
2. Using Jar2Exe
This application is also used to create the .exe file from the .jar file. Follow the given steps to use this application to create the .exe file of the Java application.
Step 1: Go to the official website Jar2Exe and download the application in the system.
Step 2: Open the application, select the path of the .jar file, select the JRE version go for 1.5, and click next for the system choose windows, and click next.
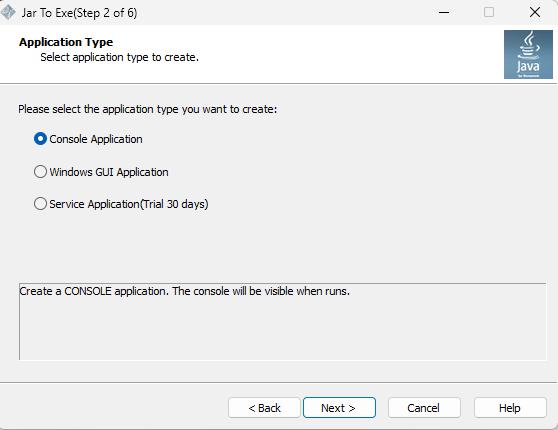
Step 3: Here choose the console application and click next.
Step 4: Here enter the class name of the Java application and click next.
 Step 5: Now .exe file will be created and you can run and see the output by double-clicking the .exe file.
3. Creation using Maven
To create an executable jar file for the maven projects we must have to install the maven in the system. Ensure the maven installation by running the following command.
mvn --version
Now follow the following steps to create the executable jar file. Note that we are using VS code as IDE.
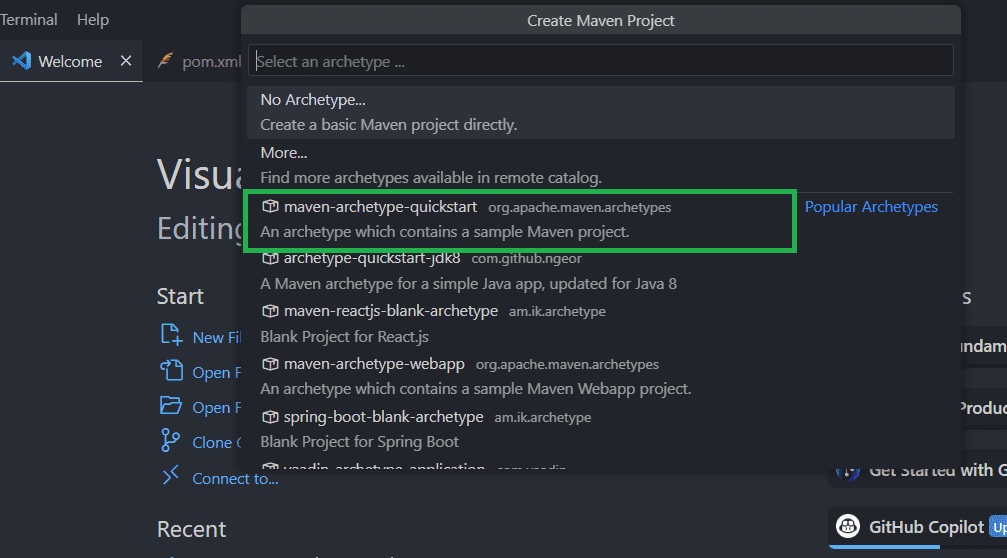
Step 1: Create a maven project, use Ctrl + Shift + P, and choose the create maven project for the basic project use the maven-archtype-quickstart option as shown in the image.
Step 2: After the project creation it will create the file directory and there will be a pom.xml file for the project configuration. On that file add the following code inside the Plugins according to your project name.
XML
<plugin>
<artifactId>maven-jar-plugin</artifactId>
<version>3.0.2</version>
<configuration>
<archive>
<manifest>
<addClasspath>true</addClasspath>
<classpathPrefix>lib/</classpathPrefix>
<mainClass>com.test.App</mainClass>
</manifest>
</archive>
</configuration>
</plugin>
<plugin>
|
Step 3: Now it’s time to build the jar file. run the following command in the terminal.
nvm package
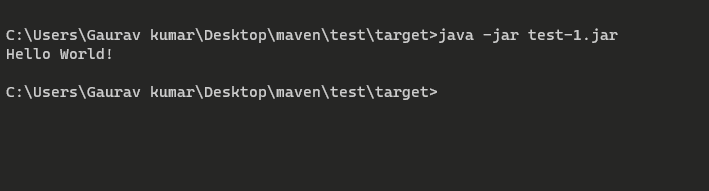
After this command, on the file directory, there will be a folder that will generate a named target, and inside that folder, there will be the .jar file. We can run this file and check by using the following command
java -jar filename.jar
Output:
Conclusion
In conclusion, we have seen two applications that help us to create a .exe file, and it’s pretty easy to use them. Now we can use the methods that are described above, to make the .exe file from the jar file. Follow those method steps and create the .exe file.
Share your thoughts in the comments
Please Login to comment...