How to Change Kali Linux hostname
Last Updated :
29 Feb, 2024
Changing the hostname in Kali Linux involves modifying system configuration files to remember the desired hostname. The hostname is a label assigned to a device on a network, and changing it can be useful for customization or security reasons. This process typically requires administrative privileges and careful attention to system files to ensure a smooth transition without disrupting the system’s functionality. In this article, we’ll explore an overview of the methods and steps involved in changing the hostname on a Kali Linux system.
What is Hostname in Kali Linux?
In Kali Linux, a hostname is a label assigned to a device on a network that identifies it uniquely. It is used to simplify the communication process by providing a human-readable name instead of using IP addresses. The hostname of a system can be viewed and set using the “hostnamectl” command. It is typically set during the system installation, and users can customize it to reflect their preferences. The hostname is crucial for networked environments as it helps in identifying and addressing systems easily. Additionally, the “/etc/hostname” file in Kali Linux stores the persistent hostname configuration.
How to change the Kali Linux hostname?
In this section, we will explore two different methods to change the Kali Linux Hostname. Below we have listed both possible methods.
We will explore each of the methods one by one.
Using the hostnamectl Command
Step 1: Open a Terminal
In the very first step, we need to have an active terminal, through which the entire profile of profiling will be done. In Linux, we can open the terminal by navigating to the Applications Menu or by using the Keyboard shortcut “Ctrl + ALT + T” to open the terminal.

Open the Terminal
Step 2: Check Current Hostname
Use hostnamectl to view the current hostname and gather information about the system’s configuration.
hostnamectl
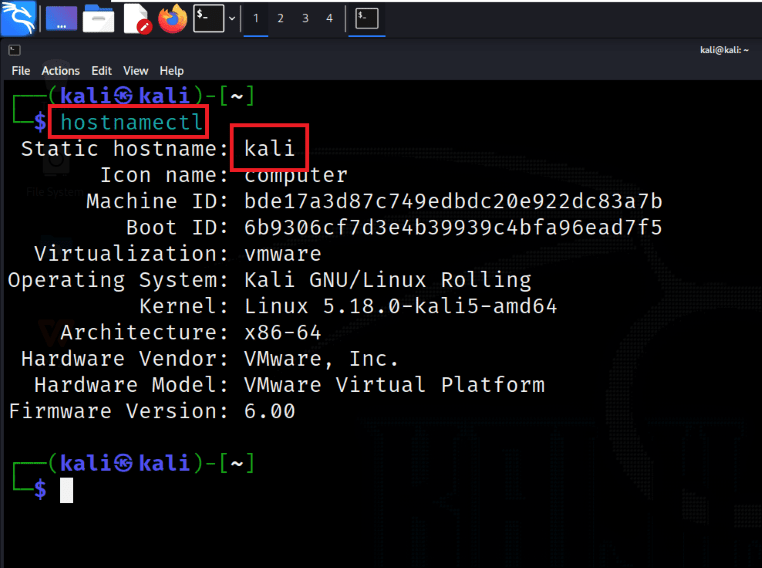
Check Current Hostname
Step 3: Change Hostname
Execute the command sudo hostnamectl set-hostname newhostname to set the new desired hostname. Replace “newhostname” with the actual hostname you want to assign to your system.
sudo hostnamectl set-hostname newhostname

Change Hostname
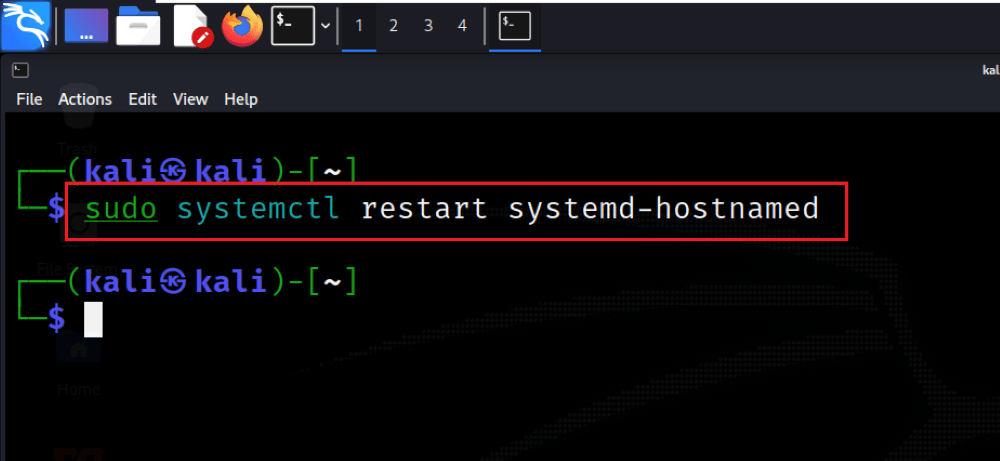
Step 4: Apply Changes
Make sure that changes take effect by restarting the hostname service using the command sudo systemctl restart systemd-hostnamed. This step is important to make the system recognize and apply the new hostname.
sudo systemctl restart systemd-hostnamed
Apply Changes
Step 5: Verify Changes
Confirm the update by checking the hostname again with the command hostnamectl. This step is necessary to verify that the changes were successfully implemented and that the new hostname is now in effect.
hostnamectl

Verify Changes
Modifying the /etc/hostname file
Step 1: Check Current Hostname
Use hostnamectl to view the current hostname and gather information about the system’s configuration.
hostnamectl

Check Current Hostname
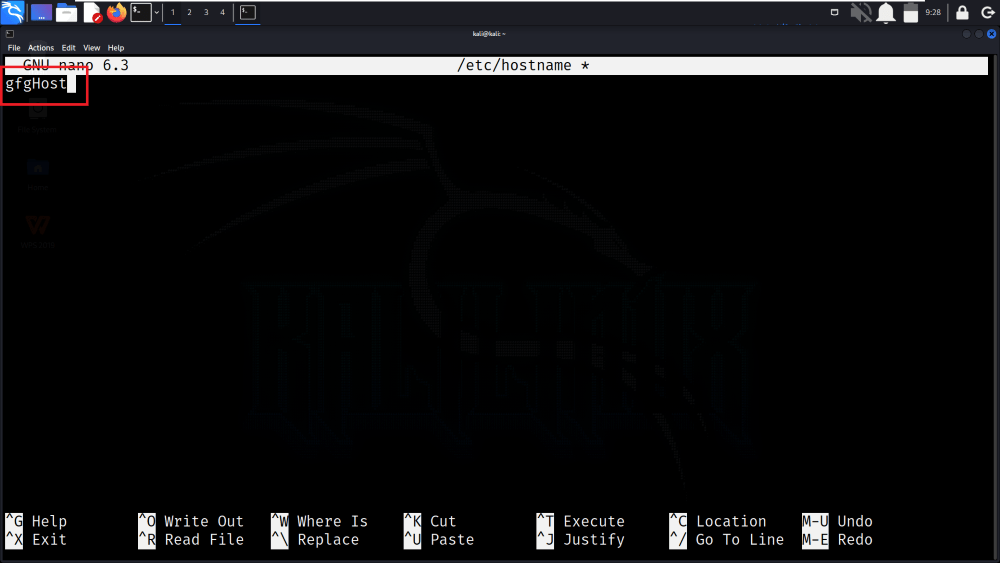
Step 2: Edit /etc/hostname
Use a text editor, such as nano, to open the /etc/hostname file. For example, execute sudo nano /etc/hostname. Replace the current hostname in this file with the desired one.
sudo nano /etc/hostname

Edit /etc/hostname
After making the change, save the file.
Saving the File
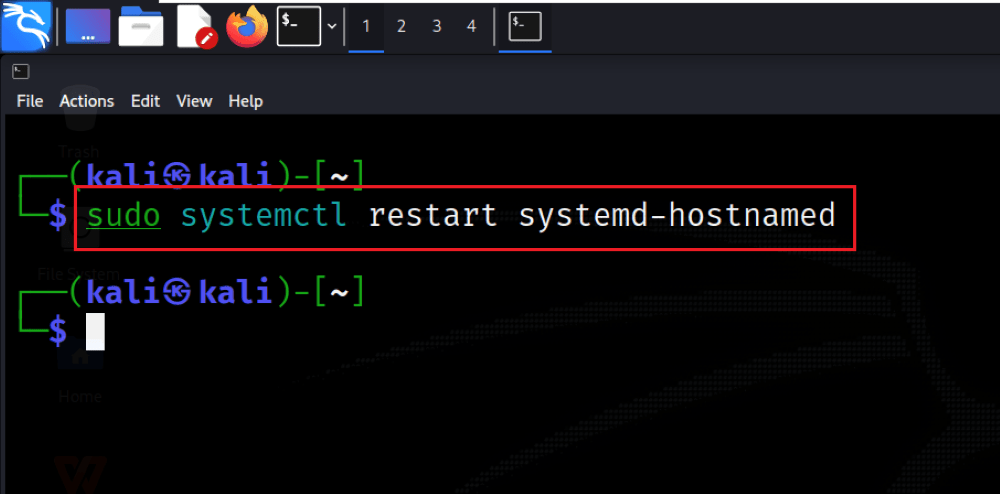
Step 3: Apply Changes
To make the changes take effect, you can either reboot the system or use the command sudo systemctl restart systemd-hostnamed. Restarting the hostname service ensures that the system recognizes the new hostname without the need for a full system reboot
sudo systemctl restart systemd-hostnamed
Apply Changes
Step 4: Verify Changes
Confirm the update by checking the hostname again with the command hostnamectl. This step is necessary to verify that the changes were successfully implemented and that the new hostname is now in effect.
hostnamectl

Verify Changes
Frequently Asked Questions on Changing Kali Linux Hostname
Can I change the hostname without administrative privileges in Kali Linux?
No, changing the hostname requires administrative privileges. Users need to use commands like “sudo” to modify system configurations.
Is it necessary to restart the system after changing the hostname?
While a system reboot is one option, using commands like “sudo systemctl restart systemd-hostnamed” can apply changes without a full restart.
What happens if the new hostname is not applied after the process?
Verify the changes with “hostnamectl” to ensure they are implemented successfully. Additionally, check for typos or errors in the configuration files.
Can I use special characters or spaces in the new hostname?
It is recommended to use alphanumeric characters and hyphens, avoiding spaces or special characters to ensure compatibility and prevent potential issues.
Conclusion
In conclusion, changing the hostname in Kali Linux can be accomplished through either the “hostnamectl” command or by modifying the “/etc/hostname” file. Both methods require administrative privileges and involve applying changes to ensure the new hostname takes effect. Whether using the command-line approach or editing system files, users should verify the success of the process by checking the updated hostname with the “hostnamectl” command.
Share your thoughts in the comments
Please Login to comment...