Amazon Web Services – Creating a User Pool in AWS Cognito
Last Updated :
27 Mar, 2023
A User pool in AWS Cognito is a user directory, which helps users to sign in to your web or mobile app through AWS Cognito. Users can also sign in through other social platforms like Google, Facebook, Amazon, or Apple. It doesn’t matter users can directly sign in or use a third-party authentication, all these users in the User pool have a profile directory that you can access through Software Development Kit (SDK).
Services provided by User pool :
- User pool provides sign-in and sign-up services.
- It also gives you a built-in web UI so that users can sign-in. This web UI is customizable too.
- It manages the user directory and user profile.
- Facilitates you to sign-in with Facebook, Google, Apple, log in with Amazon, and also sign-in with SAML identities providers from your user pool. SAML (Security Assertion Markup Language 2.0) is a service that helps identity providers (IdP) to authenticate the user and pass identity and security information to the service provider(SP).
- It provides Multi-Factor Authentication (MFA) for more secure sign-in by phone and email verification.
- It also gives you a workflow that can be customized and user migration through AWS Lambda triggers.
Prerequisite :
- AWS account (apply for free tier here).
- Install Amplify, write this on command prompt.
npm install -g @aws-amplify/cli
- Install Node.js (version 10.x) install NPM (version 6.x).
Steps to create your user pool in AWS Cognito :
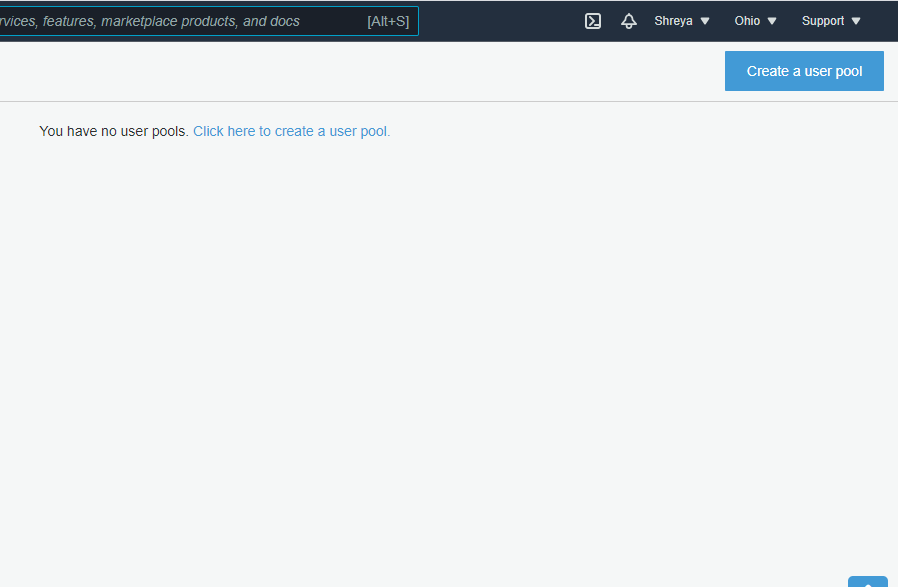
Step 1: Sign in to your AWS account, Go to Cognito -> Manage User Pool -> click to Create a user pool.
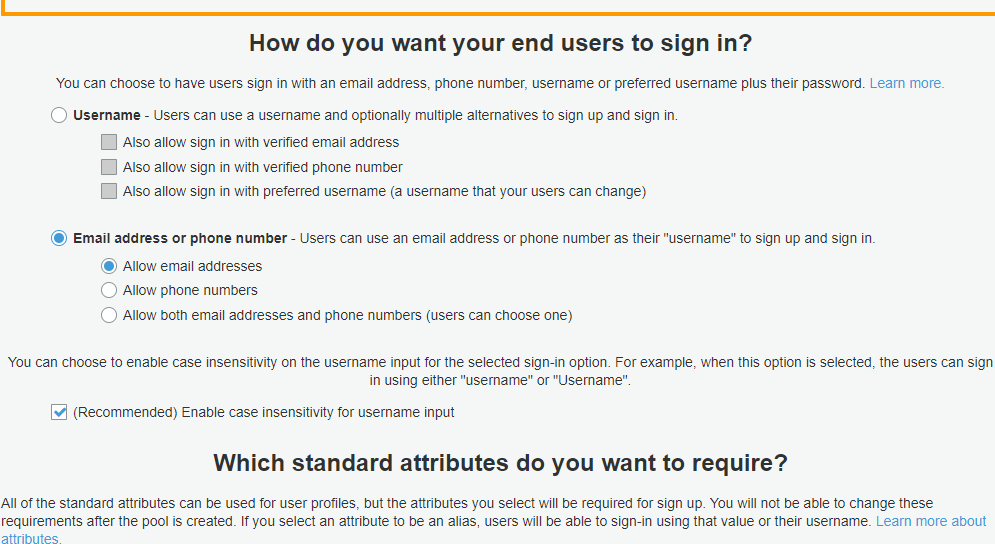
Step 2: Choose the way with which you want the user to sign-in, Email address or phone number, or Username you can select any one of them.
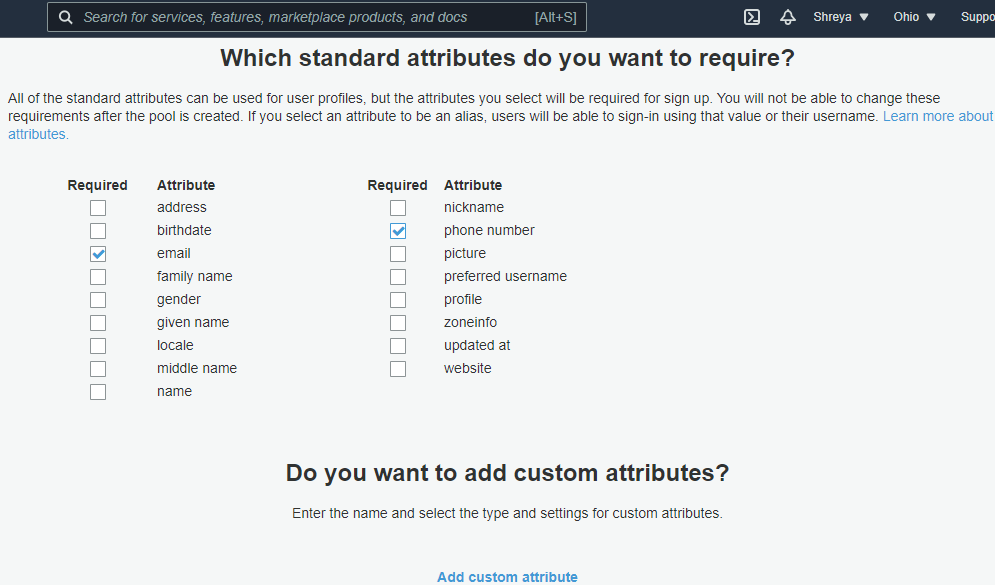
Step 3: Select the Attributes like email, phone number which will be required while sign-up, you can’t change the attributes after the user pool is created.
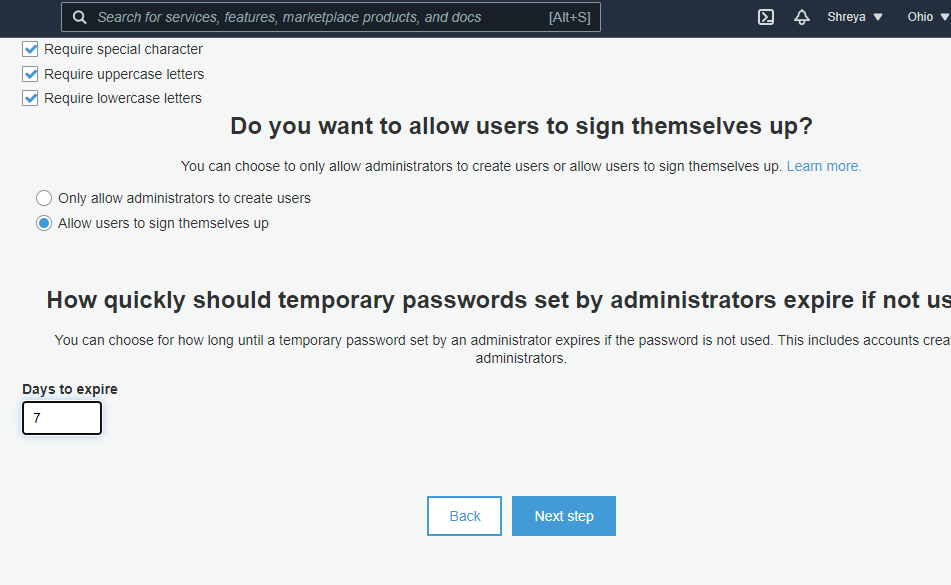
Step 4 : Select the format of password which user should follow means the user should choose a password which is must contain these letters/characters. Choose between Allow administrators to create users or Allow users to sign themselves up. Set the expiry period of the temporary password provided by the administrator.
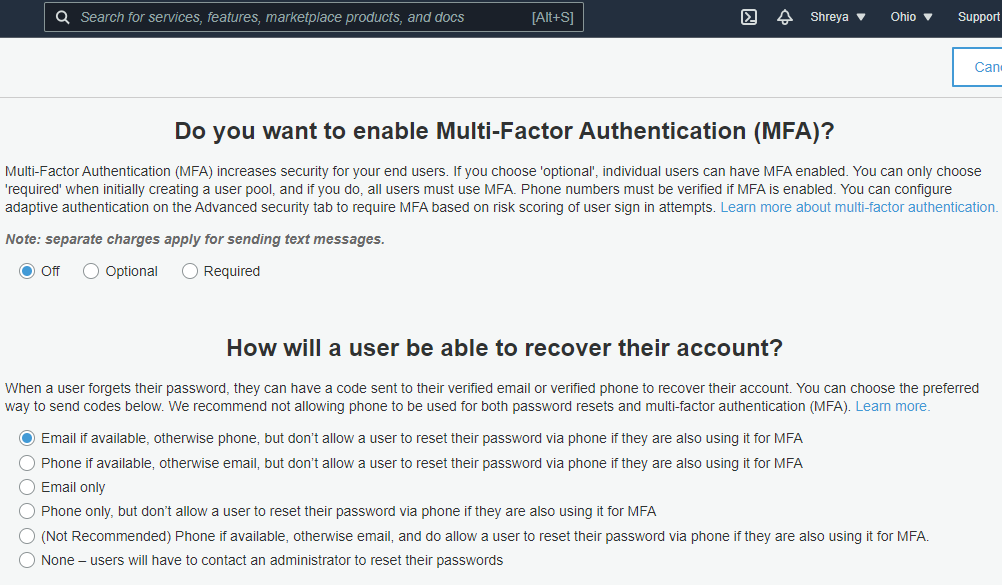
Step 5: You can also add MFA for more secure sign-in, you can either turned it off or make it optional or required.
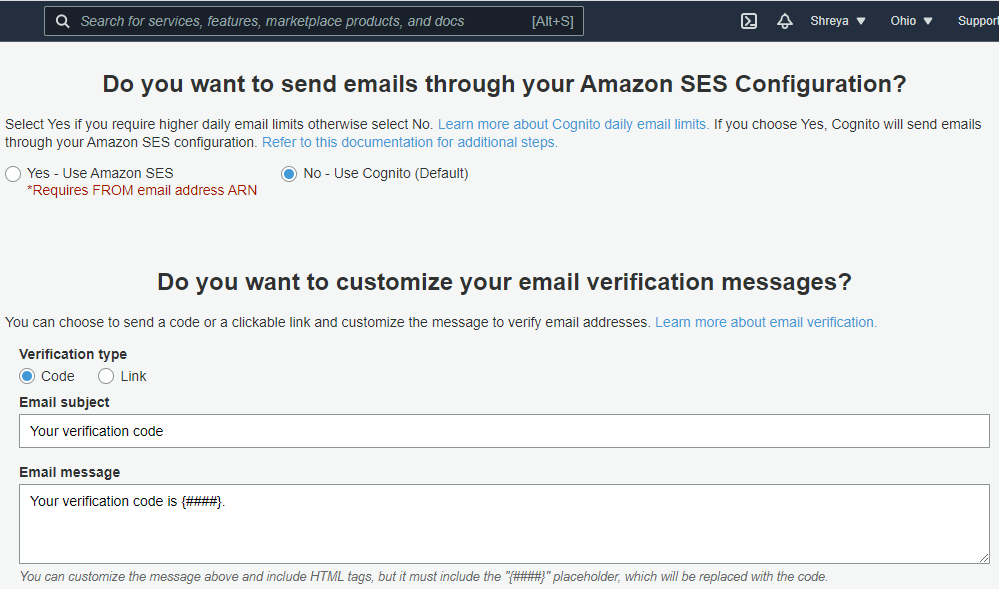
Step 6: You can customize your email verification message or code.
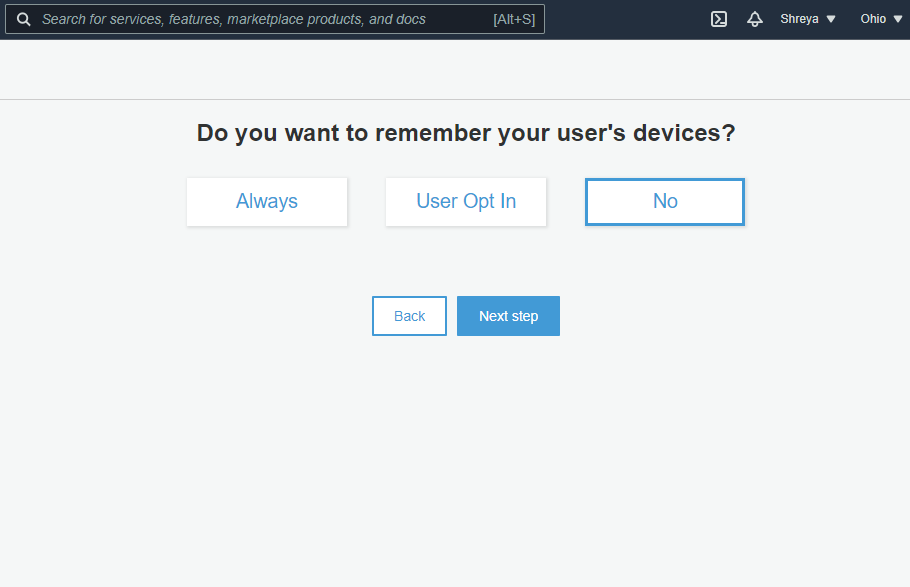
Step 7: Select No as do not want to remember a device now.
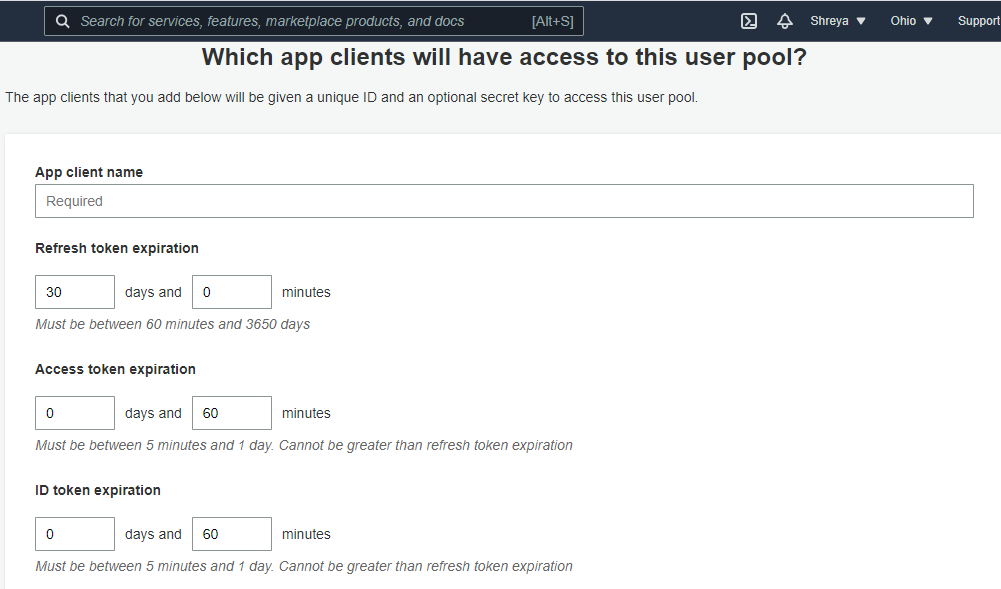
Step 8: Now provide your App client name to integrate this feature in your app.
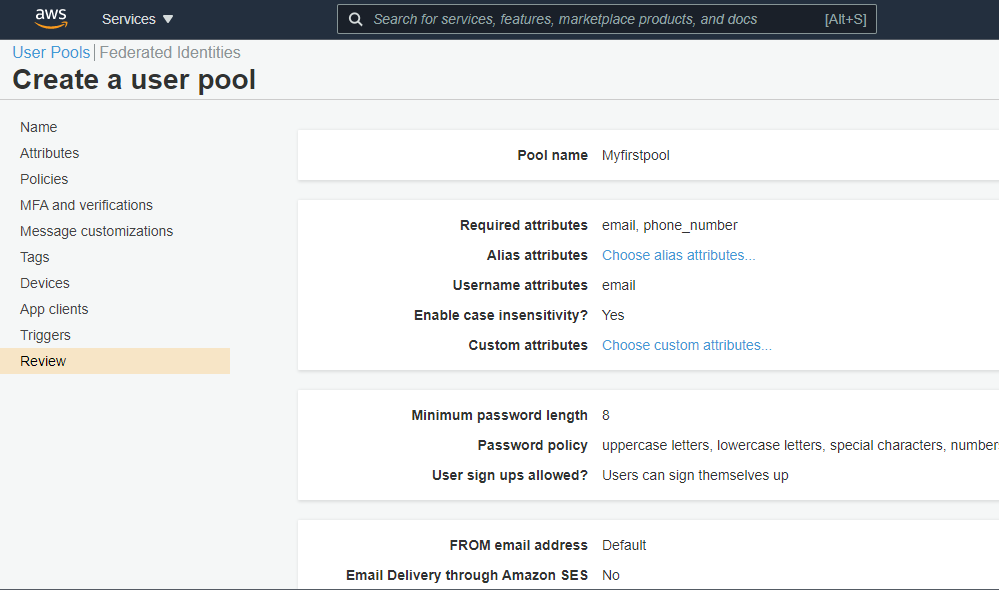
Step 9: Review all the settings make changes if required or click to Create user pool.
Your User pool has been successfully created.

Share your thoughts in the comments
Please Login to comment...