What is WPF?
Last Updated :
02 Aug, 2022
Windows Presentation Foundation(WPF) is a development framework used to create a desktop application. It is a part of the .NET framework. The WPF has a resolution-independent and vector-based rendering engine which is helpful to deal with modern graphics hardware. The latest version of WPF is 4.6. In this framework, UI of the application is designed in XAML language and Application logic is Written in C# programming language.
Features of WPF are as following:
- Extensible Application Markup Language (XAML)
- Controls
- Data Binding
- Layout
- 2D and 3D graphics
- Animation
- Styles
- Templates
- Documents
- Media
- Text
- Typography
WPF Architecture: The major components of the WPF are PresentationFramework, PresentationCore, Milcore, Common Language Runtime(CLR), User32, Kernel. Milcore is written in unmanaged code in order to enable tight integration with DirectX, which is responsible for display. WPF has fine control over memory and execution. The composition engine in milcore is extremely performance-sensitive and required giving up many advantages of the Common Language Runtime to gain performance.
Creating a WPF Application Using Visual Studio 2019
Step 1: Open Visual Studio and select Create a new project under the Get started menu. The Create a new project dialog opens. Select the WPF App (.NET Framework) template and then select Next.

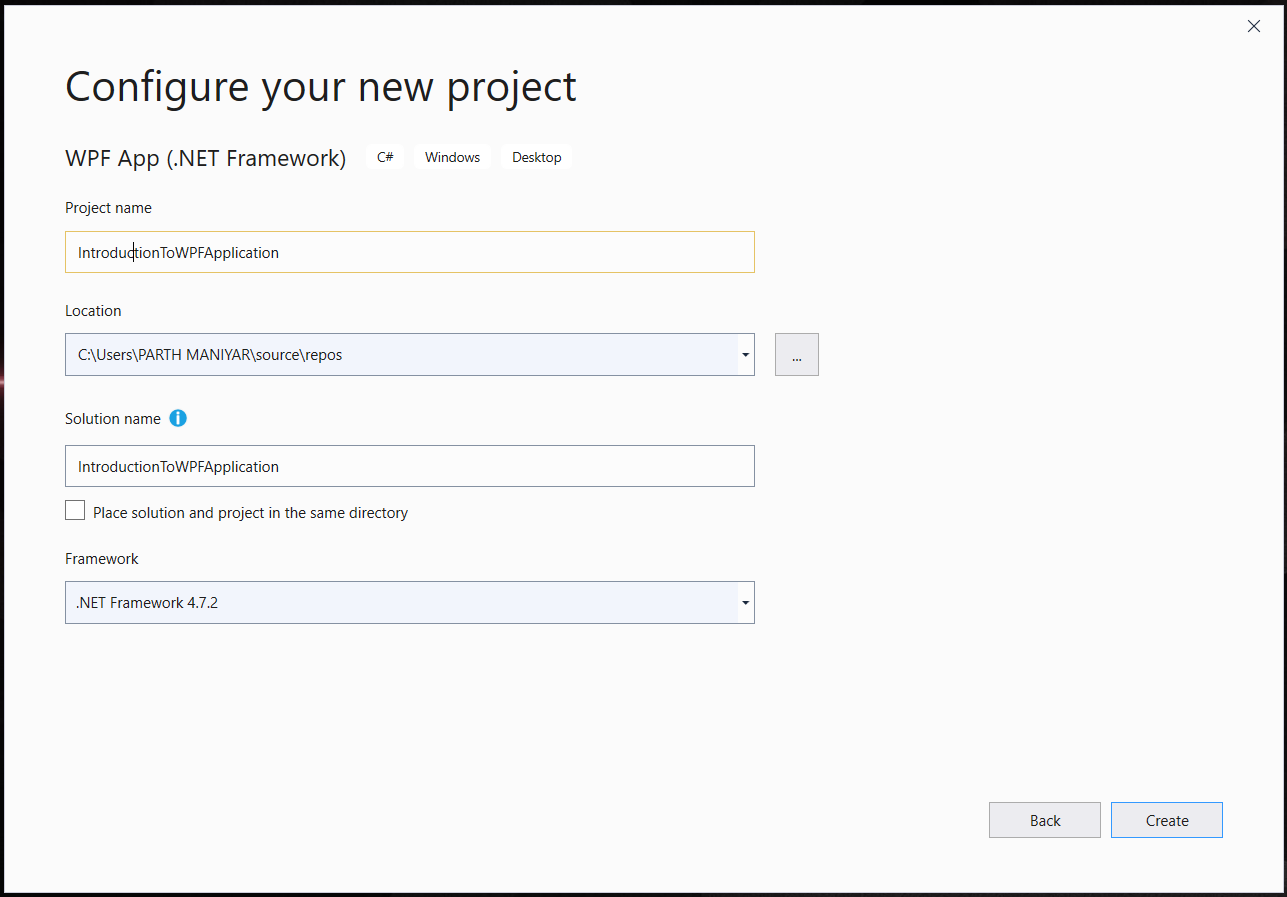
Step 2: The Configure your new project dialog opens. Enter the project name IntroductionToWPFApplication and then select Create.
Visual Studio creates the project and opens the designer for the default application window named MainWindow.xaml.
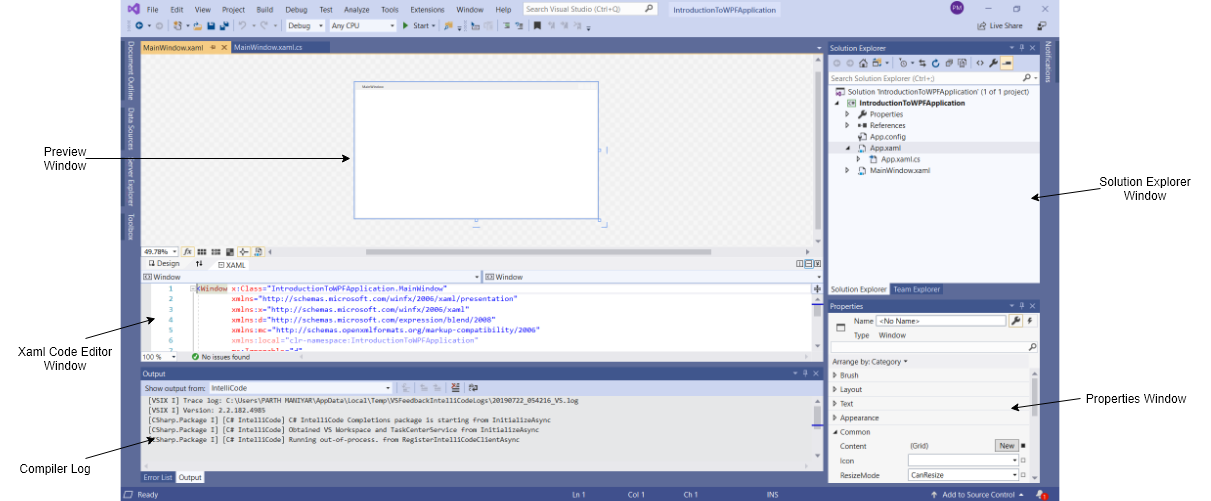
- Solution Explorer Window: It is used to navigate between all files in Project. For example, if you will select a file from this window then all the properties related to this file will be seen property window.
- Properties Window: This window is used to change the different properties of the selected item in the Solution Explorer. Also, you can change the properties of components or controls that you will add to the App.
- Compiler Log: This window displays the error and warning messages.
- Xaml Code Editor: In this window we can write the xaml code for UI of App.
- Preview Window: We can see the preview of the window how the window will look like.
You can also reset the window layout by setting it to default. To set the default layout, go to Window -> Reset Window Layout in Visual Studio Menu.
Step 3: Now to add the controls to your WPF application go to Toolbox tab present in the extreme left side of Visual Studio. Here, you can see a list of controls. To access the most commonly used controls go to Common Controls present in the Toolbox tab.

Step 4: Now drag and drop the controls that you needed on created Form. For example, if you can add TextBox, ListBox, Button, etc. as shown below. By clicking on the particular control in the preview window you can see and change its properties present in the rightmost corner of Visual Studio.

In the above image, you can see the TextBox is selected and its properties are opened in the rightmost corner. You can change its properties’ values as per the application need. The code of controls will be automatically added in the XAML code editor.
Step 5: To run the program you can use an F5 key or Play button present in the toolbar of Visual Studio. To stop the program you can use the pause button present in the ToolBar. You can also run the program by going to Debug-> Start Debugging menu in the menubar.

If you worked with Windows Forms previously then it will be very easy to work with WPF.
Advantages of WPF:
- It uses current standard because it is newer
- the developers of the controls will likely be more focused on WPF because it’s XAML makes it easy to create and edit your UI and allows the development work to be separated between a designer (XAML) and a programmer(C#).
- Databinding is used to make a clean separation between data and layout.
- Uses hardware efficiently for drawing the UI, for better performance.
- It is used to make user interfaces for both Windows applications and web applications.
Share your thoughts in the comments
Please Login to comment...