Staging in Git
Last Updated :
05 Apr, 2024
In this article we will try to understand each and every aspect which may help us to understand about Staging in Git. To keep a track of modifications or changes in the file we have to bring that changes to our staging area which we bring by using Staging. Below command and this process of adding these changes or modifications in an area to keep a track of it are called staging. While Hunk means a piece of changes. For example, we have written 4 lines of text in a file and modified 4 lines of text in that file that is known as a hunk which you can consider as a piece of change.
Following command we may use to add all the modified data while working on git:
git add .
Staging Changes
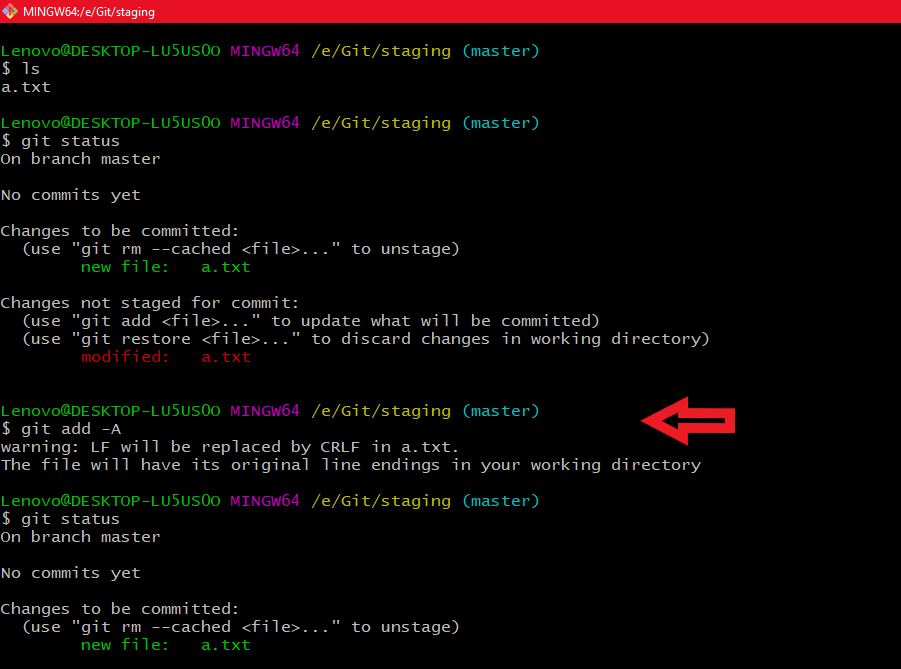
Here we will edit our file a.txt and after using the git status command we can see it is showing something in the green part that means that the file is staged but it is not committed and the part which is coming in red is there are some changes made in the file which are not being staged for example we may write hello in the file and then used “git add .” command to put it in the staging area but after that if we write “bhailogs” in the file and then if we are not adding that change in the staging area by using the git add command then we will see that in the red color which means that there are some changes which need to be tracked or staged. Now we will use various methods to add changes in a file to the staging area. If we want to stage all changes we will use the git add -A command or git add. where represents the current directory.
Unstage a File
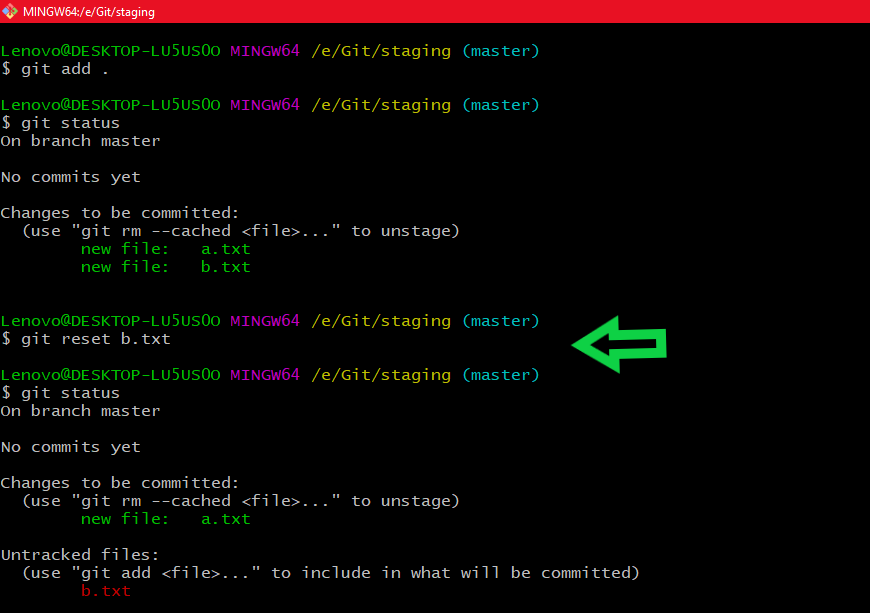
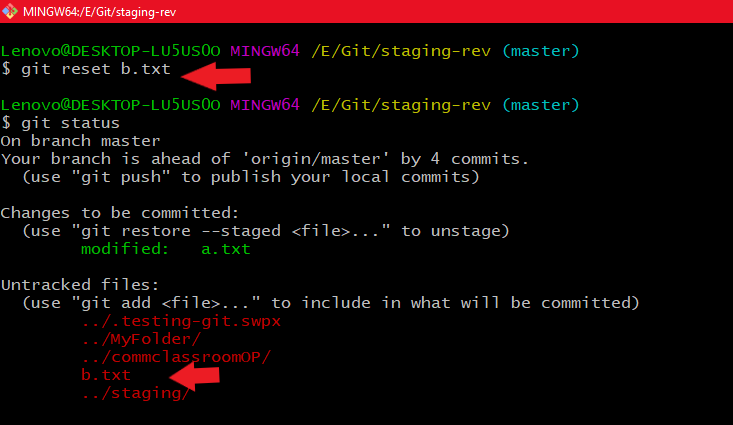
Now if you want a file to be unstaged that is we don’t want that file to be in the staging area so what we can do is we can use the command git reset file_path to unstage a file. Now here we can see that we have added all the files in the staging area after applying the git status command we can see that all the files are in the staging area so now I want that b.txt should not be in the staging area so to remove b.txt from the staging area we have used the command git reset file_path but here we are in the path only so we don’t need to mention the entire path in file path because b.txt exists in our current directory so we will write git reset file_name to remove b.txt from the staging area.
Add changes by hunk
Here we have used the git add -p command and here we can see that there are no changes to be staged after that, we have edited the file a.txt. After editing
the file we again used the command git add -p command which will open an interactive prompt that will ask the user whether we want to
Stage this hunk along with various parameters.
| Stages of Hunk |
Action Performed |
| y |
Stage this hunk for the next commit |
| n |
do not stage this hunk for the next commit |
| q |
quit; do not stage this hunk or any of the commits |
| a |
stage this hunk and all later hunks in the file |
| d |
do not stage this hunk or any of the later hunks in the file |
| e |
manually edit the current hunk |
| ? |
print hunk help |
which makes it easy to see changes that you want to stage or not.

Showing interactive prompt by using git add -p

Here I am entering y to add this hunk in the staging area
Interactive add
git add -i is the command which provides us an interactive interface along with various commands in that interface. So now let’s deep dive into this interactive add what is it and how its various commands provided in the interface works.

Showing interface provided by git add -i command
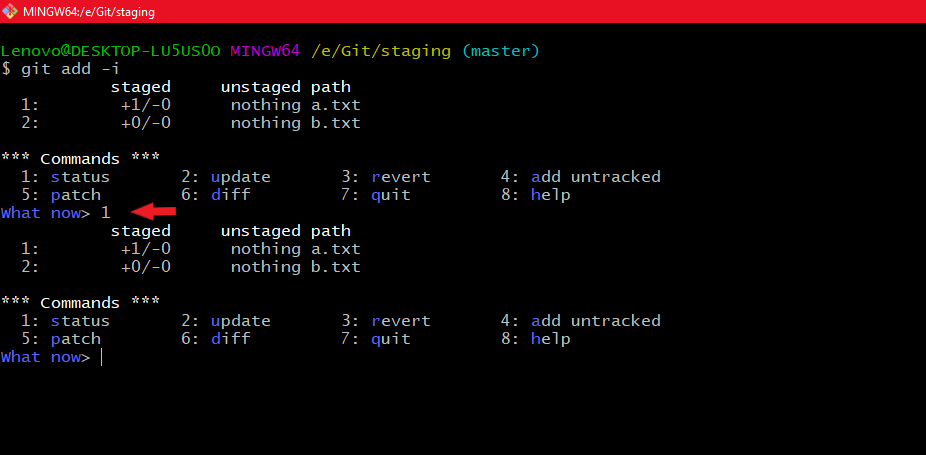
Here we can see the top half of the command output gives us the current state of the index broken up into staged and unstaged columns.
- a.txt has 1 line added and 0 lines removed. It is currently staged as the current status reports nothing in the unstaged column.
- b.txt has 0 lines added and 0 lines removed and has been staged. There are no further changes since it has been staged as indicated by the “nothing” line under the unstaged column.
The bottom half shows what you can do. Either enter a number (1-8) or a letter (s,u,r,a,p,d,q,h).
status shows output identical to the top part of the output above.
Using status command
Now to understand the working of the update command what we have done is have made some changes to a.txt and in staging whenever we modify something in your file or any folder we have to add those changes in the staging area. But we have not added those changes to the staging area. So here we will use the update command to add this file to the staging area. As you can see here on using the git status command we can see that we have modified a.txt but we have not added those changes into the staging area.
Using git status command to see the status of a.txt
Now let’s see the update command
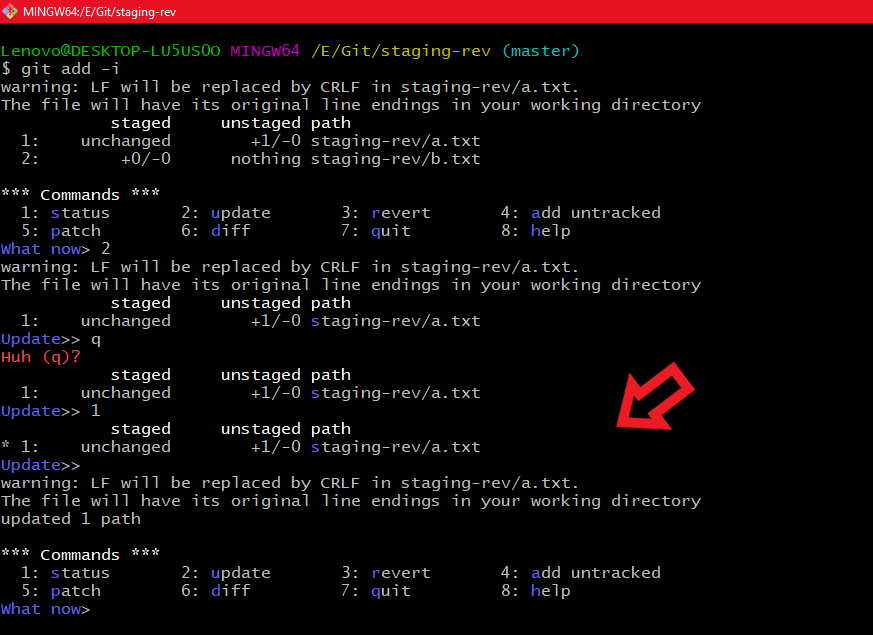
Using update command
After using the update command now if we see the status of our project using git status so we can see the file a.txt has been added into the staging area.
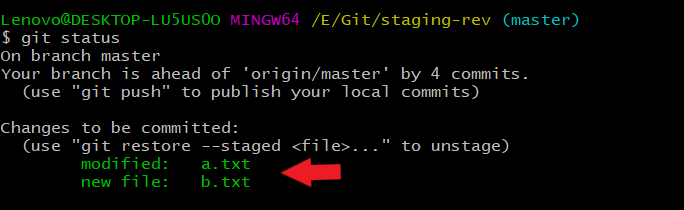
Using the git status command to verify whether the changes are staged or not using the update command
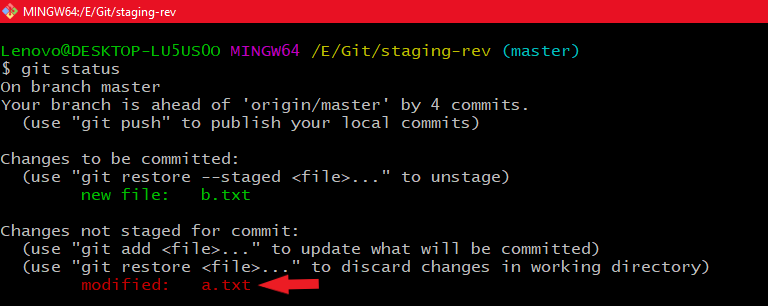
revert basically reverts back information to the head. So when you get into the interactive mode using it add -I command and press 3 over there you get in the revert command so what happens now is it shows you files and for which file you want the revert to revert information back to head you can type that index number and then press enter. So what will happen it will mention an asterisk on that index position. and if you press enter after that it puts the respective file in the untracked files.
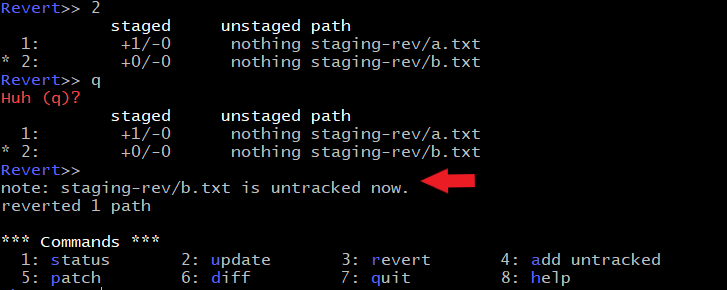
Using revert command
So you can also check now

with the git status command that the file b.txt is now in the untracked files.
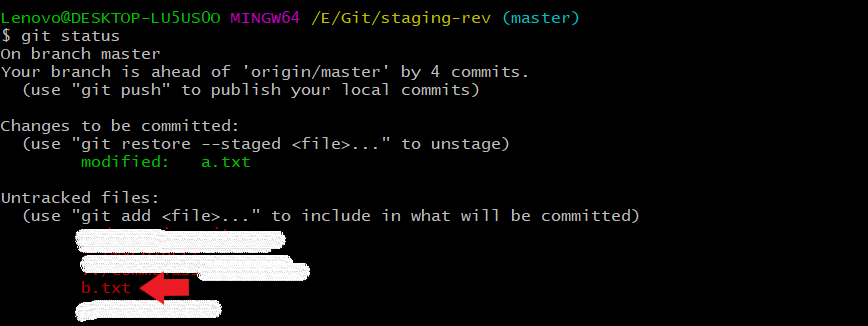
Using git status command to verify that is b.txt is in the untracked files
add untracked it allows you to add untracked files in the staging area.

Using add untracked command
Now we can see that b.txt is added into the staging area.
Using git status to see b.txt is in the staging area
patch it allows for one path to be selected out of output similar to status for further analysis
But here there are no changes to be staged therefore here it will show us no changes.

using patch command
diff displays what will be committed.
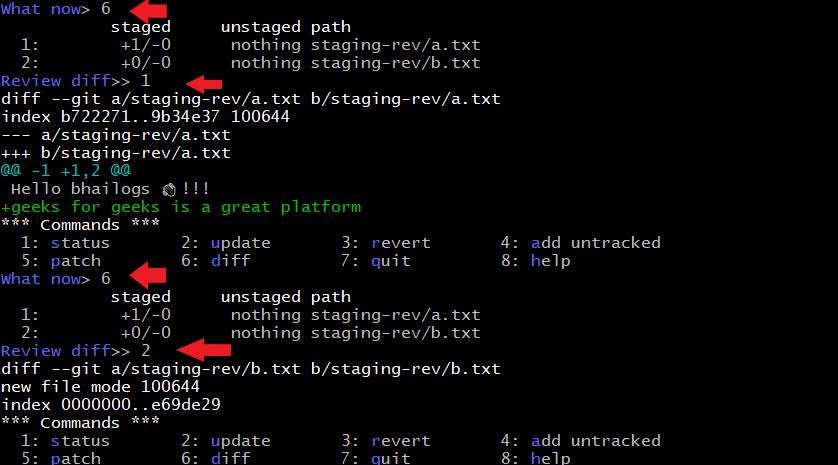
using diff command
quit exits the command

using quit command
help presents further help on using commands.
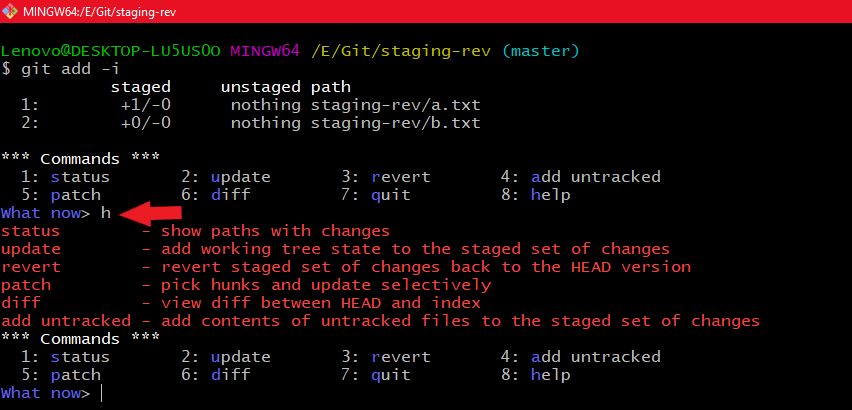
using help command
Staged Changes : To display the hunks that are staged for commit
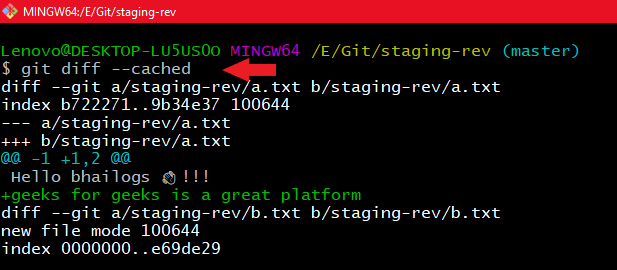
Using git diff –cached
Stage a single file: Now if you want to stage a single file what you do is type in the command git add file_name it’s that easy and you will see that the respective file is being added. Now what I have done is I have put my b.txt in the untracked files using the command git reset file_name here my file_name is b.txt and then I have used the command git add file_name to bring my b.txt in the staging area.
Using git add to stage a file
stage deleted files: To remove a file from git permanently use the -f flag in the command git rm -f file_name.
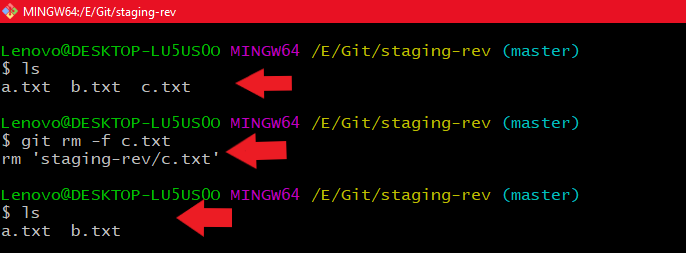
Using git rm -f file_name to remove the file permanently
To delete the file from git without removing it from disk, use the –cached flag
So to understand this what I have done is created a file r.txt then added it into the staging area and then removed it using the –cached flag from git so what happened is it was removed from the staging area but did not get deleted from the disk and is put by git into the untracked files so now if I want that file r.txt to be added what I will do is use git add r.txt to add that file again into the staging area.
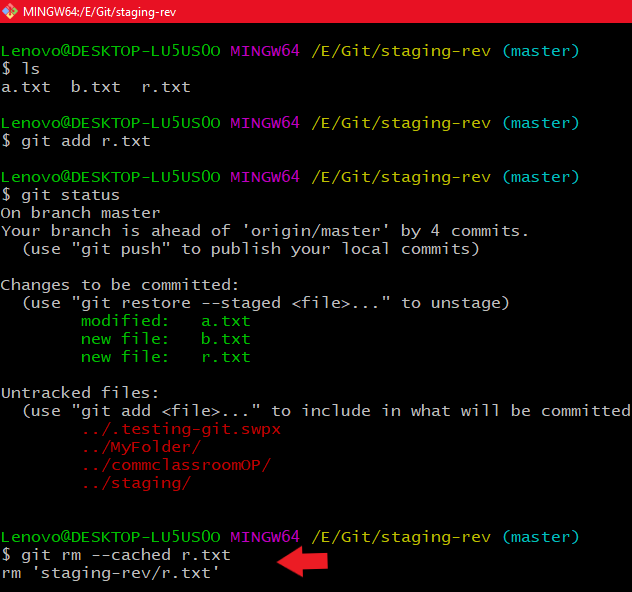
Using git rm –cached file_name
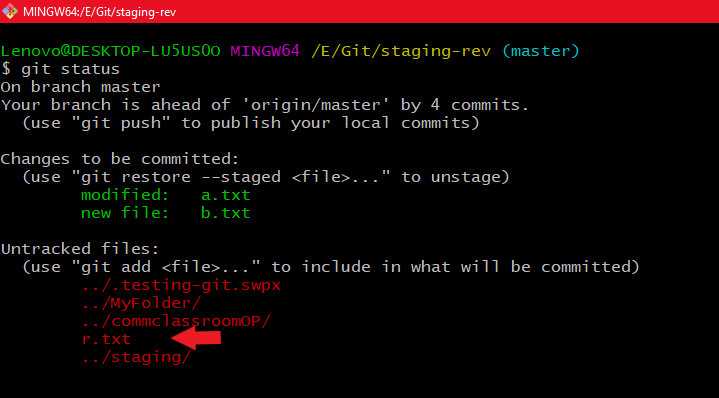
Using git status command to see whether r.txt is in untracked files or not
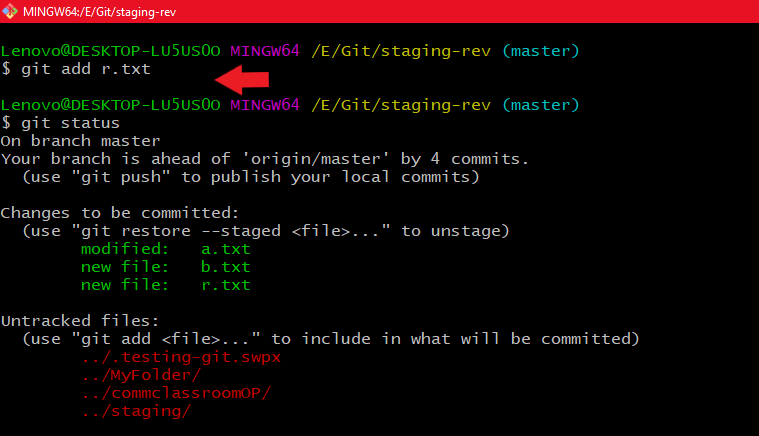
Using git add command to add r.txt file to the staging area
Like Article
Suggest improvement
Share your thoughts in the comments
Please Login to comment...