Spring MVC – Text Box
Last Updated :
02 Mar, 2022
To begin, make sure you have a working Eclipse IDE installed and follow the steps below to create a Spring Web Framework-based Dynamic Form-based Web Application.
Steps to create TextBox in Spring MVC:
- Create a SpringMVCTextField project in the com.geeksforgeeks package.
- Under the com.geeksforgeeks package, create the Java classes Registration and RegistrationController.
- Create two view files in the jsp subfolder: Registration-page.jsp and confirmation-page.jsp.
- The last stage is to construct the content of the source and configuration files, as well as to export the program, as described below.
Example Project
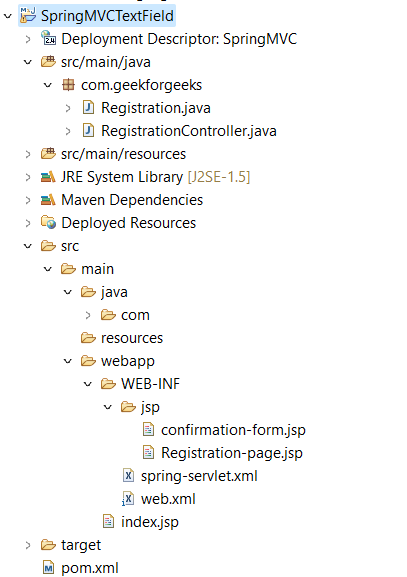
Project structure:
Step 1. Add dependencies to the pom.xml file.
You can download the required dependencies from URLs given in the comments of the program.
XML
<modelVersion>4.0.0</modelVersion>
<groupId>com.javatpoint</groupId>
<artifactId>SpringMVC</artifactId>
<packaging>war</packaging>
<version>0.0.1-SNAPSHOT</version>
<name>SpringMVC Maven Webapp</name>
<dependencies>
<dependency>
<groupId>junit</groupId>
<artifactId>junit</artifactId>
<version>3.8.1</version>
<scope>test</scope>
</dependency>
<dependency>
<groupId>org.springframework</groupId>
<artifactId>spring-webmvc</artifactId>
<version>5.1.1.RELEASE</version>
</dependency>
<dependency>
<groupId>javax.servlet</groupId>
<artifactId>servlet-api</artifactId>
<version>3.0-alpha-1</version>
</dependency>
<dependency>
<groupId>javax.servlet</groupId>
<artifactId>jstl</artifactId>
<version>1.2</version>
</dependency>
<dependency>
<groupId>org.apache.tomcat</groupId>
<artifactId>tomcat-jasper</artifactId>
<version>9.0.12</version>
</dependency>
</dependencies>
<build>
<finalName>SpringMVC</finalName>
</build>
</project>
|
Step 2. Create the bean class
The bean class includes the variables (along with setter and getter methods) that correspond to the form’s input field.
Registration.java
Java
package com.geekforgeeks;
public class Registration
{
private String firstName;
private String lastName;
public Registration()
{
}
public String getFirstName()
{
return firstName;
}
public void setFirstName(String firstName)
{
this.firstName = firstName;
}
public String getLastName()
{
return lastName;
}
public void setLastName(String lastName)
{
this.lastName = lastName;
}
}
|
Step 3. Create the controller class
RegistrationController.java
Java
package com.geekforgeeks;
import org.springframework.stereotype.Controller;
import org.springframework.ui.Model;
import org.springframework.web.bind.annotation.ModelAttribute;
import org.springframework.web.bind.annotation.RequestMapping;
@RequestMapping("/Registration")
@Controller
public class RegistrationController
{
@RequestMapping("/bookingForm")
public String bookingForm(Model model)
{
Registration res=new Registration();
model.addAttribute("Registration", res);
return "Registration-page";
}
@RequestMapping("/submitForm")
public String submitForm(@ModelAttribute("Registration") Registration res)
{
return "confirmation-form";
}
}
|
Step 4. Provide the entry of controller in the web.xml file
web.xml
XML
<?xml version="1.0" encoding="UTF-8"?>
<web-app>
<display-name>SpringMVC</display-name>
<servlet>
<servlet-name>spring</servlet-name>
<servlet-class>org.springframework.web.servlet.DispatcherServlet</servlet-class>
<load-on-startup>1</load-on-startup>
</servlet>
<servlet-mapping>
<servlet-name>spring</servlet-name>
<url-pattern>/</url-pattern>
</servlet-mapping>
</web-app>
|
Step 5. Define the bean in the XML file
spring-servlet.xml
XML
<?xml version="1.0" encoding="UTF-8"?>
xsi:schemaLocation="
<context:component-scan base-package="com.geekforgeeks" />
<mvc:annotation-driven/>
<bean id="viewResolver" class="org.springframework.web.servlet.view.InternalResourceViewResolver">
<property name="prefix" value="/WEB-INF/jsp/"></property>
<property name="suffix" value=".jsp"></property>
</bean>
</beans>
|
Step 6. Create the requested page
index.jsp
HTML
<!DOCTYPE html>
<html>
<head>
<title>Student Registration Form</title>
</head>
<body>
<a href="Registration/bookingForm">Click here for registration.</a>
</body>
</html>
|
Step 7. Create other view components
Registration-page.jsp
HTML
<!DOCTYPE html>
<html>
<head>
<title>Registration Form</title>
</head>
<h3>Student Registration Form</h3>
<body>
<form:form action="submitForm" modelAttribute="Registration">
First name: <form:input path="firstName" />
<br><br>
Last name: <form:input path="lastName" />
<br><br>
<input type="submit" value="Submit" />
</form:form>
</body>
</html>
|
confirmation-page.jsp
HTML
<!DOCTYPE html>
<html>
<body>
<p>Your Registration is confirmed successfully.</p>
First Name : ${Registration.firstName} <br>
Last Name : ${Registration.lastName}
</body>
</html>
|
Output:
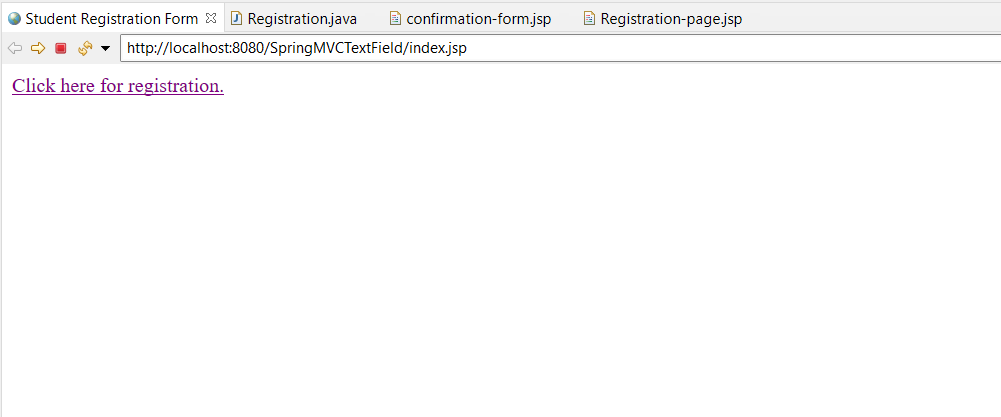
After clicking the “Click here for registration” link following page will be shown
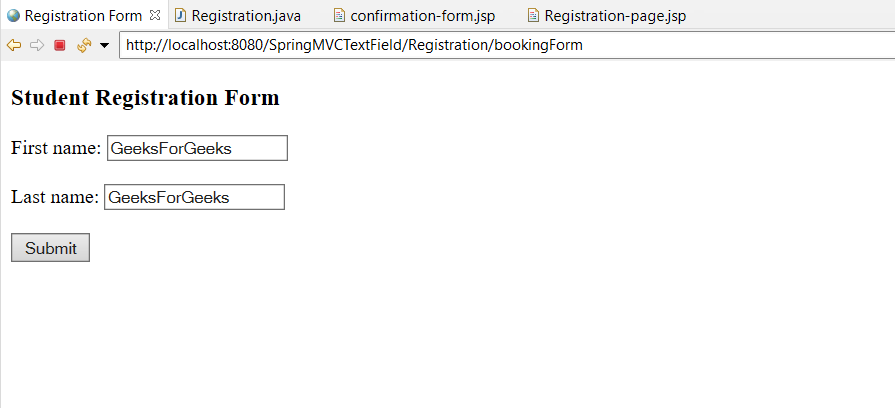
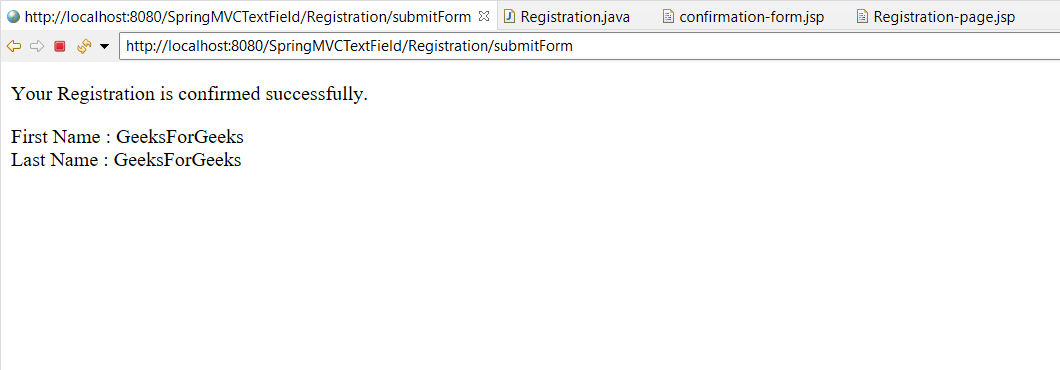
Click the submit button now
Share your thoughts in the comments
Please Login to comment...