How to Create Servlet in MyEclipse IDE?
Last Updated :
13 Nov, 2023
Servlets are Java programs that extend the capabilities of a Web Server. It runs on a Java-enabled web server like Apache Tomcat server, to receive and respond to the client’s requests. With Servlets, we can create Enterprise-grade applications with database access, session management, and content generation. It is primarily used for HTTP requests and responses like GET, POST, PUT, and DELETE.
In this article, we will create a Servlet in the MyEclipse IDE and deploy it to an Apache Tomcat Web Server.
Prerequisites:
There are some prerequisites that should be done to follow this tutorial. They are,
- MyEclipse IDE should be installed on your system. You can download and set it up by visiting the below link: MyEclipse
- Any Java-enabled Web Server should be installed, it can be Apache Tomcat, GlassFish, etc. In this example, we will be using the popular option, Apache Tomcat to serve our Servlet. You can download and set it up easily by visiting the below link: Apache Tomcat
- MyEclipse IDE should be configured to use the Apache Tomcat Local Installation done in Prerequisite 2 for publishing the developed artifacts.
Once you have done all the above steps, we can start creating our Servlet in MyEclipse IDE.
Creating Servlet in MyEclipse
We will be creating a basic Servlet that hosts a simple Login page and we will display the entered information on the next page using the developed Servlet.
Step 1: Create a Dynamic Web Project
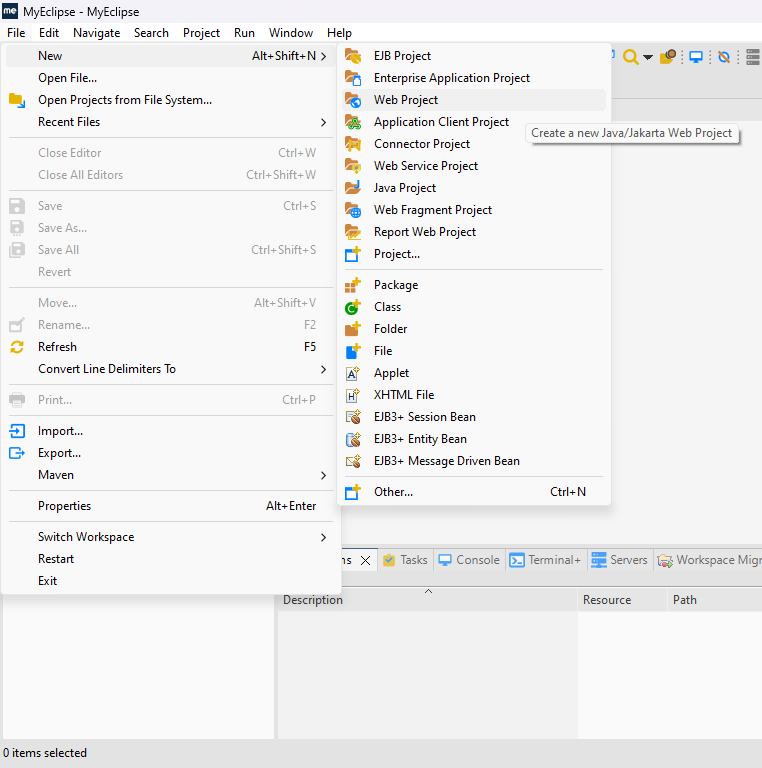
- Open MyEclipse, in the top menu, go to File -> New -> Web Project and click it to create a Web Project.
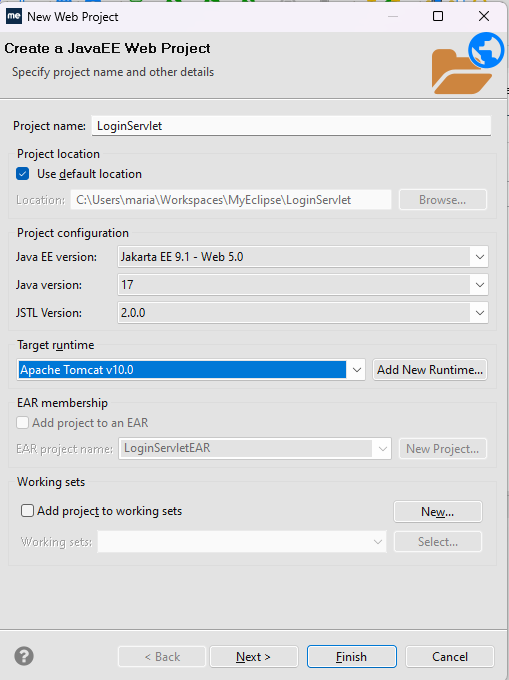
- After Clicking on Web Project, a new dialog box will be opened like the below image.
- Enter the project name.
- Configure the Java EE version, Java version and JSTL version by clicking the dropdown menu.
- If you need to change the runtime of the project you can do that by selecting the target runtime.
- In case you need to add a new runtime within MyEclipse you can click the Add New Runtime Button.
- After entering all the details, click on next.
- After that another content will be displayed with sources folder on build path and the classes folder, leave as it is like the below image and click next.

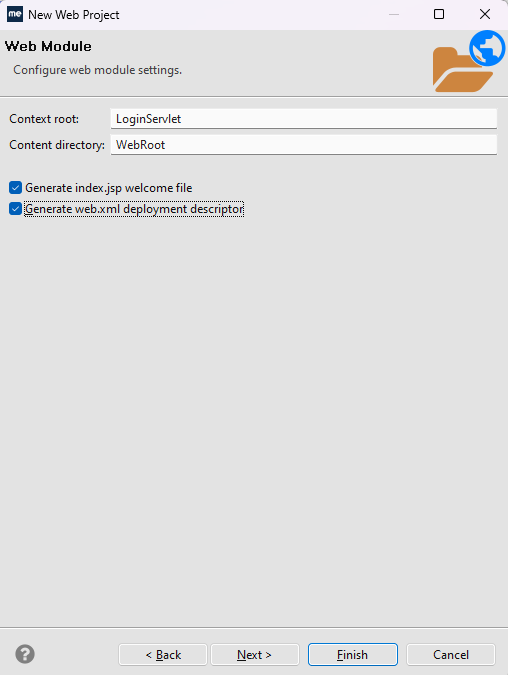
- After that, a dialog box will be asking you for context root and directory, you can leave that default.
- Click the checkbox with text as Generate web.xml Deployment Descriptor, if you want to use the web.xml to configure the servlets and servlets mapping, this basically lets the servlet container to know which servlet to call for the url pattern entered.
- We can also configure the servlet and servlets mapping using the @WebServlet() annotation
- For demonstration purpose we have chosen the generate web.xml file, but it will be much easier to work with annotation based configuration than the xml based configuration, so we will use the annotation based configuration to make it simple.
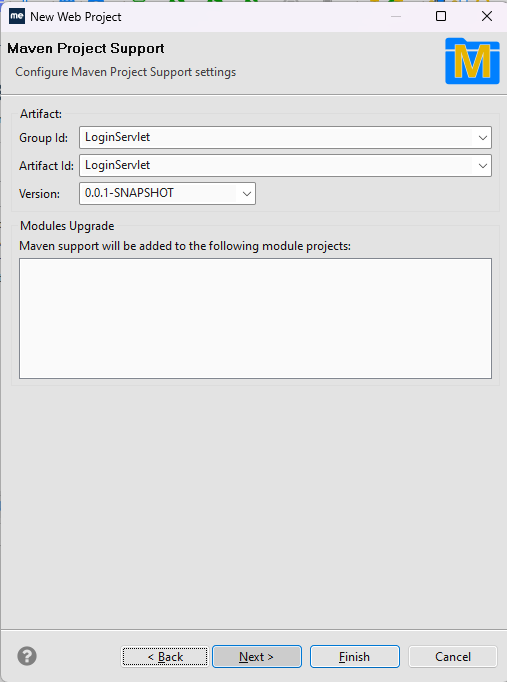
- Click on next to configure the maven support for this web project.
- Now, the support for maven should be configured as MyEclipse Web Project comes with maven build tool by default, it will be much easier to work with as we don’t need to add any servlet-api.jar or any other jars for jstl support to the build path manually.
- Enter the group id and artifact id for the maven project.
- For this demonstration purpose, i am leaving that as default, but you may need to use your company info to do that.
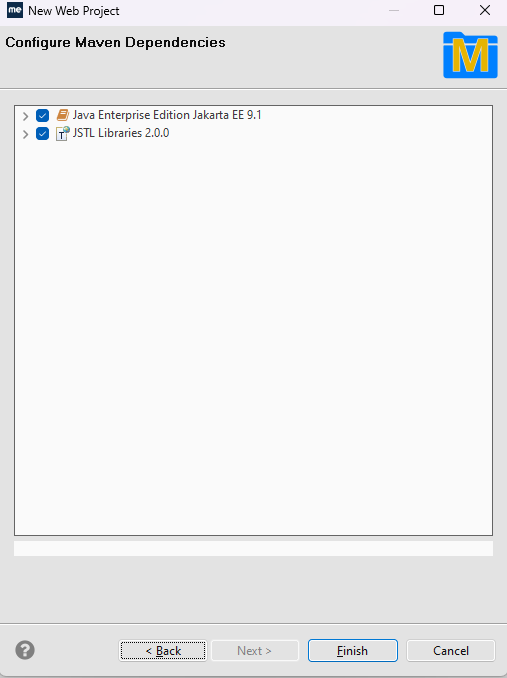
- Click on next.
- Leave the default dependencies, don’t uncheck those as these are the dependencies contains the servlet-api.jar and jstl support jars to facilitate the project.
- Click on finish to generate the web project. This may take some time for the first time as its needs to download maven dependencies from the internet. Make sure you are connected to the internet.
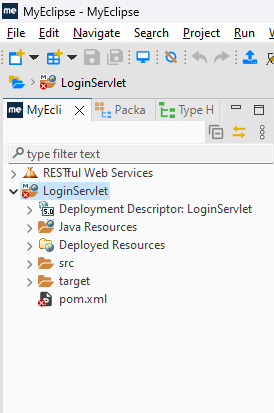
- After generating the project, your project structure should look alike the below image, just check you have everything in place. So, now you have successfully completed the step of creating the web project in MyEclipse IDE.
Step 2: Create Servlet Class
- Now, click on the Java Resources in the project tree of your project.
- Right Click on the src/main/java folder and go to New -> Servlet.
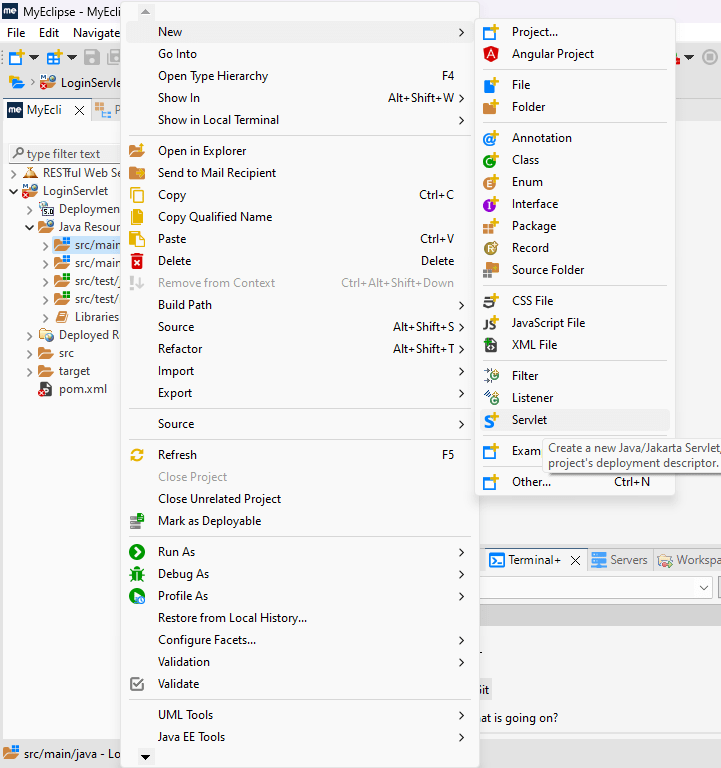
- Now, a new dialog window will be opened
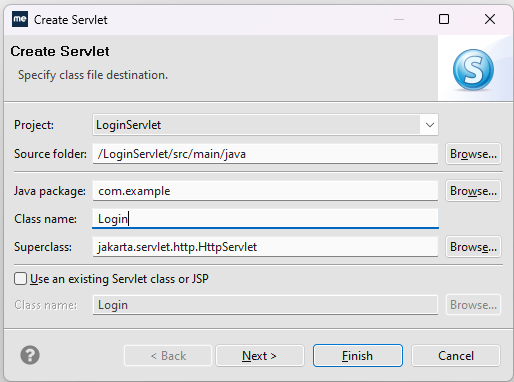
- Enter the package details, its always advisable to use good packaging style like controllers for controlling the app, repository for dealing with database.
- So, for this basic demo, we have used a sample package name.
- Enter the servlet name under the package.
- Every servlet we are creating has to be a subclass of jakarta.servlet.http.HttpServlet superclass.
- Note: javax is being used instead of jakarta in the older versions Java EE, so just replace jakarta to javax, if you are working with older Java EE versions.
- Click on next.
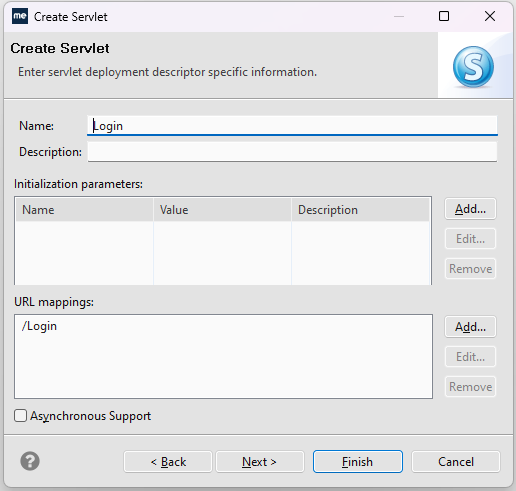
- After that, you will be provided with a window to enter the servlet description.
- You can add any other url patterns for the servlet here, I’m leaving it as default here.
- Click on next.
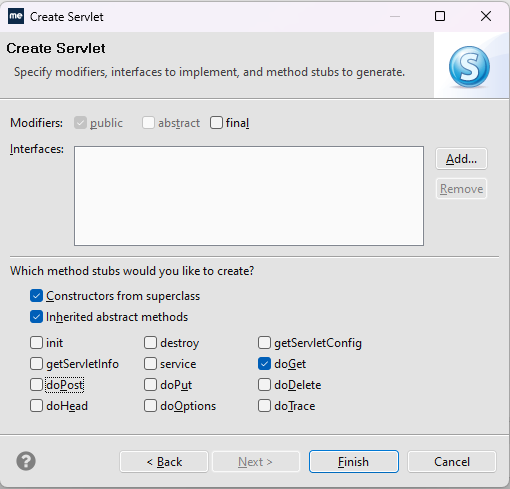
- Now, you have to configure the HTTP methods that you are going to use in the servlet.
- So that MyEclipse IDE can provide you with boilderplate code for that method implementation.
- Each method will be coming from the abstract class jakarta.servlet.http.HttpServlet.
- We have to implement those methods based on our usecase, check only the methods that you are going to implement in your project.
- If you want to accept a HTTP GET request with your servlet then, the method you have to implement is,
- Like this, every HTTP method has its own methods based on the HTTP verb.
- doPost() method for HTTP POST
- doPut() method for HTTP PUT
- doDelete() method for HTTP DELETE
- Some other methods also available like init() for initializing and destroy() to execute those methods based on the Servlet Lifecycle.
- Click on finish to create the servlet.
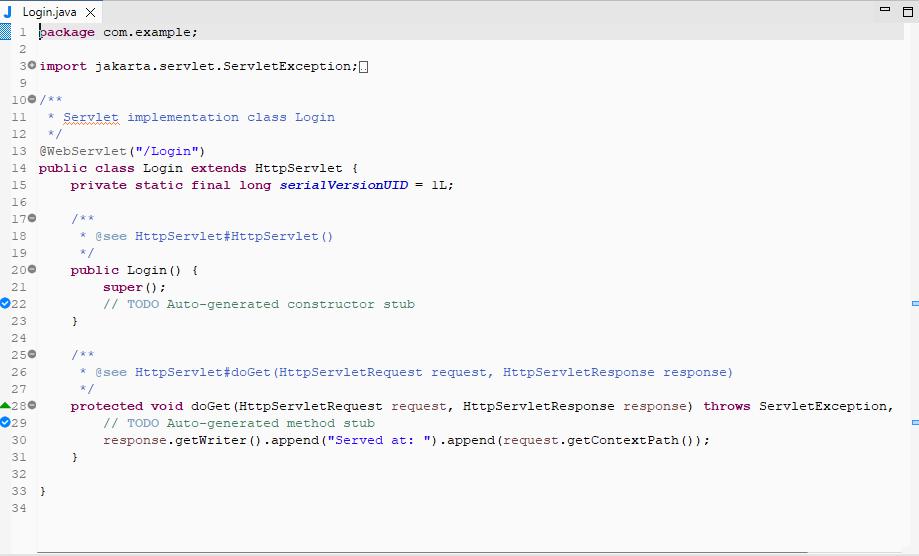
- Now the servlet is created with boilerplate code for quickstart.
- It contains a constructor, to call the super class HttpServlet constructor, to create the servlet.
- The WebServlet() annotation is used to map the url using the annotation based configuration.
- Also the selected doGet() method is also created with default code.
Step 3: Defining the servlet logic.
- The servlet creation is over, now we have to configure the welcome page of our application to display a welcome page.
- The welcome page will get a username and password through input tags and send it to the servlet using a get request.
- Though it is not advisable to use HTTP GET request and sending the username and password in the url for a real world application, it is used here just for demonstration purpose.
- Open the default index.jsp which can be found in the path: src -> main -> webapp -> index.jsp
- Add the below html content to the index.jsp to define the login page.
HTML
<%@ page language="java" import="java.util.*" pageEncoding="ISO-8859-1"%>
<%
String path = request.getContextPath();
String basePath = request.getScheme() + "://" + request.getServerName() + ":" + request.getServerPort() + path + "/";
%>
<!DOCTYPE HTML PUBLIC "-//W3C//DTD HTML 4.01 Transitional//EN">
<html>
<head>
<base href="<%=basePath%>">
<title>My Login page</title>
<style>
.row {
margin: 1rem 0;
}
</style>
</head>
<body>
<h1 class="row">Welcome to GeeksForGeeks!!!</h1>
<div style="padding:20px">
<form action="Login">
<div class="row">
<h3>Enter your username</h3>
<input name="userName" type="text">
</div>
<div class="row">
<h3>Enter your password</h3>
<input name="password" type="password">
</div>
<div class="row">
<button type="submit">Login</button>
</div>
</form>
</div>
</body>
</html>
|
- Now open the Servlet file you have just created.
- Add the below code that gets the username and password from the url parameter and displays it in the page using servlet.
- Though it is not advisable to use the url parameter for username and password in the real world applications, it is just for demonstration purpose.
Java
package com.example;
import jakarta.servlet.ServletException;
import jakarta.servlet.annotation.WebServlet;
import jakarta.servlet.http.HttpServlet;
import jakarta.servlet.http.HttpServletRequest;
import jakarta.servlet.http.HttpServletResponse;
import java.io.IOException;
import java.io.PrintWriter;
@WebServlet("/Login")
public class Login extends HttpServlet {
private static final long serialVersionUID = 1L;
public Login() {
super();
}
protected void doGet(HttpServletRequest request, HttpServletResponse response) throws ServletException, IOException {
response.setContentType("text/html");
PrintWriter out=response.getWriter();
String userName=request.getParameter("userName");
String password=request.getParameter("password");
out.print("<html><body>");
out.print("<h1>Hello!!!</h1>");
out.printf("<h3>User Name with : %s </h3><h3>Your password is : %s</h3>",userName,password);
out.print("</body></html>");
}
}
|
- So, we have done with our code implementation and used a index.jsp page to display the login form.
- Through the jsp page we have called our servlet using the given url mapping to the Login Servlet.
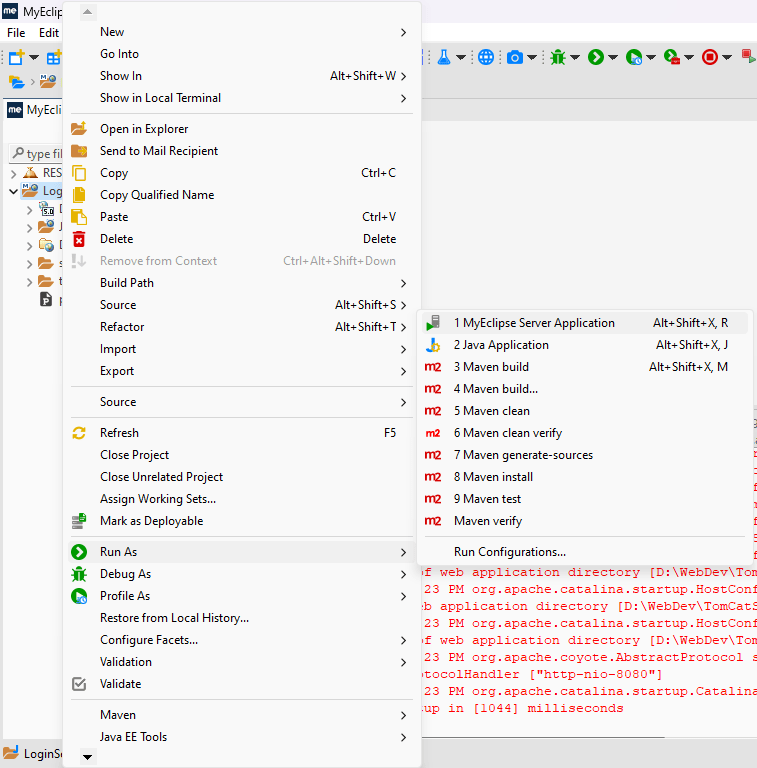
Step 4: Running our project.
- To run the project, right click on the project.
- Go to Run as -> MyEclipse Server Application
- Once you clicked the run button, you could see some logs in the console tab in MyEclipse IDE from the tomcat server.
- If you done installed and configured the server correctly in MyEclipse IDE, your project will be published to the Tomcat server without any errors.
Output
- Once you run the project, it will be running in the tomcat server, it may open a tab in your default browser automatically.
- If not use the below format to see your project running.
- Url format : http://localhost:8080/project_name/servlet_url_mapping
- So here, the project name is LoginServlet.
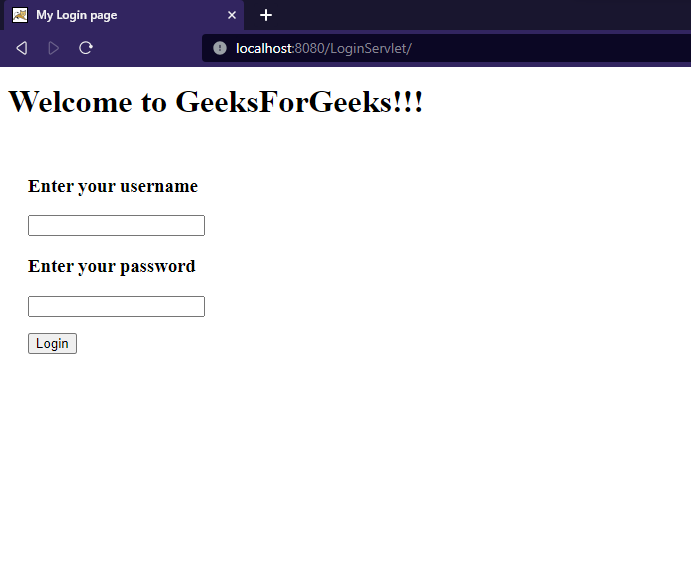
- As we have configured a welcome file using index.jsp, we can omit the servlet_url_mapping to see the welcome file first.
- The welcome file will looks like the below image.
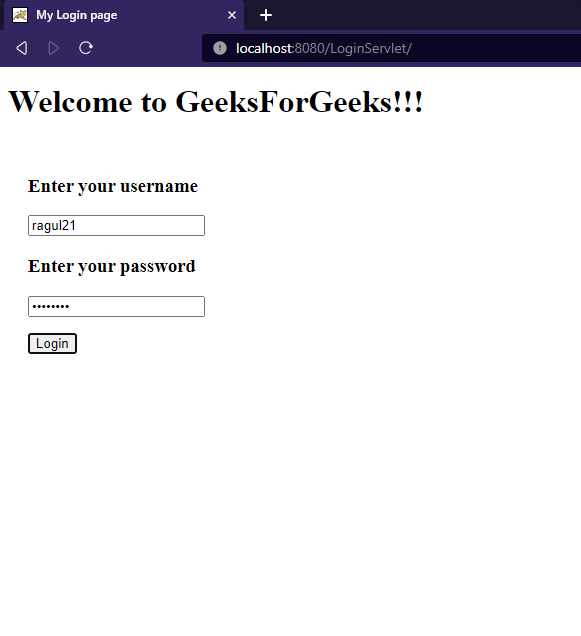
- Once the username and password is filled and when you hit the submit button.
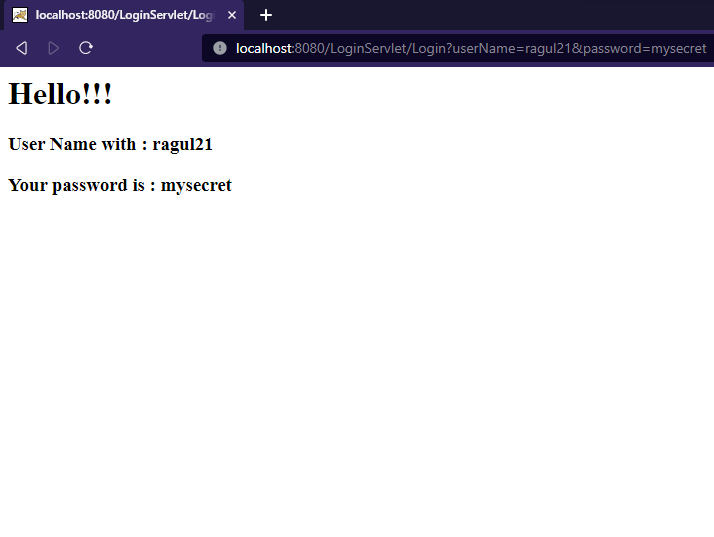
- You can see the Login Servlet is being called as the url mapping is for the specific servlet.
- The servlet is responding with the response with the username and password just entered.
The result for the specific username and password.
Share your thoughts in the comments
Please Login to comment...