Manually creating and managing reactive forms can be complex, leading to increased development time and potential for errors. In this article, we will see aboutFormBuilder service in Angular, a powerful utility that ease the process of building reactive forms with a fluent API and minimal boilerplate code.
Prerequisites
What is FormBuilder Service?
FormBuilder in Angular is like a helper that makes building forms easier. Instead of writing a lot of code to create form controls and groups, you can use FormBuilder to do it with just a few lines. It helps you define the structure of your form and manage its values. FormBuilder simplifies tasks like adding validation rules and handling form submissions. It's a handy tool for creating and managing forms in Angular applications, saving you time and effort in the process.
Key Features
- Fluent API: The
FormBuilderservice offers a fluent API that allows you to chain methods together to define form controls and their properties concisely. - Abstracts Complexity: It abstracts away the complexity of creating and managing form controls, validators, and form groups, reducing the amount of boilerplate code needed in components.
- Consistent Syntax: With the
FormBuilderservice, you can ensure a consistent syntax for defining form controls and validators across different components and applications. - Dynamic Form Generation: The
FormBuilderservice enables dynamic generation of form controls based on dynamic data or user requirements, allowing for more flexible and customizable forms. - Integration with Dependency Injection: Being a service, the
FormBuilderintegrates seamlessly with Angular's dependency injection system, making it easy to inject it into components and services where forms are needed.
Approach to use FormBuilder Service
- Import the required modules: You have to import the FormsModule or ReactiveFormsModule in your Angular module where you intend to use the form.
- Inject FormBuilder into your component: In the constructor of your component, inject FormBuilder.
- Use FormBuilder to create your form: You can use the FormBuilder's methods to create form controls and groups.
- Bind the form to your HTML template: Use formGroup and formControlName directives to bind the form controls to your HTML elements.
- Access form values: You can access form values and perform actions like form submission or validation using the FormGroup instance.
Steps to create Angular Application
Step 1: Create a new Angular project
ng new my-angular-appStep 2: Navigate to the project directory
cd my-angular-appStep 3: Serve the application
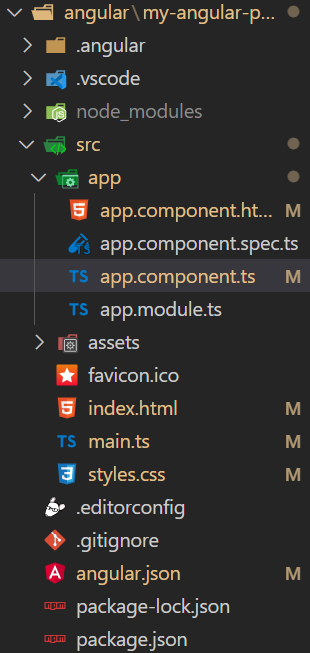
ng serveProject Structure:
The updated dependencies in package.json file will look like.
"dependencies": {
    "@angular/animations": "^16.0.0",
    "@angular/common": "^16.0.0",
    "@angular/compiler": "^16.0.0",
    "@angular/core": "^16.0.0",
    "@angular/forms": "^16.0.0",
    "@angular/platform-browser": "^16.0.0",
    "@angular/platform-browser-dynamic": "^16.0.0",
    "@angular/router": "^16.0.0",
    "rxjs": "~7.8.0",
    "tslib": "^2.3.0",
    "zone.js": "~0.13.0"
  }
Example: In this example, FormBuilder simplifies the process of creating and managing the form in Angular.
<!-- app.component.html -->

<div class="container">
  <h2>Angular FormBuilder Example</h2>
  <form [formGroup]="myForm" (ngSubmit)="onSubmit()" class="form-container">
    <div class="form-group">
      <label for="firstName">First Name:</label>
      <input
        type="text"
        id="firstName"
        formControlName="firstName"
        placeholder="Enter your first name"
      />
    </div>
    <div class="form-group">
      <label for="lastName">Last Name:</label>
      <input
        type="text"
        id="lastName"
        formControlName="lastName"
        placeholder="Enter your last name"
      />
    </div>
    <div class="form-group">
      <label for="email">Email:</label>
      <input
        type="email"
        id="email"
        formControlName="email"
        placeholder="Enter your email"
      />
    </div>
    <button type="submit" [disabled]="!myForm.valid" class="btn-submit">
      Submit
    </button>
  </form>
</div>
/* app.component.css */

.container {
    max-width: 400px;
    margin: 0 auto;
    padding: 20px;
    background-color: #f8f9fa;
    border-radius: 5px;
    box-shadow: 0 2px 4px rgba(0, 0, 0, 0.1);
}

h2 {
    text-align: center;
}

.form-container {
    margin-top: 20px;
}

.form-group {
    margin-bottom: 15px;
}

label {
    font-weight: bold;
}

input[type="text"],
input[type="email"] {
    width: 100%;
    padding: 10px;
    font-size: 16px;
    border: 1px solid #ced4da;
    border-radius: 5px;
}

button.btn-submit {
    display: block;
    width: 100%;
    padding: 10px;
    font-size: 16px;
    background-color: #007bff;
    color: #fff;
    border: none;
    border-radius: 5px;
    cursor: pointer;
}

button.btn-submit:hover {
    background-color: #0056b3;
}
// app.module.ts

import { NgModule } from '@angular/core';
import { BrowserModule } from '@angular/platform-browser';
import { FormsModule, ReactiveFormsModule } from '@angular/forms';
import { AppComponent } from './app.component';

@NgModule({
    declarations: [
        AppComponent
    ],
    imports: [
        BrowserModule,
        FormsModule,
        ReactiveFormsModule
    ],
    providers: [],
    bootstrap: [AppComponent]
})
export class AppModule { }
//app.component.ts

import { Component, OnInit } from "@angular/core";
import { FormBuilder, FormGroup } from "@angular/forms";

@Component({
    selector: "app-root",
    templateUrl: "./app.component.html",
    styleUrls: ["./app.component.css"],
})
export class AppComponent implements OnInit {
    myForm!: FormGroup;

    constructor(private fb: FormBuilder) { }

    ngOnInit() {
        this.myForm = this.fb.group({
            firstName: [""],
            lastName: [""],
            email: [""],
        });
    }

    onSubmit() {
        const formData = this.myForm.value;
        const message = `First Name: ${formData.firstName}
            \nLast Name: ${formData.lastName}\nEmail: ${formData.email}`;
        alert(message);
    }
}
Output: