Widget refers to the elements of the UI (User Interface) that help the user interact with the Android App. TextView is one of many such widgets which can be used to improve the UI of the app. TextView refers to the widget which displays some text on the screen based on the layout, size, colour, etc set for that particular TextView. It optionally allows us to modify or edit itself as well.
Class Syntax:
public class TextView
  extends View
  implements ViewTreeObserver.OnPreDrawListener
Class Hierarchy:
java.lang.Object
  ↳ android.view.View
     ↳ android.widget.TextView
Syntax:
<SomeLayout>
    .
    .
    <TextView>
        android:SomeAttribute1 = "Value of attribute1"
        android:SomeAttribute2 = "Value of attribute2"
        .
        .
        android:SomeAttributeN = "Value of attributeN"
    </TextView>
    .
    .
</SomeLayout>
Here the layout can be any layout like Relative, Linear, etc (Refer this article to learn more about layouts). And the attributes can be many among the table given below in this article.
Example:
<LinearLayout
xmlns:android="http://schemas.android.com/apk/res/android"
android:layout_width="match_parent"
android:layout_height="match_parent">
<TextView
android:id="@+id/text_view_id"
android:layout_height="wrap_content"
android:layout_width="wrap_content"
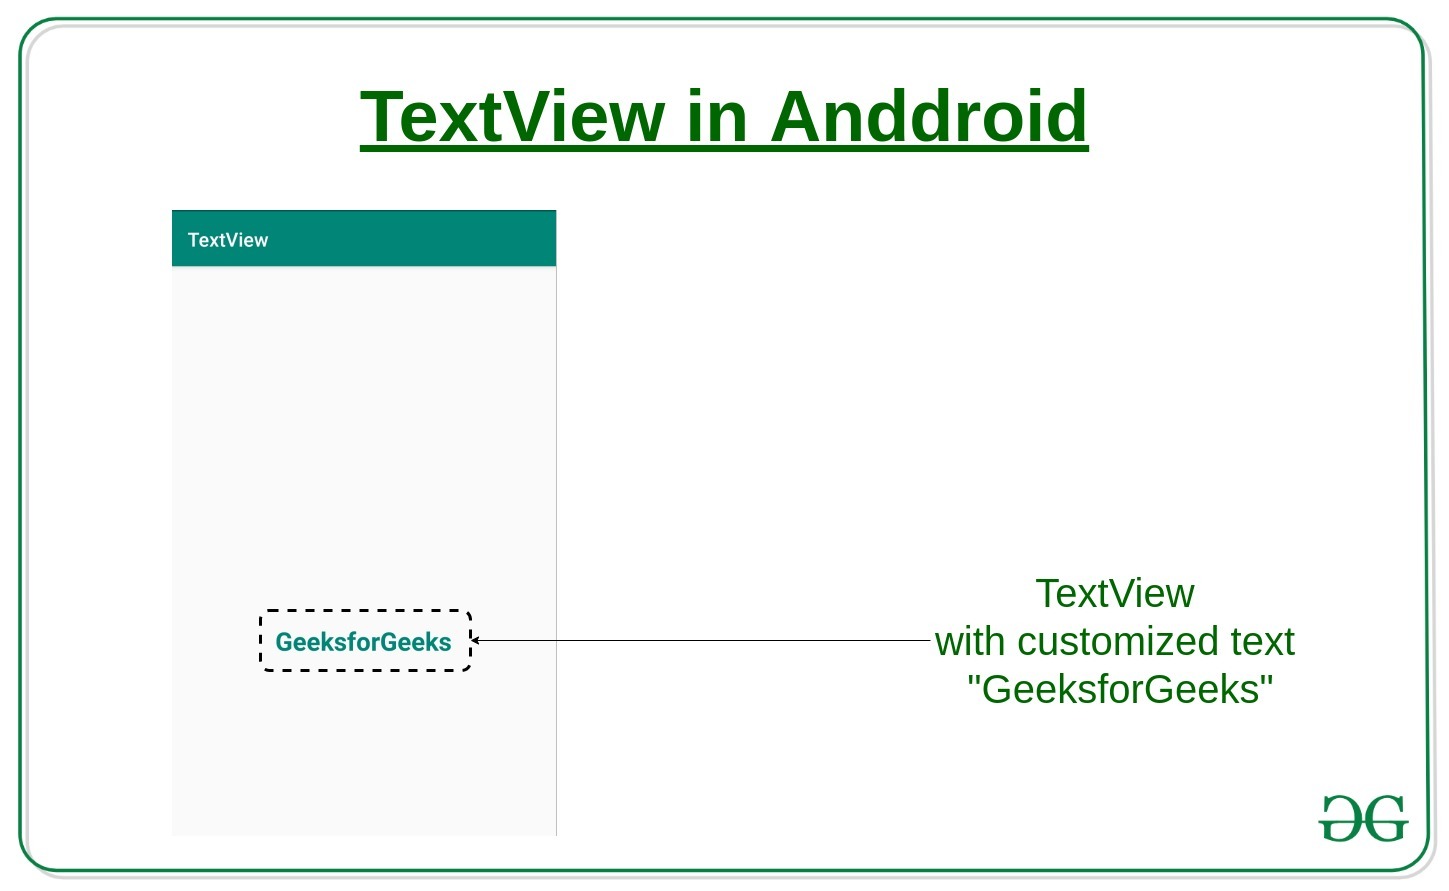
android:text="GeeksforGeeks" />
</LinearLayout>
XML Attributes of TextView in Android
| Attributes | Description |
|---|---|
| android:text | Sets text of the Textview |
| android:id | Gives a unique ID to the Textview |
| android:cursorVisible | Use this attribute to make cursor visible or invisible. Default value is visible. |
| android:drawableBottom | Sets images or other graphic assets to below of the Textview. |
| android:drawableEnd | Sets images or other graphic assets to end of Textview. |
| android:drawableLeft | Sets images or other graphic assets to left of Textview. |
| android:drawablePadding | Sets padding to the drawable(images or other graphic assets) in the Textview. |
| android:autoLink | This attribute is used to automatically detect url or emails and show it as clickable link. |
| android:autoText | Automatically correct spelling errors in text of the Textview. |
| android:capitalize | It automatically capitalize whatever the user types in the Textview. |
| android:drawableRight | Sets drawables to right of text in the Textview. |
| android:drawableStart | Sets drawables to start of text in the Textview. |
| android:drawableTop | Sets drawables to top of text in the Textview. |
| android:ellipsize | Use this attribute when you want text to be ellipsized if it is longer than the Textview width. |
| android:ems | Sets width of the Textview in ems. |
| android:gravity | We can align text of the Textview vertically or horizontally or both. |
| android:height | Use to set height of the Textview. |
| android:hint | Use to show hint when there is no text. |
| android:inputType | Use to set input type of the Textview. It can be Number, Password, Phone etc. |
| android:lines | Use to set height of the Textview by number of lines. |
| android:maxHeight | Sets maximum height of the Textview. |
| android:minHeight | Sets minimum height of the Textview. |
| android:maxLength | Sets maximum character length of the Textview. |
| android:maxLines | Sets maximum lines Textview can have. |
| android:minLines | Sets minimum lines Textview can have. |
| android:maxWidth | Sets maximum width Textview can have. |
| android:minWidth | Sets minimum lines Textview can have. |
| android:textAllCaps | Show all texts of the Textview in capital letters. |
| android:textColor | Sets color of the text. |
| android:textSize | Sets font size of the text. |
| android:textStyle | Sets style of the text. For example, bold, italic, bolditalic. |
| android:typeface | Sets typeface or font of the text. For example, normal, sans, serif etc |
| android:width | Sets width of the TextView. |
How to include a TextView in an Android App:
Step 1: First of all, create a new Android app, or take an existing app to edit it. In both the case, there must be an XML layout activity file and a Java class file linked to this activity.
Step 2: Open the Activity file and include a TextView in this file. The code for the TextView will be:
<TextView
      android:id="@+id/textview"
      android:layout_width="wrap_content"
      android:layout_height="wrap_content"
      android:text="Welcome To"
      android:textSize="26sp"
      android:textStyle="bold"
      android:textColor="@color/colorPrimary"
      app:layout_constraintBottom_toBottomOf="parent"
      app:layout_constraintLeft_toLeftOf="parent"
      app:layout_constraintRight_toRightOf="parent"
      app:layout_constraintTop_toTopOf="parent" />
Step 3: Now in the Java file, link this layout file with the below code:
@Override
protected void onCreate(Bundle savedInstanceState)
{
    super.onCreate(savedInstanceState);
    setContentView(R.layout.activity_main);
}
where activity_main is the name of the layout file to be attached.
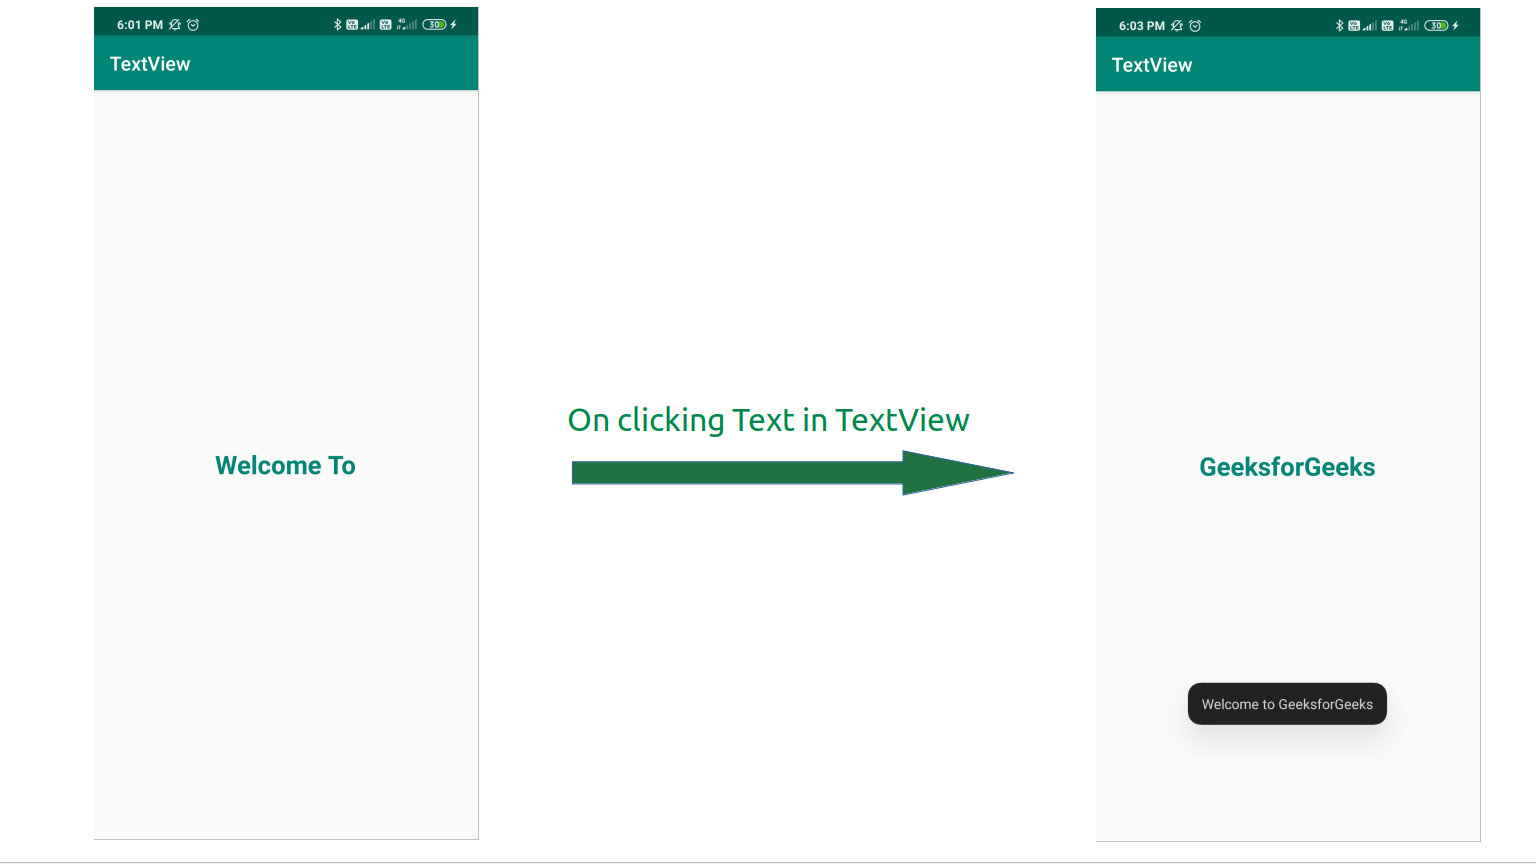
Step 4: In the Java file, we will try to change the Text displayed on the TextView upon touching along with a Toast message.
Step 5: The complete code of the layout file and the Java file is given below.
Below is the implementation of the above approach:
package com.project.textview;

import androidx.appcompat.app.AppCompatActivity;
import android.os.Bundle;
import android.view.View;
import android.widget.TextView;
import android.widget.Toast;

public class MainActivity extends AppCompatActivity {

    // Creating the instance of the TextView created
    private TextView textView;

    @Override
    protected void onCreate(Bundle savedInstanceState)
    {
        super.onCreate(savedInstanceState);

        // Linking the activity file to this Java file
        setContentView(R.layout.activity_main);

        // Get the TextView with the id
        // mentioned in the layout file
        textView = (TextView)findViewById(R.id.textview);

        // Try to change the text of the Textview upon touch
        // and also display a Toast message
        textView.setOnClickListener(new View.OnClickListener() {

            @Override
            public void onClick(View v)
            {

                // Changing text
                textView.setText("GeeksforGeeks");

                // Displaying Toast message
                Toast
                    .makeText(MainActivity.this,
                              "Welcome to GeeksforGeeks",
                              Toast.LENGTH_SHORT)
                    .show();
            }
        });
    }
}
<?xml version="1.0" encoding="utf-8"?>

<RelativeLayout
    xmlns:android="http://schemas.android.com/apk/res/android"
    xmlns:app="http://schemas.android.com/apk/res-auto"
    xmlns:tools="http://schemas.android.com/tools"
    android:layout_width="match_parent"
    android:layout_height="match_parent"
    tools:context=".MainActivity"
    android:gravity="center">

    <TextView
        android:id="@+id/textview"
        android:layout_width="wrap_content"
        android:layout_height="wrap_content"
        android:text="Welcome To"
        android:textSize="26sp"
        android:textStyle="bold"
        android:textColor="@color/colorPrimary"
        app:layout_constraintBottom_toBottomOf="parent"
        app:layout_constraintLeft_toLeftOf="parent"
        app:layout_constraintRight_toRightOf="parent"
        app:layout_constraintTop_toTopOf="parent" />

</RelativeLayout>
Output: