Styling is one of the most important parts of web development as it enhances the visual appearance of a website. In today's era visual presentation of content holds immense importance.
EJS, short for Embedded JavaScript offers a seamless integration of JavaScript functionality within HTML templates. While EJS is very good in dynamic content generation it falls apart in styling. So, here CSS (Cascading Style Sheets), steps in. In this article, we will be learning how to add CSS in EJS to improve the visual presentation of a website.
We will discuss the approach of .css file to EJS:
Table of Content
Inline CSS: using <style> tag within the EJS template
In this approach, we embed CSS directly into the EJS template using the <style> tag. This approach provides simplicity but it is not recommended for large projects as adding CSS into the EJS template could make it more complex instead of simplifying.
<style>
  /* CSS styles here */
</style>
External CSS: Linking an external .css file
Linking a external CSS file to EJS is the best approach as it reduce complexity of code and increase reusability of code.
<link rel="stylesheet" type="text/css" href="styles.css">
Steps to Create a NodeJS App and Installing Module:
Step 1: First of all you need to create the new directory for your project. You can do it by using 'cd' command in your terminal
cd project_nameStep 2: Now, initialize your project through 'npm init'.
npm init -yStep 3: Now, to use EJS you need to install EJS package. You can do it bu using 'npm install ejs' command in your terminal and also install `express` through `npm install express`.
npm install ejs expressStep 4: Now, the final step is to crete an EJS template file like index.ejs and in CSS file like style.css.
Project structure:

Updated dependencies in package.json:
"dependencies": {
    "ejs": "^3.1.9",
    "express": "^4.19.2"
  }
Example: Below is an example of .file to ejs.
const express = require('express');
const app = express();

// Set EJS as the view engine
app.set('view engine', 'ejs');

// Serve static files from the 'public' directory
app.use(express.static('public'));

// Define a route to render the index.ejs file
app.get('/', (req, res) => {
  res.render('index');
});

// Start the server
const PORT = process.env.PORT || 3000;
app.listen(PORT, () => {
  console.log(`Server is running on port ${PORT}`);
});
<!DOCTYPE html>
<html lang="en">
<head>
<meta charset="UTF-8">
<meta name="viewport" content="width=device-width, initial-scale=1.0">
<title>GeeksForGeeks EJS Template</title>
<link rel="stylesheet" type="text/css" href="/style.css">
</head>
<body>
<header class="header">
<h1>Welcome to GeeksForGeeks</h1>
</header>
<main class="main-content">
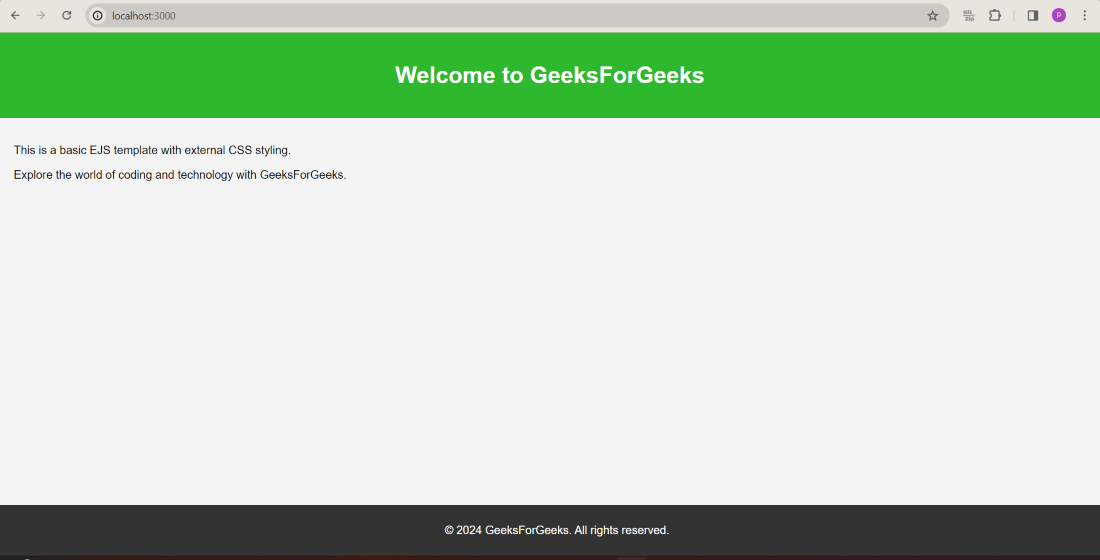
<p>This is a basic EJS template with external CSS styling.</p>
<p>Explore the world of coding and technology with GeeksForGeeks.</p>
</main>
<footer class="footer">
<p>© 2024 GeeksForGeeks. All rights reserved.</p>
</footer>
</body>
</html>
/* External CSS Styles for GeeksForGeeks EJS Template */

body {
    font-family: Arial, sans-serif;
    background-color: #f4f4f4;
    margin: 0;
    padding: 0;
  }

  .header {
    background-color: #2eb82e;
    color: #fff;
    text-align: center;
    padding: 20px;
  }

  .main-content {
    padding: 20px;
  }

  .footer {
    background-color: #333;
    color: #fff;
    text-align: center;
    padding: 10px;
    position: fixed;
    bottom: 0;
    width: 100%;
  }
Output:

Output