ReactJS, often referred to as React, is a popular JavaScript library developed by Facebook for building user interfaces. It emphasizes a component-based architecture, where UIs are built using reusable components. React uses a declarative syntax to describe how UIs should look based on their state, simplifying development and enhancing code readability.
React also utilizes a virtual DOM to optimize rendering performance by minimizing actual DOM manipulations. React's unidirectional data flow and rich ecosystem of libraries and tools have made it a go-to choice for frontend development, especially in building single-page applications (SPAs).
Table of Content
- Why ReactJS ?
- Setting Up Your Development Environment
- Understanding React Components
- Creating Your First React Component
- JSX (JavaScript XML)
- Working with Props and State
- Handling Events:
- Conditional Rendering
- Lists and Keys
- Styling React Components
- Introduction to React Hooks
- Building a Simple React Application
- Component Lifecycle
- React Router
- Managing State with Context API
Why ReactJS ?
ReactJS, commonly known as React, is a JavaScript library developed by Facebook for building robust user interfaces. Here's why React has become immensely popular among developers:
- Component-Based Architecture: React emphasizes reusable components, making it easy to build modular UI elements that can be reused across the application.
- Declarative Syntax: React's approach focuses on describing how the UI should look based on its current state, leading to efficient updates and clear code readability.
- Virtual DOM: React uses a virtual DOM, an in-memory representation of the actual DOM, for efficient updates and minimal DOM manipulations, resulting in better performance.
- Unidirectional Data Flow: React follows a one-way data flow, ensuring that data flows down the component hierarchy via props. Any changes trigger re-renders, maintaining a predictable data flow pattern.
- Rich Ecosystem: React boasts a diverse ecosystem with numerous libraries, tools, and community contributions. This wealth of resources empowers developers to extend their applications with ease and add new features seamlessly.
Setting Up Your Development Environment:
- Node.js Installation: Ensure Node.js is installed on your system as it includes npm (Node Package Manager), which we'll use to manage dependencies.
- Create React App: Use Create React App to set up a new React project quickly. Run
npx create-react-app my-appin your terminal to create a new React application namedmy-app.
npx create-react-app my-react-app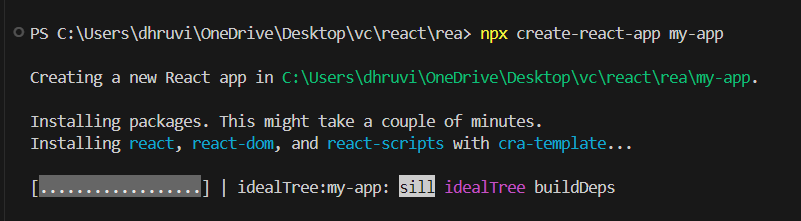
Step 2: Once the project is created, navigate to your project directory:
cd my-react-appStep 3: Start the development server to see your React application in action:
npm start
Understanding React Components
- Functional Components: These are simple functions that return JSX (JavaScript XML) to describe the UI.
- Class Components: Traditional React components defined using ES6 classes. They have additional features like lifecycle methods.
Creating Your First React Component:
In React, components are the building blocks of UIs. You can create a new component by defining a JavaScript function or class. Here's an example of a simple functional component in React:
import React from 'react';

const MyComponent = () => {
  return <div>Hello, React!</div>;
};

export default MyComponent;
JSX (JavaScript XML)
JSX allows you to write HTML-like code within JavaScript. It's a syntax extension that makes React's component structure more readable and expressive.
const element = <h1>Hello, JSX!</h1>;Working with Props and State:
Props (short for properties) and state are two fundamental concepts in React. Props are used to pass data from parent to child components, while state is used to manage component-specific data. Here's an example of how to use props and state in a React component.
countis a state managed by theuseStatehook.- There are no props being used in this component; it is a simple stateful functional component using React hooks to manage local state (
count).
Example: This example shows the use of props and state.
import React, { useState } from 'react';

function Counter() {
  const [count, setCount] = useState(0);

  return (
    <div>
      <p>Count: {count}</p>
      <button onClick={() => setCount(count + 1)}>Increment</button>
    </div>
  );
}

export default Counter;
Handling Events:
In React, you can handle user events like clicks and input changes using event handlers. Event handlers are functions that are called when a specific event occurs.
This code snippet demonstrates event handling in React using an 'onClick' attribute that references the 'handleClick' function, triggering an alert when the button is clicked.
Example: This example shows the use of handling events.
import React from 'react';

function Button() {
  function handleClick() {
    alert('Button clicked!');
  }

  return <button onClick={handleClick}>Click Me</button>;
}

export default Button;
Conditional Rendering:
React allows you to conditionally render components based on certain conditions. You can use JavaScript's conditional operators like if statements and ternary operators to conditionally render components.
The code uses conditional rendering in React to display "Welcome back!" if the user is logged in (true), and "Please log in." if the user is not logged in (false).
Example: This example shows the use of conditional rendering.
import React from 'react';

function Greeting({ isLoggedIn }) {
  return isLoggedIn ? <h1>Welcome back!</h1> : <h1>Please log in.</h1>;
}

export default Greeting;
Lists and Keys:
When rendering lists of items in React, each item should have a unique key prop to help React identify which items have changed, added, or removed. Keys should be stable, predictable, and unique among siblings.
The 'key' attribute is used on each '<li>' element to uniquely identify and optimize rendering when working with lists in React.
Example: This example shows the use of lists and keys.
import React from 'react';

function TodoList({ todos }) {
  return (
    <ul>
      {todos.map(todo => (
        <li key={todo.id}>{todo.text}</li>
      ))}
    </ul>
  );
}

export default TodoList;
Styling React Components:
React allows you to style components using CSS, inline styles, or CSS-in-JS libraries like styled-components. You can use the style prop to apply inline styles to components. Here's an example of styling a component with inline styles.
Example: This example shows the styling the react component.
import React from 'react';

function StyledComponent() {
  const styles = {
    backgroundColor: 'lightblue',
    padding: '10px',
    borderRadius: '5px'
  };

  return <div style={styles}>Styled Component</div>;
}

export default StyledComponent;
Introduction to React Hooks:
React Hooks are functions that allow functional components to use state and other React features without writing a class. They were introduced in React 16.8 to address common issues with class components, such as managing state and lifecycle methods.
- useState: Manages state in functional components, allowing them to have stateful behavior.
- useEffect: Performs side effects in functional components, such as data fetching or DOM manipulation, after rendering.
- useContext: Accesses context values in functional components, providing a way to share data across the component tree.
- useReducer: Alternative to useState, especially useful for managing complex state logic in functional components.
- useCallback: Memoizes callback functions, optimizing performance by preventing unnecessary re-renders in child components.
- useMemo: Memoizes computed values, improving performance by caching expensive calculations.
- useRef: Creates a mutable ref object, useful for accessing and managing references to DOM elements or other values across renders.
- useLayoutEffect: Similar to useEffect but runs synchronously after all DOM mutations, ideal for tasks requiring precise DOM measurements or manipulations.
Example: Here's an example of using the useState hook in a functional component:
import React, { useState } from 'react';

function Counter() {
  const [count, setCount] = useState(0);

  return (
    <div>
      <p>Count: {count}</p>
      <button onClick={() => setCount(count + 1)}>Increment</button>
    </div>
  );
}

export default Counter;
Building a Simple React Application:
Now that you have a basic understanding of React, it's time to build a simple React application. You can start by creating a project structure, defining components, managing state, and adding interactivity to your application. Here's a simple example of a React application:
/* index.css */

body {
    display: flex;
    justify-content: center;
    align-items: center;
}

button {
    margin: 10px;
}

p,
h2 {
    text-align: center;
}
import React, { useState } from 'react';

const Counter = () => {
  // State to hold the count value
  const [count, setCount] = useState(0);

  // Function to increment the count
  const incrementCount = () => {
    setCount(count + 1);
  };

  // Function to decrement the count
  const decrementCount = () => {
    setCount(count - 1);
  };

  return (
    <div>
      <h2>Counter</h2>
      <p>{count}</p>
      <button onClick={incrementCount}>
        Increment
      </button>
      <button onClick={decrementCount}>
        Decrement
      </button>
    </div>
  );
};

export default Counter;
Output:

Component Lifecycle:
- Mounting Phase:
- constructor( ): Initializes state and binds event handlers.
- render( ): Renders the component's UI based on initial state/props.
- componentDidMount( ): Executes after component insertion, ideal for initial setup and data fetching.
- Updating Phase:
- shouldComponentUpdate( ): Determines if the component should re-render.
- render( ): Updates the UI based on state/props changes.
- componentDidUpdate( ): Executes after component updates, useful for side effects based on new data.
- Unmounting Phase:
- componentWillUnmount( ): Executes just before component removal, used for cleanup tasks to prevent memory leaks.
Example: This example shows the use of all component lifecycle methods in one code example.
import React, { Component } from 'react';

class LifecycleExample extends Component {
    constructor(props) {
        super(props);
        this.state = { count: 0 };
        console.log('Constructor called');
    }

    componentDidMount() {
        console.log('Component did mount');
    }

    componentDidUpdate() {
        console.log('Component did update');
    }

    componentWillUnmount() {
        console.log('Component will unmount');
    }

    handleIncrement = () => {
        this.setState(
            (prevState) => ({ count: prevState.count + 1 }));
    };

    render() {
        console.log('Render method called');
        return (
            <div>
                <h1>Lifecycle Example</h1>
                <p>Count: {this.state.count}</p>
                <button onClick={this.handleIncrement}>
                    Increment
                </button>
            </div>
        );
    }
}

export default LifecycleExample;
Output:
React Router:
React Router is a library that enables routing in React applications, allowing you to define routes and navigate between different views or pages within a single-page application (SPA). You can install React Router using npm or yarn:
npm install react-router-dom
# or
yarn add react-router-dom
Note: React Router provides components like BrowserRouter, Route, and Link for setting up routing in your application.
- Router: The
<Router>component from React Router v6 (imported asBrowserRouterhere) wraps the entire application, providing the routing functionality. - Link: The
<Link>component is used for navigation. It renders as an anchor tag (<a>) and changes the URL without causing a full page reload, providing a seamless navigation experience. - Routes and Route: In React Router v6, we use
<Routes>and<Route>components to define routes. Each<Route>component within<Routes>specifies a path and the corresponding component to render when that path matches. Theelementprop is used to specify the component to render.
import {
    BrowserRouter as Router,
    Routes, Route, Link
} from 'react-router-dom';

const Home = () => <h1>Home Page</h1>;
const About = () => <h1>About Page</h1>;

const App = () => (
    <Router>
        <nav>
            <Link to="/">Home</Link>
            <Link to="/about">About</Link>
        </nav>
        <Routes>
            <Route path="/" element={<Home />} />
            <Route path="/about" element={<About />} />
        </Routes>
    </Router>
);

export default App;
Output:
Managing State with Context API:
The Context API in React provides a way to share state across the component tree without having to pass props manually at every level. It's particularly useful for managing global state, such as user authentication, theme preferences, or language settings.
- createContext: The
createContextfunction from React allows you to create a new context object. This context object consists of a Provider and a Consumer. - Provider: The Provider component is used to wrap the part of your component tree where you want to share the context. It accepts a value prop that provides the data to be shared.
- Consumer: The Consumer component is used within child components to access the data provided by the context. It uses a render prop pattern or the useContext hook to consume the context's value.
import React, {
    createContext,
    useState
} from 'react';

// Create a context with initial state
const MyContext = createContext({
    data: null,
    updateData: () => { },
});

const MyProvider = ({ children }) => {
    const [data, setData] = useState(null);

    const updateData = newData => {
        setData(newData);
    };

    return (
        <MyContext.Provider value={{ data, updateData }}>
            {children}
        </MyContext.Provider>
    );
};

export { MyContext, MyProvider };