The Spring Boot is a powerful layer of abstraction placed on the Spring platform. It makes developing standalone and production-ready web applications easy. Spring Boot provides a few starter dependencies for handling the application. In this article, we discuss configuring a Tomcat Connection Pool in Spring Boot. We can use any database for this purpose. Here, we use MongoDB for configuring a Tomcat Connection Pool in Spring Boot with the help of the MongoClientSettings bean. The MongoClientSettings object is used to control the MongoClient by providing MongoDB configuration details.
The Tomcat Connection Pool in Spring Boot is a robust and high-performance database connection pool implemented based on the Apache Tomcat Project. It is used for managing database connections, allowing us to avoid creating a new database connection for every database operation in the software application. Instead, it reuses the connection from the pool. In Spring Boot, we configure the Tomcat Connection Pool through the application.properties file located in the project resource folder.
Key Terminologies:
- Connection Pool: A collection of database connections maintained and reused to reduce the overhead with creating new connections.
- Connection Leaks: When connections are not properly closed and returned to the pool leading to resource depletion.
- Connection Timeout: The Time after which idle connections are closed.
- Max Connections: The Maximum number of connection in the Pool which controllers the maximum number of concurrent database operations.
Prerequisites:
To understand this article, You should know below listed topics
- Spring Boot framework
- Apache Tomcat
- Database
- Connection Pooling
- MongoClient and MongoClientSettings
- Spring starter dependencies management
Steps to Implement Configuring a Tomcat Connection Pool in Spring Boot
Now, we create a Spring Starter project with MongoDB Starter dependency for connection pooling with the Apache Tomcat Server. When creating this project, the Apache Tomcat is built-in and managed by the Spring Boot Framework. By following the steps below, we can successfully configure a Tomcat Connection Pool in Spring Boot.
Step 1:
Create the spring project using spring initializer on creating the project add the below dependencies into the project.
Dependencies:
- Spring Web
- MongoDB
- DevTools
dependencies {
    implementation 'org.springframework.boot:spring-boot-starter-data-mongodb'
    implementation 'org.springframework.boot:spring-boot-starter-web'
    developmentOnly 'org.springframework.boot:spring-boot-devtools'
    testImplementation 'org.springframework.boot:spring-boot-starter-test'
}
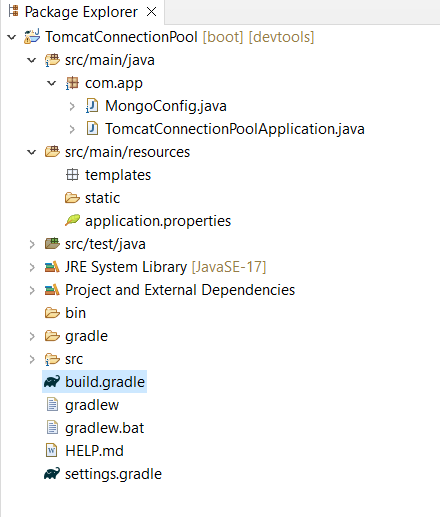
Once Create the spring project then the file structure looks like the below image.
Step 2:
Now, we create a class in the main package of the project. After this, we use the @Configuration Spring annotation to make this a configuration class. Now, we write the code for MongoClient Configuration using the MongoClientSettings bean. This configuration class manages database connections while performing database operations.
package com.app;

import com.mongodb.ConnectionString;
import com.mongodb.MongoClientSettings;
import com.mongodb.client.MongoClient;
import com.mongodb.client.MongoClients;
import org.springframework.context.annotation.Bean;
import org.springframework.context.annotation.Configuration;

@Configuration
public class MongoConfig {

    @Bean
    public MongoClientSettings mongoClientSettings() {
        ConnectionString connectionString = new ConnectionString("mongodb://localhost:27017/exampledb");
        return MongoClientSettings.builder()
                .applyConnectionString(connectionString)
                .build();
    }

    @Bean
    public MongoClient mongoClient() {
        return MongoClients.create(mongoClientSettings());
    }
}
Step 3:
Now, let's open the application.properties file from the resource folder in the project. Then, we'll write the following code to configure a Tomcat Connection Pool in Spring Boot using properties file.
spring.application.name=TomcatConnectionPool

# MongoDB connection details
spring.data.mongodb.uri=mongodb://localhost:27017/work


# Connection pool settings
spring.data.mongodb.connection-per-host=100
spring.data.mongodb.min-connections-per-host=10
spring.data.mongodb.max-wait-time=120000
spring.data.mongodb.connect-timeout=10000
spring.data.mongodb.socket-timeout=10000
This properties file contains information about the minimum and maximum number of connections, connection timeout, socket timeout, and maximum waiting time. More properties can be defined based on our project requirements.
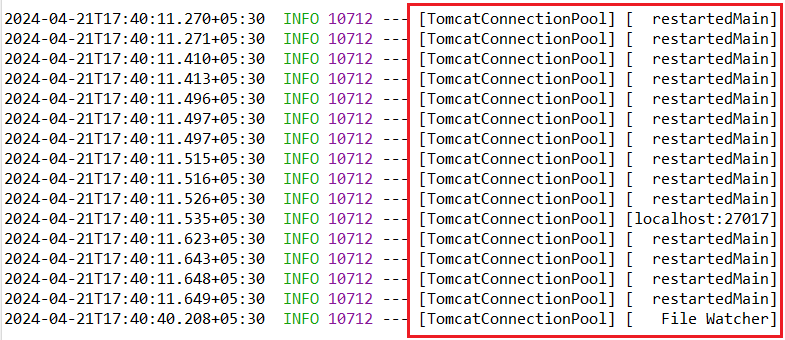
Step 4:
Now, let's run this project as a Spring Boot application. By default, the project runs on port number 8080 with the Apache Tomcat server. Below, an image is provided where we can observe the connection pool.