The Spring Boot framework provides a lot of features for testing our applications. Here, we have a tool called JUnit, which is used to test software applications. We can override default Spring Boot properties in JUnit tests, allowing us to customize the behavior of the Spring Boot Application for specific test cases. This is useful when we want to change configurations like database connections, ports, and other application-specific properties without affecting the main application. Before diving into this, we should know about JUnit testing within the Spring framework. In this article, we will explain overriding default Spring Boot properties in JUnit tests with related examples and explanations.
JUnit
JUnit is an open-source testing tool framework for Java applications. It provides tools and methodologies for writing test cases in our application. It allows developers to validate the correctness of their code, and JUnit plays an important role in promoting test-driven development and automatic testing in the Java ecosystem.
Benefits of JUnit:
- Automated Testing
- Early Bug Detection
- Improved Code Quality
- Support for Test-Driven Development
- Community Support
- Integration with Build Tools
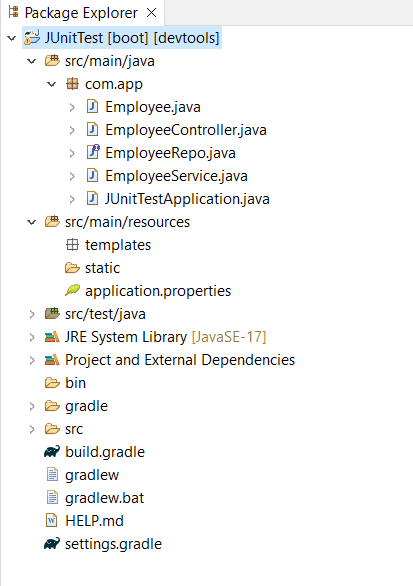
Project Folder:
After creating the project, the folder structure will look like below:
Steps To Override default Spring Boot properties in JUnit Test
Here, we create a simple Spring application for adding new details of an employee and deleting an employee by ID. After completing the APIs, we design test cases for those two APIs, and we override the default values in JUnit. While testing the application, we override the database properties, as you can observe in the following testing code.
Step 1:
We create a Spring Starter project with the required dependencies using Spring Starter Initializr. The Spring application execution starts from the main function in the project.
package com.app;

import org.springframework.boot.SpringApplication;
import org.springframework.boot.autoconfigure.SpringBootApplication;

@SpringBootApplication
public class JUnitTestApplication {

    public static void main(String[] args) {
        SpringApplication.run(JUnitTestApplication.class, args);
    }

}
Then, we add the dependencies listed below to our project.
Dependencies:
dependencies {
    implementation 'org.springframework.boot:spring-boot-starter-data-mongodb'
    implementation 'org.springframework.boot:spring-boot-starter-web'
    compileOnly 'org.projectlombok:lombok'
    developmentOnly 'org.springframework.boot:spring-boot-devtools'
    annotationProcessor 'org.projectlombok:lombok'
    testImplementation 'org.springframework.boot:spring-boot-starter-test'
}
Step 2:
Now, let's create a Domain or POJO class in the project package. This class will handle employee data during database operations. Here, we'll utilize the Lombok dependency to manage setters and getters in the domain class.
package com.app;

import org.springframework.data.mongodb.core.mapping.Document;

import lombok.AllArgsConstructor;
import lombok.Data;
import lombok.NoArgsConstructor;

@Data
@AllArgsConstructor
@NoArgsConstructor
@Document(collection = "employee")
public class Employee {
    private String id;
    private String employeeName;
    private Integer age;
}
Step 3:
After that, we create a MongoRepository interface by using the @Repository annotation. It takes input arguments as the domain name and its ID data type. Here, we create the EmployeeRepo interface to perform database-related operations.
package com.app;

import org.springframework.data.mongodb.repository.MongoRepository;
import org.springframework.data.mongodb.repository.config.EnableMongoRepositories;
import org.springframework.stereotype.Repository;

@Repository
@EnableMongoRepositories
public interface EmployeeRepo extends MongoRepository<Employee, String> {

}
Step 4:
Now, let's create a Service class using the @Service annotation where we'll write our business logic. Here, we will develop logic to add new employee details and delete an employee by their ID.
package com.app;

import org.springframework.beans.factory.annotation.Autowired;
import org.springframework.stereotype.Service;

@Service
public class EmployeeService {

    @Autowired
    private EmployeeRepo employeeRepo;

    // Save a new employee
    public Employee saveEmployee(Employee employee) {
        return employeeRepo.save(employee);
    }

    // Delete an employee by ID
    public void deleteEmployeeById(String id) {
        employeeRepo.deleteById(id);
    }
}
Step 5:
We will create a RestController class named EmployeeController with the help of the @RestController annotation. We will create two API endpoints, one for saving and another for deleting by ID, as you can observe in the code below.
package com.app;

import org.springframework.beans.factory.annotation.Autowired;
import org.springframework.http.HttpStatus;
import org.springframework.http.ResponseEntity;
import org.springframework.web.bind.annotation.PostMapping;
import org.springframework.web.bind.annotation.RequestBody;
import org.springframework.web.bind.annotation.RequestMapping;
import org.springframework.web.bind.annotation.RestController;

@RestController
@RequestMapping("/emp")
public class EmployeeController {

    @Autowired
    private EmployeeService employeeService;

    @Autowired
    private EmployeeRepo employeeRepo;

    @PostMapping("/save")
    public ResponseEntity<Employee> saveEmployee(@RequestBody Employee employee) {
        Employee savedEmployee = employeeService.saveEmployee(employee);
        return new ResponseEntity<>(savedEmployee, HttpStatus.OK);
    }

    @PostMapping("/delete")
    public ResponseEntity<String> deleteEmployee(@RequestBody String id) {
        boolean exists = employeeRepo.findById(id).isPresent();

        if (!exists) {
            return new ResponseEntity<>("Employee not found", HttpStatus.NOT_FOUND);
        }
        employeeRepo.deleteById(id);
        return new ResponseEntity<>("Employee deleted successfully", HttpStatus.OK);
    }
}
Step 6:
Once the required logic is developed, we create test cases using the JUnit framework in the Test class. Then, we override the required properties. We override the database property in the testing code, as you can observe in the code below.
package com.app;

import static org.junit.jupiter.api.Assertions.assertEquals;
import static org.junit.jupiter.api.Assertions.assertFalse;
import static org.junit.jupiter.api.Assertions.assertNotNull;

import org.junit.jupiter.api.Test;
import org.springframework.beans.factory.annotation.Autowired;
import org.springframework.boot.test.context.SpringBootTest;
import org.springframework.test.context.TestPropertySource;

@SpringBootTest
@TestPropertySource(properties = { "spring.data.mongodb.host=localhost", "spring.data.mongodb.port=27017", "spring.data.mongodb.database=testdb"})
class JUnitTestApplicationTests {

    @Autowired
    private EmployeeService employeeService;

    @Autowired
    private EmployeeRepo employeeRepo;
    @Test
    void contextLoads() {
        Employee employee = new Employee(null, "Sweta", 24);
        Employee savedEmployee = employeeService.saveEmployee(employee);
        assertNotNull(savedEmployee.getId());
        assertEquals("Sweta", savedEmployee.getEmployeeName());
    }

    @Test
    void testDeleteEmployeeById() {
        Employee employee = new Employee(null, "Sweta", 22);
        Employee savedEmployee = employeeService.saveEmployee(employee);
        String employeeId = savedEmployee.getId();
        employeeService.deleteEmployeeById(employeeId);
        boolean exists = employeeRepo.findById(employeeId).isPresent();
        assertFalse(exists, "After deletion, employee should not exist");
    }
}
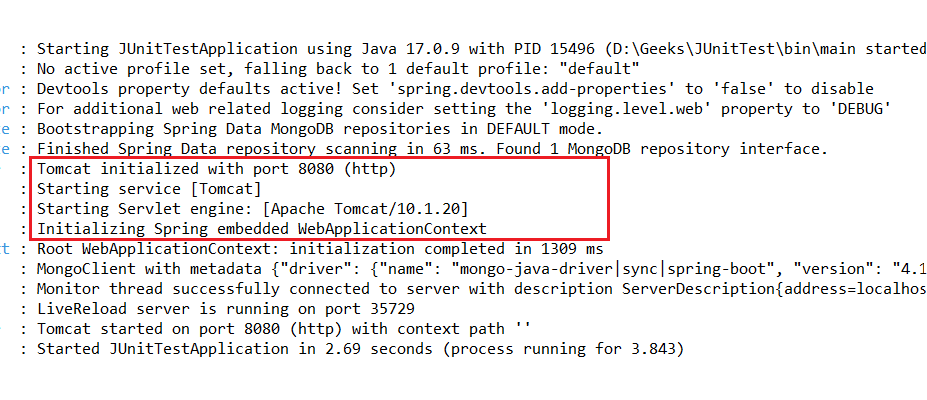
Step 7:
Now let's run this project as a Spring Boot App. The default port is 8080, and we'll be using the Apache Tomcat Server.
Step 8:
Now, let's test these API endpoints. We'll utilize the Postman tool for testing the save and delete by ID API endpoints. Below, we'll provide the images depicting the output obtained during testing in the Postman tool.
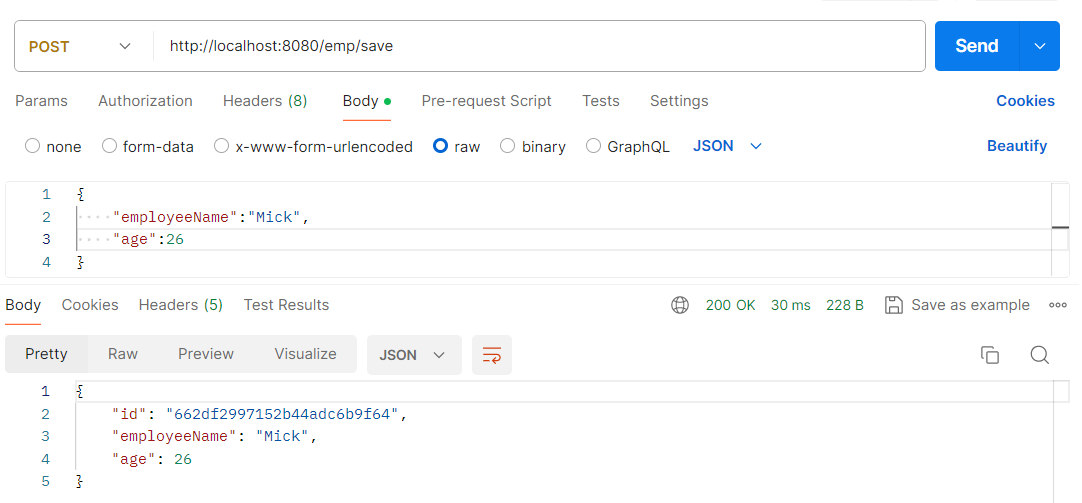
Save API:
Below we have tested the API in Postman tool to save employee.
Delete API:
Below we have tested the API in Postman tool for delete employee.

Step 9:
Now we run the override test cases. After running those test cases, we obtained the image below as output on the screen.
