In this article we will learn about test suites and how can we build them using Java and TestNG. TestNG is a modern testing framework that is used very widely used today. It has a broad base of features that allow us to write unit tests and club them together in groups.
Table of Content
TestNG is used in combination with Selenium to implement browser automation and therefore used for regression testing. By the end of this article, you will be successfully creating and running your own test suites.
What is a Test Suite?
A test suite is a collection of test cases. There are various ways to create test these. You could either choose to group these tests by functionality or you could simply club your test classes together to form a test suite. In TestNG, the test suite is written in the form of a xml document. This allows you as a tester to have a fine grained control over what tests you want to run and create groups or suites according to the very specific requirements of your project.
Steps to Create Test Suite in TestNG
Step 1. Setting Up TestNG Environment
TestNG does not require any special kind of setup incase of IntelliJ Idea, both enterprise and community edition. Incase you choose to follow this tutorial on eclipse IDE, then you need to setup the TestNG environment before you can start using it in your application. To learn how to install and configure the plugin in the Eclipse IDE, please visit this page.
To Create a new TestNG project regardless of the IDE you choose to use, simply - Create a new Maven project and add the TestNG dependencies to it. Maven automatically provides us with a default project structure with a separate place to our unit tests in.
Step 2. Create a new Maven Project
To learn how to create a new maven project, visit this page.
Step 3. Add The following Dependencies to Your pom.xml file
    <dependencies>
        <dependency>
            <groupId>org.seleniumhq.selenium</groupId>
            <artifactId>selenium-java</artifactId>
            <version>4.18.1</version>
        </dependency>
        <dependency>
            <groupId>org.seleniumhq.selenium</groupId>
            <artifactId>selenium-server</artifactId>
            <version>4.0.0-alpha-2</version>
        </dependency>
        <dependency>
            <groupId>org.testng</groupId>
            <artifactId>testng</artifactId>
            <version>7.9.0</version>
        </dependency>
        <dependency>
            <groupId>org.hamcrest</groupId>
            <artifactId>hamcrest-core</artifactId>
            <version>2.2</version>
        </dependency>
    </dependencies>
Step 4. Creating Test Classes
Explanation of test classes in TestNG:
- Knowledge of TestNG is a basic pre-requisite of this tutorial. Please read this article for some background knowledge. Basically what we do is that we create our tests under the test directory that Maven created for us. Go to test > java > inverse domain name folder > package > classes.
- Inverse Domain name means that suppose we have a domain name called geeksforgeeks.org. The inverse domain name of this would be org.geeksforgeeks. This is essential for TestNG to be able to locate your test classes.
- Inside the folder with the inverse domain name that we have created, we can have as many packages we need. These test packages can be based on features or they may be based upon the different types of tests. This depends upon the specific needs of the project that you are working on and may be different for different companies.
- And lastly, inside these test packages, we can write our test classes. These test classes allow us to write unit tests inside them. We can have as many test classes we need and as many tests inside them as we want.
Step 5. For this tutorial, we will create two test classes called TestClassA and TestClassB inside the java folder in the test directory.
TestClassA
public class TestClassA {


}
TestClassB
public class TestClassB {

}
Leave these classes as they are for now, we will right tests in them in the next section.
Step 6. Writing simple test methods with @Test annotation
- Annotations like @Test in TestNG allow us to run our tests independently of the main class in Java. It reduces the need to write boilerplate code.
- The @Test annotation is used to mark the unit tests in TestNG. They tell the TestNG environment that the following method is a unit test. Now we will add unit test to the classes we created earlier.
Step 7. Open the test classes you created earlier and add the unit tests to it.
TestClassA
import org.openqa.selenium.By;
import org.openqa.selenium.WebDriver;
import org.openqa.selenium.WebElement;
import org.openqa.selenium.chrome.ChromeDriver;
import org.testng.annotations.AfterClass;
import org.testng.annotations.BeforeClass;
import org.testng.annotations.Test;

import java.time.Duration;

public class TestClassA {
    private WebDriver driver;
    private WebElement searchBar;
    String searchBarXpath="//*[@id=\"RA-root\"]/div/div[1]/div[1]/div[2]/span/span/span[1]/input";
    String searchButtonXpath="//*[@id=\"RA-root\"]/div/div[1]/div[1]/div[2]/span/span/span[2]/button";

    @BeforeClass
    public void setUp() {
        driver=new ChromeDriver();
        driver.get("https://www.geeksforgeeks.org/");
        driver.manage().timeouts().implicitlyWait(Duration.ofSeconds(3));
        searchBar=driver.findElement(By.xpath(searchBarXpath));
    }

    @Test(groups = {"page-search"})
    public void testWebPageSearch() {
        searchBar.sendKeys("TestNG and Selenium");
        driver.findElement(By.xpath(searchButtonXpath)).click();
    }

    @AfterClass
    public void tearDown() {
        driver.quit();
    }
}
TestClassB
import org.openqa.selenium.By;
import org.openqa.selenium.Keys;
import org.openqa.selenium.WebDriver;
import org.openqa.selenium.WebElement;
import org.openqa.selenium.chrome.ChromeDriver;
import org.testng.annotations.AfterClass;
import org.testng.annotations.BeforeClass;
import org.testng.annotations.Test;

import java.time.Duration;

public class TestClassB {
    private WebDriver driver;
    private WebElement searchIcon;
    private WebElement searchBar;
    String navSearchIconXpath="//*[@id=\"gcse-form\"]/button/i";
    String navSearchBarXpath="//*[@id=\"gcse-search-input\"]";

    @BeforeClass
    public void setUp() {
        driver=new ChromeDriver();
        driver.get("https://www.geeksforgeeks.org/");
        driver.manage().timeouts().implicitlyWait(Duration.ofSeconds(3));
        searchIcon= driver.findElement(By.xpath(navSearchIconXpath));
        searchIcon.click();
    }

    @Test(groups = {"nav-search"})
    public void testNavBarSearch() {
        searchBar=driver.findElement(By.xpath(navSearchBarXpath));
        searchBar.sendKeys("TestNG and Selenium");
        searchBar.sendKeys(Keys.ENTER);
    }

    @AfterClass
    public void tearDown() {
        driver.quit();
    }
}
Our Test Classes and unit tests are complete as of now. We will now proceed to organizing packages.
Step 8. Organizing test classes into packages
Create a folder with the inverse domain as com.geeksforgeeks.browsertests. Move the test classes you created earlier inside this folder. This allows the test classes to be detected automatically by the testng environment. The final organization of files should match the following:

This completes the part concerning the test classes and unit tests for this tutorial. Now, we see how we can create test suites.
Understanding TestNG XML Configuration
Introduction to TestNG XML configuration file
The testNG XML configuration is defined in the file called as testng.xml in the root directory of your project. It defines how your tests should be run and allows you to have fine-grained control of the unit testing processes. The name should not be modified otherwise you will not be able to run your tests. Instead of running your tests one class at a time, this file allows you to run all your tests inside all your test classes at once.
Structure of TestNG XML file (test suite, test, classes, methods)
The elements that are added to the file in the form of xml tags have a pre-defined hierarchy that should not be altered. The main elements we use in this file are: suite, test, classes, include and exclude tags.
A typical structure of testng.xml file is as follows:
<suite name="RegressionSuite">
  <test name="Functionality Test">
    <classes>
      <class name="com.example.tests.LoginTest"/>
      <class name="com.example.tests.SearchTest">
      <methods>
          <include name="searchByProduct"/>
          <exclude name="searchByCategory"/>
        </methods>
      </ class>
    </classes>
  </test>
  <test name="UI Test">
    <classes>
      <class name="com.example.tests.ScrollTest"/>
      <class name="com.example.tests.NightModeTest" />
    </classes>
  </test>
</suite>
Defining test suite, test, and test classes in XML file
- Test Suite: This is the root level tag of the xml tree. Each file can have only one of these tags.
- Test Tag: This tag is defined inside the suite tag and there can be many test tags inside the suite tags. For example: <test name="UI Test"></test>, <test name="Functionality Test"></test> etc.
- Test Classes: This tag is inside of the test tag. Again, you can have only one of the <classes /> tag defining the classes you want to have in your test. These classes must be relevant to the name of the parent test tag. Please refer to the xml code above for better understanding.
We will understand these concepts in more detail in the next section.
Creating Test Suites Using TestNG XML
Guide to creating a basic test suite in TestNG XML
To create a test suite using testng.xml file, we first write the <suite></suite> tag. This is the root element of the test suite document and consists of all the tests that we want to run. The 'suite' element contains a name parameter that tells what the name of the test suite is.
In the example above, this feature is implemented as:
<suite name="Regression Suite">
<test></test>
.
.
.
<test ></test>
<suite />
Inside the suite tag, we can have more than one test tags, each for a set of test cases to be executed. Building up from the previous example as:
<suite name="Regression Suite">
<test name="Functionality Test"></test>
<test name="UI Test"></test>
<suite />
Please use readable and appropriate names for the suite tag and the test tags to improve code readability.
Including and excluding test classes and methods in the suite
In the example testng.xml we have taken above, the test tag named functionality test we have the classes tag. Each test tag can have only one classes tag. The classes we have included in this test are LoginTest and SearchTest in the Regression Test and ScrollTest and NightModeTest for the UI Testing. This is the following part in the code above:
<classes>
<class name="com.example.tests.ScrollTest"/>
<class name="com.example.tests.NightModeTest" />
</classes>
Within the class tag, we have an optional methods tag. If we choose to omit it, then by default all the tests in class are run. Otherwise, we can choose to include or exclude the methods as we want.
This can be seen from the following example:
<class name="com.example.tests.SearchTest">
<methods>
<include name="searchByProduct"/>
<exclude name="searchByCategory"/>
</methods>
</ class>
We have a class called Search Test and inside that class, we choose to include the method searchByProduct in execution and exclude the method searchByCategory from execution.
Parameterizing test suite configuration
Test parameterization in test suite is the key to test methods with different datasets. To learn deeply about parameterizing test suite configuration, please visit this page.
So, now let us define the contents of our testng.xml file:
<!DOCTYPE suite SYSTEM "http://testng.org/testng-1.0.dtd">
<suite name="Regression Test Suite">
    <test name="Search Test">
        <classes>
            <class name="com.geeksforgeeks.browsertests.TestClassA">
                <methods>
                    <include name="testWebPageSearch" />
                </methods>
            </class>
            <class name="com.geeksforgeeks.browsertests.TestClassB" >
                <methods>
                    <include name="testNavBarSearch"/>
                </methods>
            </class>
        </classes>
    </test>
</suite>
Our project is complete. We will now look at ways to run it.
Running Test Suites
Running Test Suites From IDE
To run the test suite from your IDE, right click on the testng.xml file in the side navigation bar. Then click on the option 'Run testng.xml' to run your suite:

Running test suites from command line
To run test suites from command line, navigate to the root directory of your project in the terminal and type:
mvn test
This will automatically compile tests as:
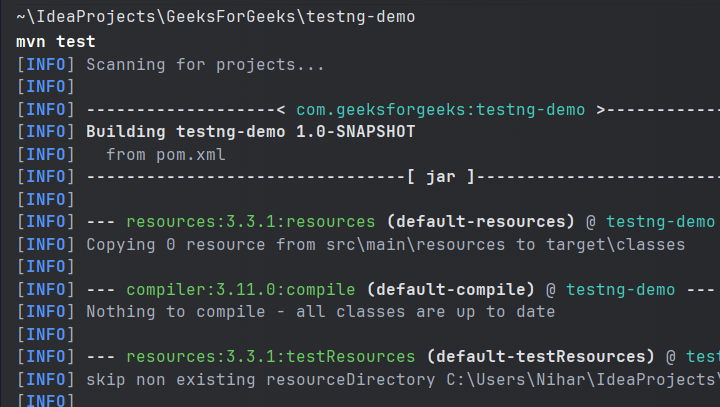
Test Compilation
Then the testng.xml file will be automatically run as:
Automation by Test Class A
Automation by Test class B
Finally you will see the following result logged on the console as:
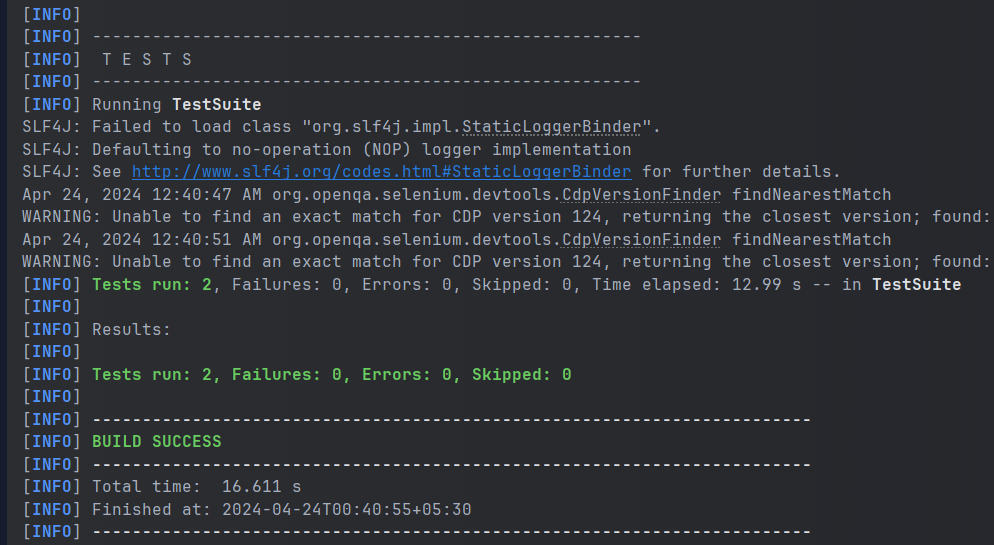
Running testng.xml through command line
Configuring test suite execution options
1. Thread Count
TestNG provides you with the option to define the number of threads you want to use to run your test suite. This can be simply achieved as:
<suite name="MySuite" thread-count="10">
  </suite>
You have to assign an integer value to the attribute 'thread-count' and you are done.
2. Parallel Execution
You can also configure your test suite to allow your tests to run in parallel. To know more on how to parallelize your tests, click here.
Conclusion
In this article we looked at what test suites are and how we can create them using TestNG in java. We looked at two approaches to clubbing tests, through groups and through classes. Hope you learnt something useful. If you want to discuss something, please feel free to leave comments below.
FAQ's on How to Create Test Suite in TestNG
Where can I use the <groups>...</groups> tag inside testng.xml?
Ans: You can you the groups tag either inside the <suite><suite> tag or the <test></test> tag only.
Can I rename the testng.xml file to anything else?
Ans: No. The testng.xml file is a unique one and if you change it to anything else other than the regular expression allowed, then it will not be detected by the test environment and you will not be able to use the file to run your test.
Can I place the testng.xml file anywhere I want?
Ans: No. You should not place the testng.xml file anywhere you want. It should only be placed at the same level as the pom.xml file in order to be detected by the test environment. Also make sure that the test classes follow the tree structure as depicted in the article.