In HTML, the form submit button is an important element in sending the user's data to the server for further processing. We can create these buttons using two different approaches like <input> or <button> tag.
Table of Content
Using <button> tag
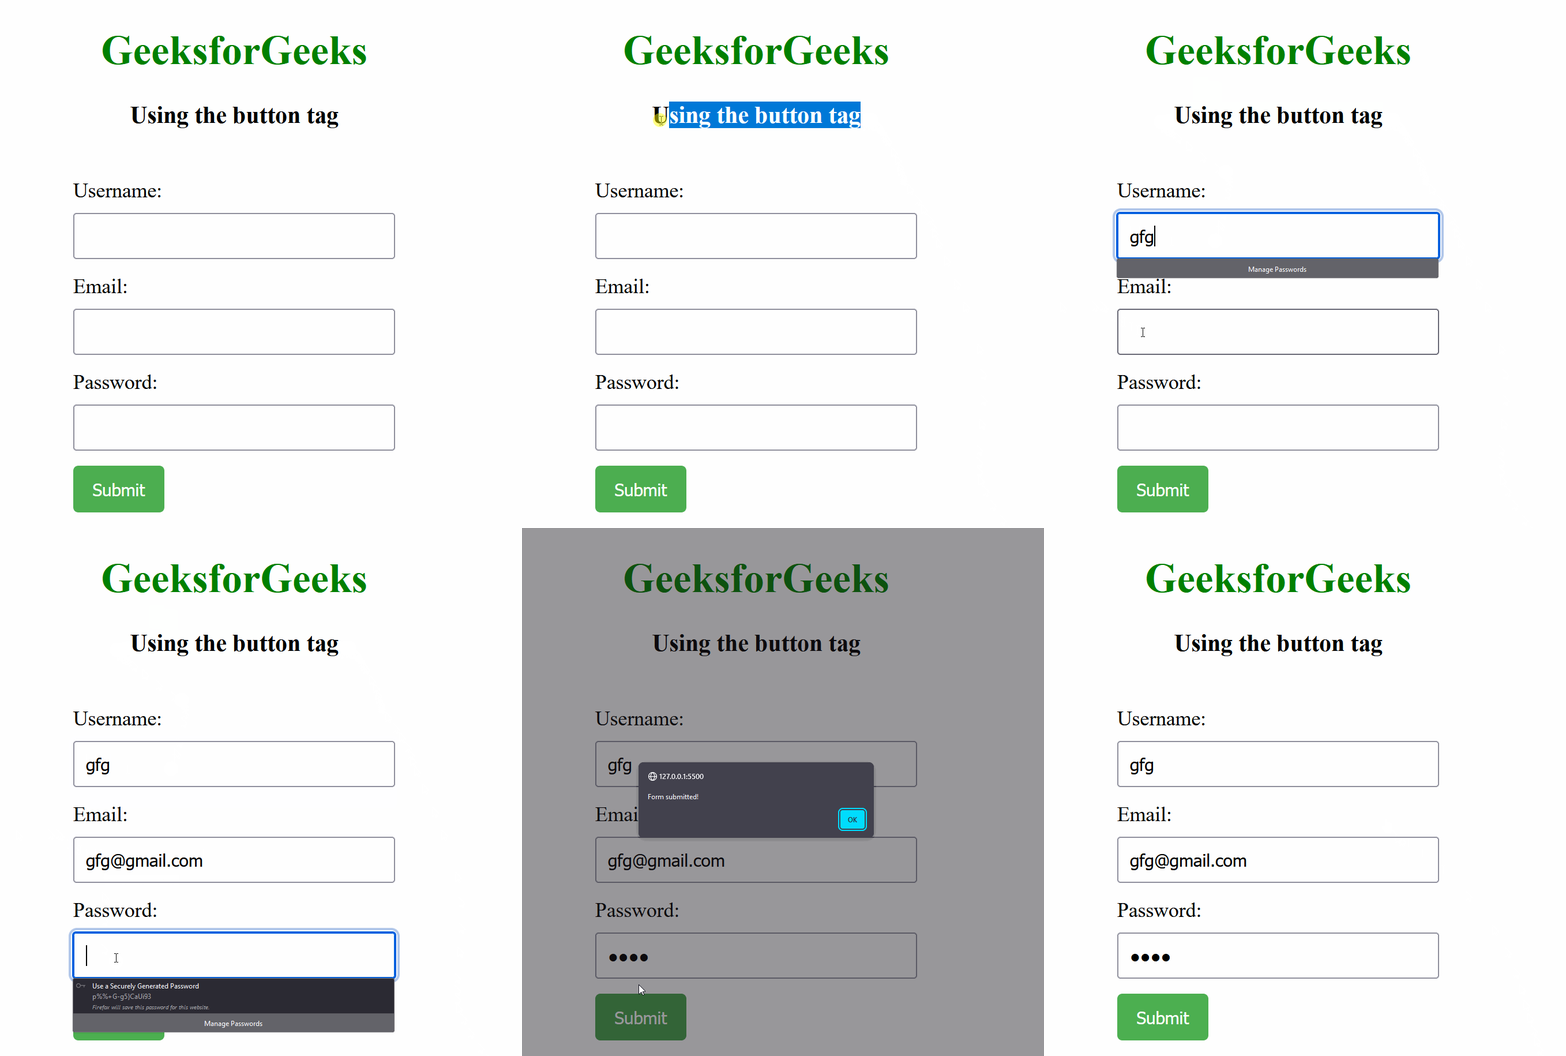
In this approach, we are using the <button> tag to create a submit button within an HTML form. The button is styled with CSS for green background color, white text, and a hover effect, and its functionality is defined through a JavaScript event listener to display an alert when clicked.
Syntax:
<button type="button" id="submitButton">Submit</button>Example: The below example uses <button> tag to create a Form Submit button in HTML.
<!DOCTYPE html>
<html>

<head>
    <title>Example 1</title>
    <link rel="stylesheet" href="style.css">
</head>

<body>
    <h1>GeeksforGeeks</h1>
    <h3>Using the button tag</h3>
    <form>
        <label for="username">Username:</label>
        <input type="text" id="username"
               name="username" required>
        <label for="email">Email:</label>
        <input type="email" id="email"
               name="email" required>
        <label for="password">Password:</label>
        <input type="password" id="password"
               name="password" required>
        <button type="button"
                id="submitButton">
              Submit
          </button>
    </form>

    <script>
        document.addEventListener(
              'DOMContentLoaded', () => {
            document.getElementById('submitButton').
                addEventListener('click', function () {
                    alert('Form submitted!');
                });
        });
    </script>
</body>

</html>
h1 {
    color: green;
    text-align: center;
}

body {
    text-align: center;
}

form {
    display: inline-block;
    text-align: left;
    max-width: 400px;
    margin: 20px auto;
}

label {
    display: block;
    margin-bottom: 8px;
}

input {
    width: 100%;
    padding: 8px;
    margin-bottom: 12px;
    box-sizing: border-box;
}

button {
    background-color: #4caf50;
    color: white;
    padding: 10px 15px;
    border: none;
    border-radius: 4px;
    cursor: pointer;
}

button:hover {
    background-color: #45a049;
}
Output:

Using <input> tag
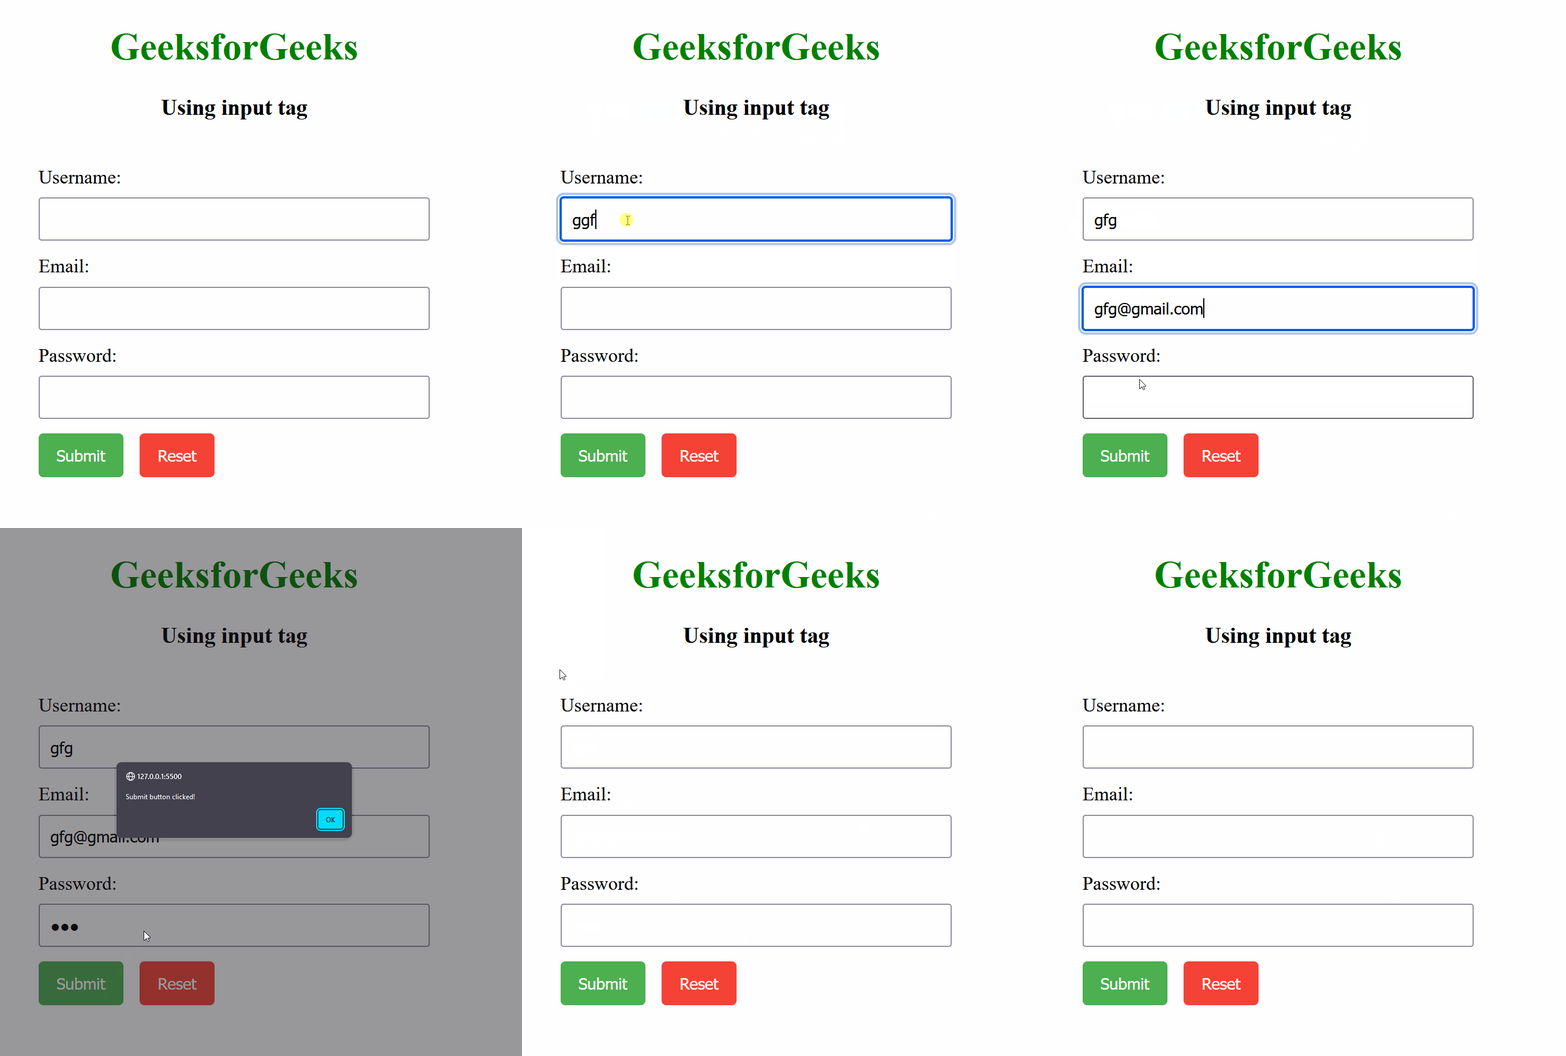
In this approach, we are using the <input> tag to create form fields and buttons within an HTML form. The styling is applied through CSS, between the submit button with a green background and the reset button with a red background. JavaScript is used to add functionality, which triggers alerts when the submit or reset buttons are clicked.
Syntax:
<input type="submit" class="submitButton" id="submitButton" value="Submit">Example: The below example uses <input> tag to create a Form Submit button in HTML.
<!DOCTYPE html>
<html>

<head>
    <title>Example 2</title>
    <link rel="stylesheet" href="style.css">
</head>

<body>
    <h1>GeeksforGeeks</h1>
    <h3>Using input tag</h3>
    <form>
        <label for="username">Username:</label>
        <input type="text" id="username"
               name="username" required>
        <label for="email">Email:</label>
        <input type="email" id="email"
               name="email" required>
        <label for="password">Password:</label>
        <input type="password" id="password"
               name="password" required>
        <input type="submit" class="submitButton"
               id="submitButton" value="Submit">
        <input type="reset" class="resetButton"
               id="resetButton" value="Reset">
    </form>

    <script>
        document.addEventListener(
              'DOMContentLoaded', function () {
            document.getElementById('submitButton').
            addEventListener('click', function () {
                alert('Submit button clicked!');
            });
            document.getElementById('resetButton').
            addEventListener('click', function () {
                alert('Reset button clicked!');
            });
        });
    </script>
</body>

</html>
h1 {
    color: green;
    text-align: center;
}

body {
    text-align: center;
}

form {
    display: inline-block;
    text-align: left;
    max-width: 400px;
    margin: 20px auto;
}

label {
    display: block;
    margin-bottom: 8px;
}

input[type="text"],
input[type="email"],
input[type="password"] {
    width: 100%;
    padding: 8px;
    margin-bottom: 12px;
    box-sizing: border-box;
}

.submitButton {
    background-color: #4caf50;
    color: white;
    padding: 10px 15px;
    border: none;
    border-radius: 4px;
    cursor: pointer;
    margin-right: 10px;
}

.resetButton {
    background-color: #f44336;
    color: white;
    padding: 10px 15px;
    border: none;
    border-radius: 4px;
    cursor: pointer;
}

button:hover,
.resetButton:hover {
    opacity: 0.8;
}
Output:
