A Neo4j graph database stores nodes and relationships which same as we store data in relational databases like tables or documents. Data is stored like we are designing concepts on a whiteboard. Our data is stored without any restrictions and without defining schema here, allowing a very flexible way of thinking about and using it.
Components of Node
- Nodes include Properties in key-value pair ("Name": "abcd")
- Nodes include Relationship between two nodes (person-1 ---is a friend of---> person-2)
- Relationships of many types like
- Incoming relationship
- Outgoing relationship
Note: First, we need to download the neo4j desktop and make one project run on the browser with valid credentials.
Step-by-Step Implementation to Perform Crud Operation in Neo4j with Spring Boot Application
Below are the steps to perform Crud Operation in Neo4j by taking a Simple Example Project.
Step 1: To create a Spring Boot project, refer to this article How to Create a Spring Boot Project with IntelliJ IDEA
Step 2: Add required Dependencies.
        <dependency>
            <groupId>org.springframework.boot</groupId>
            <artifactId>spring-boot-starter-data-neo4j</artifactId>
        </dependency>
Step 3: After adding dependencies, below is the pom.xml file:
<?xml version="1.0" encoding="UTF-8"?>
<project xmlns="http://maven.apache.org/POM/4.0.0" xmlns:xsi="http://www.w3.org/2001/XMLSchema-instance"
    xsi:schemaLocation="http://maven.apache.org/POM/4.0.0 https://maven.apache.org/xsd/maven-4.0.0.xsd">
    <modelVersion>4.0.0</modelVersion>
    <parent>
        <groupId>org.springframework.boot</groupId>
        <artifactId>spring-boot-starter-parent</artifactId>
        <version>3.2.3</version>
        <relativePath/> <!-- lookup parent from repository -->
    </parent>
    <groupId>org.technous</groupId>
    <artifactId>neo4jdemo</artifactId>
    <version>0.0.1-SNAPSHOT</version>
    <name>neo4jdemo</name>
    <description>Demo project for Spring Boot</description>
    <properties>
        <java.version>17</java.version>
    </properties>
    <dependencies>
        <dependency>
            <groupId>org.springframework.boot</groupId>
            <artifactId>spring-boot-starter-data-neo4j</artifactId>
        </dependency>
        <dependency>
            <groupId>org.springframework.boot</groupId>
            <artifactId>spring-boot-starter-web</artifactId>
        </dependency>

        <dependency>
            <groupId>org.springframework.boot</groupId>
            <artifactId>spring-boot-devtools</artifactId>
            <scope>runtime</scope>
            <optional>true</optional>
        </dependency>
        <dependency>
            <groupId>org.projectlombok</groupId>
            <artifactId>lombok</artifactId>
            <optional>true</optional>
        </dependency>
        <dependency>
            <groupId>org.springframework.boot</groupId>
            <artifactId>spring-boot-starter-test</artifactId>
            <scope>test</scope>
        </dependency>
    </dependencies>

    <build>
        <plugins>
            <plugin>
                <groupId>org.springframework.boot</groupId>
                <artifactId>spring-boot-maven-plugin</artifactId>
                <configuration>
                    <excludes>
                        <exclude>
                            <groupId>org.projectlombok</groupId>
                            <artifactId>lombok</artifactId>
                        </exclude>
                    </excludes>
                </configuration>
            </plugin>
        </plugins>
    </build>

</project>
Step 4: Now make one entity Book.java.
package org.technous.neo4jdemo.node;

import lombok.AllArgsConstructor;
import lombok.Getter;
import lombok.NoArgsConstructor;
import lombok.Setter;
import org.springframework.data.neo4j.core.schema.Id;
import org.springframework.data.neo4j.core.schema.Node;

@Node      // Annotation to mark this class as a Node entity in Neo4j
@Getter    // Lombok annotation to generate getter methods for all fields
@Setter    // Lombok annotation to generate setter methods for all fields
@AllArgsConstructor    // Lombok annotation to generate constructor with all arguments
@NoArgsConstructor     // Lombok annotation to generate constructor with no arguments
public class Book
{

    @Id      // Annotation to specify the property as the identifier
    private int id;
    private String name;
    private String author;

}
Here, we have used @Node annotation because we need to make a book node in the database and @Id annotation used for making the id is unique in the database.
Note: It is compulsory to make one filed as unique.
Step 5: Now make a Repository of this Book class.
package org.technous.neo4jdemo.repository;

import org.springframework.data.neo4j.repository.Neo4jRepository;
import org.springframework.stereotype.Repository;
import org.technous.neo4jdemo.node.Book;

@Repository
public interface BookRepository extends Neo4jRepository<Book,Integer> {
    public Book findBookByName(String bookName);
}
We are using here Neo4jRepository for saving data in graph form in the database. It works the same as JpaRepository in the Jpa operation.
It defines a repository interface for the Book entity by extending Neo4jRepository<Book, Integer>.
Step 6: Now we need to make a service class where we write our business logic the same as when we write simple crud operation logic. (BookService.java)
import org.springframework.beans.factory.annotation.Autowired;
import org.springframework.stereotype.Service;
import org.technous.neo4jdemo.node.Book;

import java.util.List;

@Service // Marks this class as a Spring service
public interface BookService {

    // Method to add a new book
    public Book addBook(Book book);

    // Method to get all books
    public List<Book> getAllBook();

    // Method to find a book by name
    public Book findByName(String name);

    // Method to update a book
    public Book updateBook(int bookId, Book book);

    // Method to delete a book by ID
    public String deleteBook(int bookId);
}
Now make the implementation class (BookServiceImpl.java)
Step 7: Now create the service implementation class (BookServiceImpl.java)
package org.technous.neo4jdemo.service.impl;

import org.springframework.beans.factory.annotation.Autowired;
import org.springframework.stereotype.Service;
import org.springframework.util.ResourceUtils;
import org.technous.neo4jdemo.node.Book;
import org.technous.neo4jdemo.repository.BookRepository;
import org.technous.neo4jdemo.service.BookService;

import java.io.BufferedReader;
import java.io.FileNotFoundException;
import java.io.FileReader;
import java.io.IOException;
import java.util.List;

@Service // Indicates that this class is a Spring service
public class BookServiceImpl implements BookService {

    @Autowired // Injects BookRepository dependency
    private BookRepository bookRepository;

    @Override
    public Book addBook(Book book) {
        // Save the book using BookRepository
        return bookRepository.save(book);
    }

    @Override
    public List<Book> getAllBook() {
        // Retrieve all books using BookRepository
        return bookRepository.findAll();
    }

    @Override
    public Book findByName(String name) {
        // Find a book by name using BookRepository
        return bookRepository.findBookByName(name);
    }

    @Override
    public Book updateBook(int bookId, Book book) {
        // Find the existing book by ID
        Book mybook = bookRepository.findById(bookId).orElseThrow();
        // Update the existing book attributes
        mybook.setName(book.getName());
        mybook.setAuthor(book.getAuthor());
        // Save the updated book using BookRepository
        return bookRepository.save(mybook);
    }

    @Override
    public String deleteBook(int bookId) {
        // Find the existing book by ID
        Book mybook = bookRepository.findById(bookId).orElseThrow();
        // Delete the book using BookRepository
        bookRepository.delete(mybook);
        return bookId + " is deleted..";
    }
}
Step 8: Now create a controller class to handle incoming HTTP requests related to books. (BookController.java)
import org.springframework.beans.factory.annotation.Autowired;
import org.springframework.http.HttpStatus;
import org.springframework.http.ResponseEntity;
import org.springframework.web.bind.annotation.*;
import org.technous.neo4jdemo.node.Book;
import org.technous.neo4jdemo.service.BookService;

import java.util.List;

@RestController // Indicates that this class is a Spring REST controller
@RequestMapping("/api") // Base URL mapping for all endpoints in this controller
public class BookController {

    @Autowired // Injects BookService dependency
    private BookService bookService;

    @PostMapping("/addBook") // Mapping for adding a new book
    public ResponseEntity<Book> addBook(@RequestBody Book book) {
        // Add the book using BookService and return a ResponseEntity with the added book and HTTP status OK
        Book mybook = bookService.addBook(book);
        return new ResponseEntity<>(mybook, HttpStatus.OK);
    }

    @GetMapping("/getAll") // Mapping for retrieving all books
    public ResponseEntity<List<Book>> allBook() {
        // Retrieve all books using BookService and return a ResponseEntity with the list of books and HTTP status OK
        List<Book> books = bookService.getAllBook();
        return new ResponseEntity<>(books, HttpStatus.OK);
    }

    @PutMapping("/updateBook/{bookId}") // Mapping for updating a book
    public ResponseEntity<Book> updateBook(@PathVariable("bookId") int bookId, @RequestBody Book book) {
        // Update the book with the given ID using BookService and return a ResponseEntity with the updated book and HTTP status OK
        Book mybook = bookService.updateBook(bookId, book);
        return new ResponseEntity<>(mybook, HttpStatus.OK);
    }

    @DeleteMapping("deleteById/{bookId}") // Mapping for deleting a book by ID
    public String deleteBook(@PathVariable("bookId") int bookId) {
        // Delete the book with the given ID using BookService and return a confirmation message
        bookService.deleteBook(bookId);
        return bookId + " is deleted";
    }
}
Step 9: Now configure over properties file. (application.properties)
spring.neo4j.authentication.username=neo4j
spring.neo4j.authentication.password=password
Note: Here, the username is by default neo4j, and the password is when you make a database in neo4j, you need to set the password and it needs to be mentioned here.
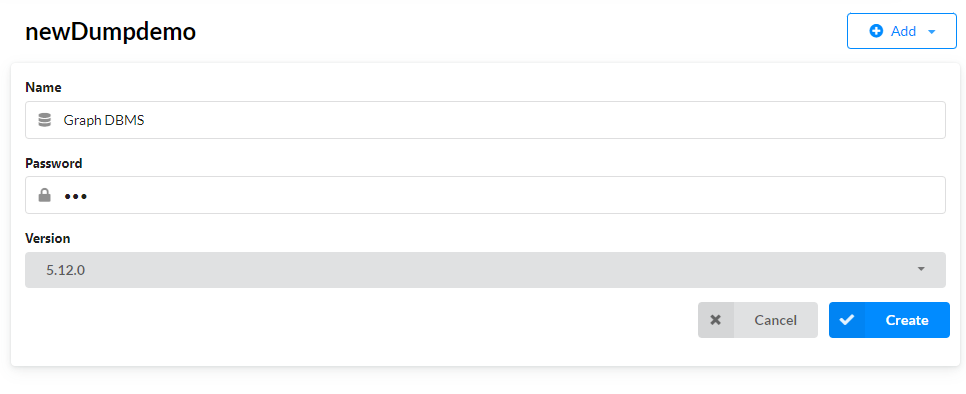
Step 10: Now test the application by running as spring boot application.
Below we can see we have defined a password for creating a database.
Then, we will use Postman tool to test our CRUD operations by sending HTTP requests to the appropriate endpoints.
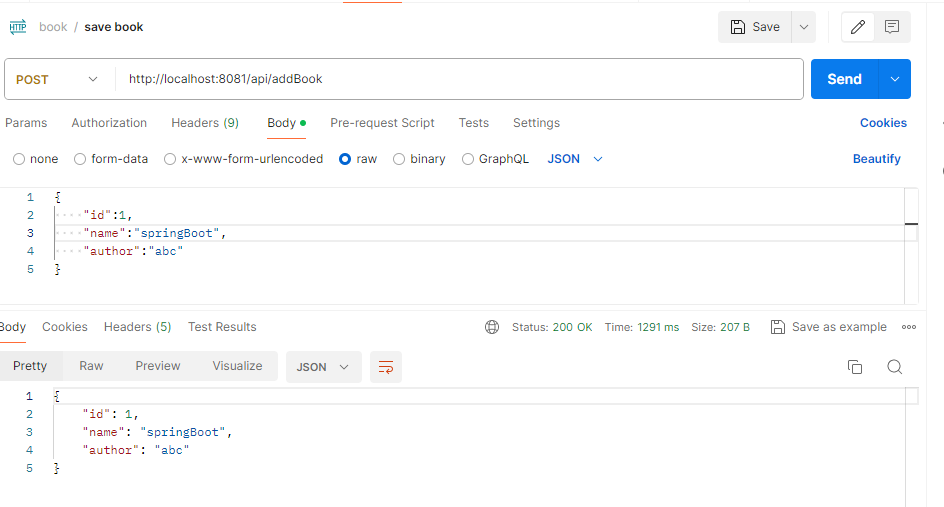
1. To add book:
Endpoint: HTTP://localhost:8081/api/addBookOutput:
Below in Postman, we have added a new book with id, name, and author.
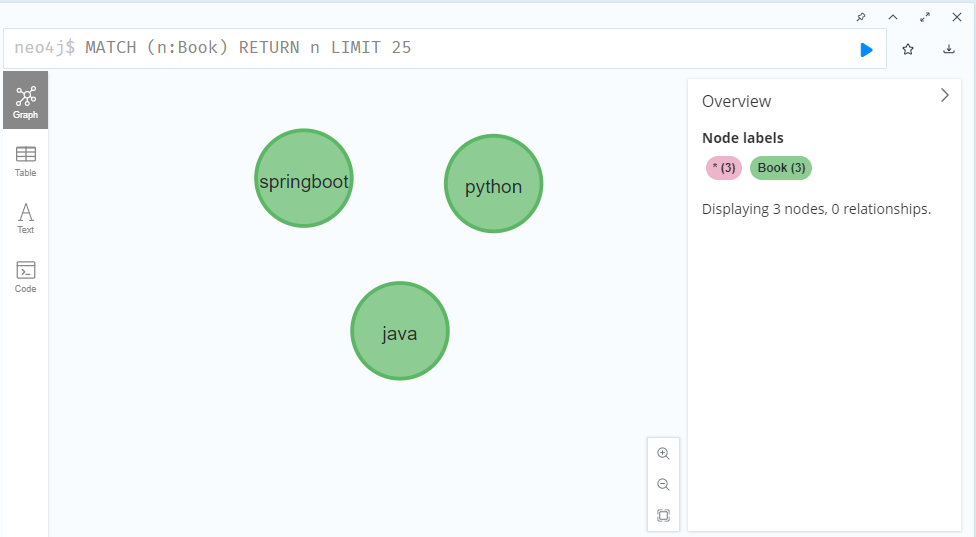
Now we can see our Book node is added to the neo4j database.
2. To update book by id:
Endpoint : http://localhost:8081/api/updateBook/2Output:
Below we have updated the book details by id.
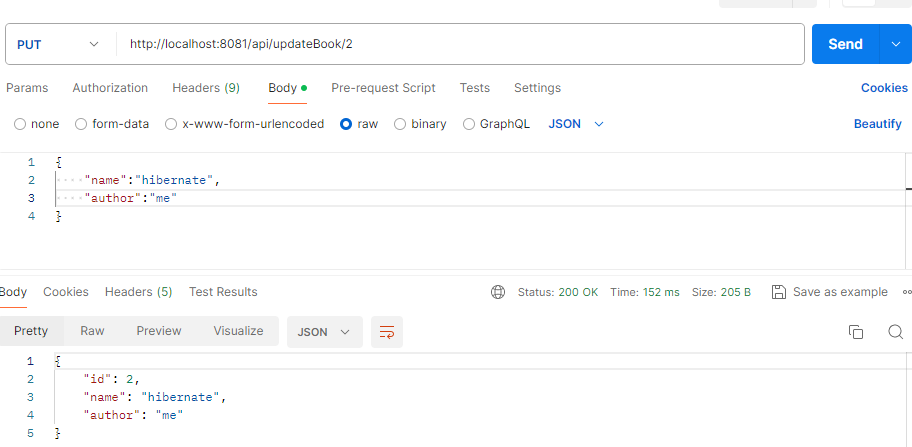
Now, we can see our book is updated in neo4j database.
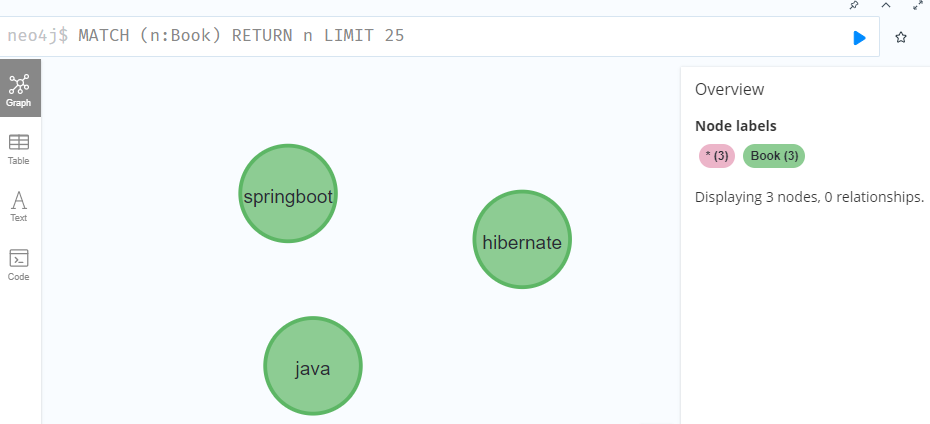
3. To delete book by id:
Endpoint: http://localhost:8081/api/deleteById/2Output:
Below we have deleted the book by id 2.
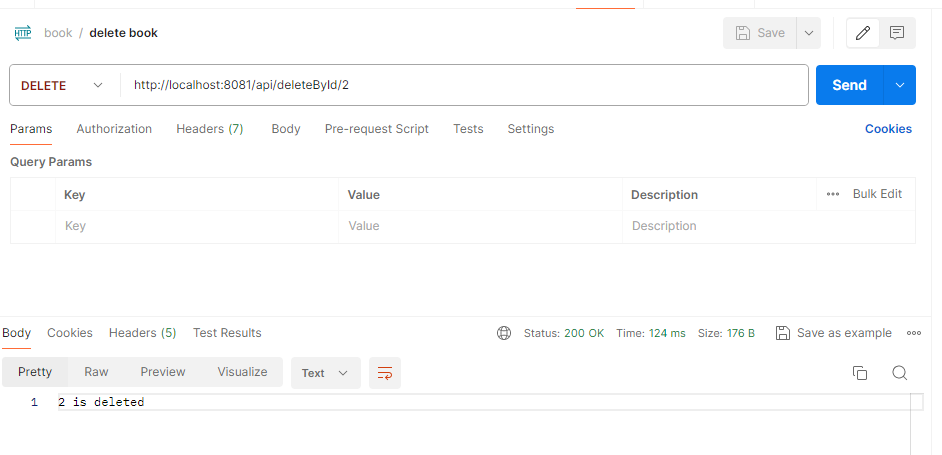
Now, we can see below that our book of id 2 is deleted from database.
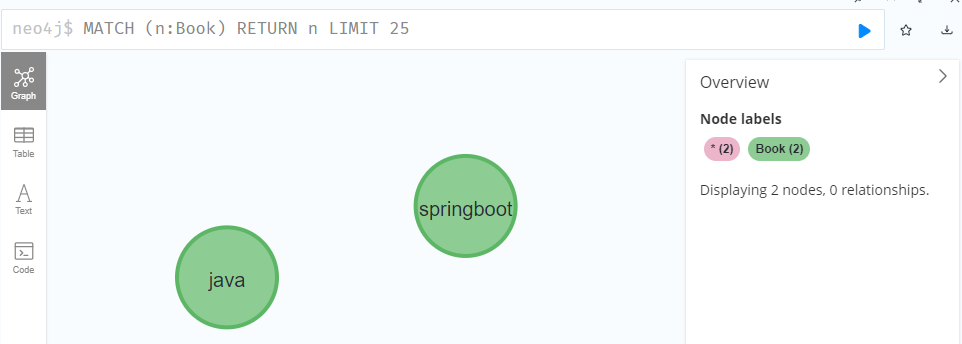
4. To get All books:
Endpoint: http://localhost:8081/api/getAllOutput:
By hitting the above endpoint, we get all books.
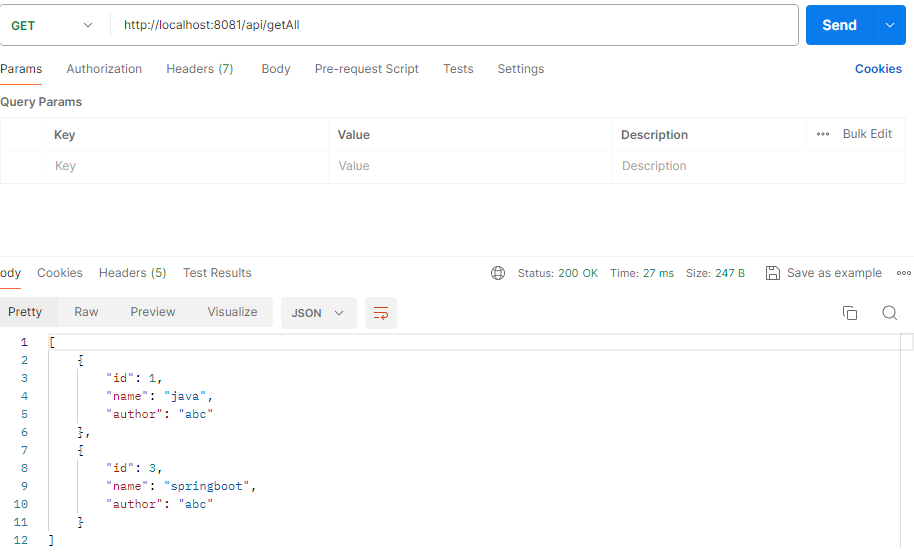
Now, we can see all books in the neo4j database.

By following the above steps, we can perform CRUD operation in neo4j with Spring Boot application.
Advantages Neo4j Database
- We need not to worry about complex relationships.
- It makes flexible schema.
- Easy to maintain.
- Database design is straightforward.