If you have integrated Apis in your React js website, then you know that whenever a page is refreshed the data is re-fetched every time whether you have used useEffect to fetch data on the component mount or used some custom functions to fetch data. This results in unnecessary requests and decreased performance. For that situation, caching is a very good option so in this article, we'll see how to cache that data using React Query which is now known as TanStack Query.
Table of Content
What will we do?
We will use React Query/TanStack Query to cache the data fetched from API. The API that will be used for testing will be the Books API provided by FreeTestAPI.
What is React Query/TanStack Query?
TanStack Query is an open-source JavaScript library, formerly known as React Query, which was developed to simplify data caching, data fetching, and state management in JavaScript and its frameworks and libraries. It provides its own hooks and functions which are make very complex and annoying code to written very simple way and result in less clean code. It does all the work from handling the cache to fetching the data in the background. While in this article we'll focus on its powerful cache feature only.
How does TanStack Query work?
TanStack query has 'useQuery' hook at its core which provides data fetching and caching. It behind the scene takes the data and stores its and serves it when needed, managing cache intelligently. Let's understand it better while working on it.
Steps to Create a React App
Step 1: Create a new React.js project and install the required dependencies:-
npx create-react-app my-react-app.Step 2: Navigate to the root directory of your project using the following command.
cd my-react-appProject Structure:
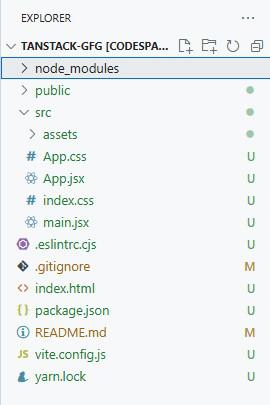
App Structure
Directly Installing:
$ npm i @tanstack/react-query
# or
$ pnpm add @tanstack/react-query
# or
$ yarn add @tanstack/react-query
# or
$ bun add @tanstack/react-query
Using ESM-compatible CDN:
<script type="module">
  import React from 'https://esm.sh/react@18.2.0'
  import ReactDOM from 'https://esm.sh/react-dom@18.2.0'
  import { QueryClient } from 'https://esm.sh/@tanstack/react-query'
</script>
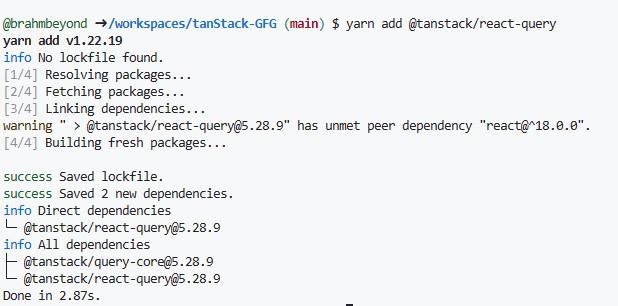
Installing TanStack Query
3. Now to use the TanStack Query you will need to first wrap it around the main function like we had to do in redux or react-router, so you can use this on your App.jsx or main.jsx. I'll wrap it around the main.jsx
So for that import the QueryClient to create a client and QueryClientProvider to provide that client in your main.jsx file and then wrap that around the App component
import { QueryClient, QueryClientProvider } from '@tanstack/react-query'//main.jsx
import React from 'react'
import ReactDOM from 'react-dom/client'
import App from './App.jsx'
import './index.css'
import { QueryClient, QueryClientProvider } from '@tanstack/react-query'
// Create a client
const queryClient = QueryClient();
ReactDOM.createRoot(document.getElementById('root')).render(
<React.StrictMode>
{/* Provide the client to your App */}
<QueryClientProvider client={queryClient}>
<App />
</QueryClientProvider>
</React.StrictMode>,
)
In this code, QueryClient is being imported from @tanstack/react-query and a new instance of it is being created. This queryClient is then provided to the entire React application using the QueryClientProvider component.
4. Now define your custom function that will fetch the data from the API and then return response in Json format. Like I here create fetchData function to get data from api .
  const fetchData = async () => {
    const response = await fetch('https://freetestapi.com/api/v1/books');
    return response.json();
  }
5. Now import useQuery hook from '@tanstack/react-query'
import { useQuery } from '@tanstack/react-query';The useQuery Hook will do all the work for you now from handling fetch requests to caching.
const { data, isLoading, isError } = useQuery({ queryKey: ['books'], queryFn: fetchData })● queryFn : The queryFn takes the function which will fetch the data from api, you can either define a custom function like fetchData and put it here or just you can simply define a callback function inside the useQuery hook itself.
● querykey : The first argument queryKey is used as unique identifier for this query data that will be returned from the queryFn , here like fetchData will return data from the api request, which will be identified by the 'books' key. It is used to refetching, caching, and sharing. Also here 'books' is defined in an array as you can define multiple keys. I'll tell in further steps how this will be used for data caching .
● data : It is the data which is fetched from the API via queryFn and is stored in that to be used in the website.
● isLoading : It returns the Boolean value for if data is on the way or is fetched successfully.
● isError : It returns error if any error is cause while fetching the data from API.
6. Now write conditions for isLoading and isError to display Loading text on webpage in case of any delay or show error in case or error while fetching the data from the api.
  if (isLoading) return <div>Loading...</div>;
  if (isError) return <div>Error fetching data</div>;
7. That's our work with the caching is complete and now we have to show the data fetched from the API to the webpage. But before rendering the lets first understand how caching will work. First see the below code on how it will look on completing (except for the rendering on webpage part).
//App.jsx

import { useQuery } from '@tanstack/react-query';
import './App.css';

const App = () => {

  const fetchData = async () => {
    const response = await fetch('https://freetestapi.com/api/v1/books');
    if (!response.ok) {
      throw new Error('Network response was not ok');
    }
    return response.json();
  }


  const { data, isLoading, isError } = useQuery({ queryKey: ['books'], queryFn: fetchData })

  if (isLoading) return <div>Loading...</div>;
  if (isError) return <div>Error fetching data</div>;

  return (
    <>
      <div>hi</div>
    </>
  );
}

export default App;
- When the useQuery hook is called, it checks if there's already data associated with the given queryKey in the cache. In this case, the queryKey is ['books'].
- If there's already data in the cache for this queryKey, useQuery will return that data immediately. This means that the data variable will be populated with the cached data right away, and isLoading will be false. This allows for instant rendering of cached data.
- If there's no data in the cache for this queryKey, useQuery will call the queryFn function to fetch the data. In this case, the queryFn is fetchData, which fetches data from the 'https://freetestapi.com/api/v1/books' URL.
- While fetchData is running, useQuery will return undefined for data and true for isLoading. This allows you to display a loading state in your UI.
- When fetchData resolves, useQuery will update the cache with the new data and re-render the component. Now, data will be the fetched data, and isLoading will be false. If fetchData rejects (for example, if the network request fails), useQuery will set isError to true, allowing you to display an error state in your UI.
- The next time useQuery is called with the same queryKey, it will again return the cached data immediately. This means that even if your component re-renders or if another component uses the same queryKey, the data will not be fetched again from the server, but instead will be loaded from the cache, saving network requests and improving performance.
useQuery has some more options to control the cache time and re-fetching of data from the api, like if you have a api that is not static but data changes in that in some time and you need to re-fetch after some minutes or seconds then these options will be beneficial for you, i won't be covering all the options as there are a lots of them which you can find here - useQuery Options.
- cacheTime : default time is 5 minutes , and is always defined in milliseconds in code and in the defined time the cache is referred to as fresh. After the given time the cache is termed as stale cache but is not immediately removed. Instead, it can still be used for new requests to the same queryKey, but React Query will attempt to refetch the data in the background to ensure it's up-to-date.
- staleTime : This time refers to after when cache is not fresh. During this time as cache has became stale, but is not deleted from the memory and will wait for the defined time and when new data comes , that data is stored in the cache. The useQuery re-fetches the data from api by running the queryFn in the background during the stale time. Also during this time, if a new request is made with the same queryKey, React Query will not attempt to refetch the data, and will instead return the cached data immediately.
- refetchInterval : here you have to define the time in milliseconds and after the set time, the queries are re-fetched irrespective of the cacheTime or staleTime.
So I told you three main options which are mostly used in useQuery like in the code below cacheTime is 60 seconds after that cache is termed as stale and then during the stale time which is 30 seconds here , the query will re-fetch the data and will store in cache. Where as refetchInterval will make the query to run in every 2 minutes :-
  const { data, isLoading, isError } = useQuery({ queryKey: ['books'], queryFn: fetchData,  cacheTime: 60000,
    staleTime: 30000,
    refetchInterval: 120000, })
8. Now I'll display the data on the Webpage also using the map so the complete code with that will be
import { useQuery } from '@tanstack/react-query';
import './App.css';

const App = () => {

  const fetchData = async () => {
    const response = await fetch('https://freetestapi.com/api/v1/books');
    if (!response.ok) {
      throw new Error('Network response was not ok');
    }
    return response.json();
  }

  const { data, isLoading, isError } = useQuery({ queryKey: ['books'], queryFn: fetchData })

  if (isLoading) return <div>Loading...</div>;
  if (isError) return <div>Error fetching data</div>;

  return (
    <>
      <div>hi</div>
      <div>
        {
          data.map((item) => (
            <div key={item.id}>
              <h2>{item.title}</h2>
              <p>{item.author}</p>
            </div>
          ))
        }

      </div>
    </>
  );
}

export default App;
Conclusion
In this tutorial you learned the concept of how to use TanStack Query to cache data in React JS Website. We also got to know why caching is important and how much unnecessary requests sent to API server will be reduced, also if website is using a API plan with limited requests then this is like boon for it. Using TanStack Query makes it very easy to cache without setting up many things and you get a very nice and clean code in your project. TanStack query is much more than caching the data, you can read its documentation or read other tutorials on what else can it do.
FAQs
Is React Query and TanStack Query different?
No, both are same, first it was introduced for using with react js but later from v4 the code was included to support more frameworks and now it supports TS/JS, React, Solid, Vue, Svelte and Angular.
Can we cache data in react js?
Yes, you can cache data for reuse them and reduce website content loading time and all unnecessary requests, one method is using TanStack Query.
What to do if we want to update the API data when a post request is sent instead of depending on refectInterval?
You can useMutation hook from TanStack Query to sent post requests and then update the cache data to updated one.
Can we refetch the data from API at a given set of time interval with caching?
Yes, there is very simple way to do, just use refetchInterval option in useQuery hook and define the time in milliseconds and everything will be managed by useQuery.
Can we use TanStack Query with other JavaScript frameworks ?
Yes, TanStack Query is React Query from version4, which provided support for other javaScript frameworks - TS/JS, React, Solid, Vue, Svelte and Angular.
Can we integrate TanStack Query for cache in existing projects?
Yes, you can just read the article above and you will know how and where you have to put the required functions and which options to use as per your project requirements.
Does useQuery handles errors and loading information on its own?
Yes, TanStack's useQuery provides isLoading, isError which are discussed above in article and It offers isFetching for ongoing fetches, error for detailed error information, failureCount for failed attempts, status for a concise state indicator, and dataUpdatedAt for tracking data updates. For more details you have to visit its documentation.