Introduction
So far we have been using C language for simple console output only. Most of us are unaware that using C++, low level graphics program can also be made. This means we can incorporate shapes,colors and designer fonts in our program. This article deals with the steps to enable the DevC++ compiler to generate graphics .
Configuring DevC++
- Step 1: Download the DevC++ version 5.11 from here.
- Step 2: Download the Graphics header files, and etc stuff needed from the given dropbox link.
- Step 3: Extract the contents of the rar file.
- Step 4: Go to the location where DevC++ is installed. For me its D drive. Go inside the MinGW64 folder. Copy the graphics.h and winbgim.h in the include folder and D:\Dev-Cpp\MinGW64\x86_64-w64-mingw32\include folder.
- Step 5:Copy the libbgi.a file into lib folder and in D:\Dev-Cpp\MinGW64\x86_64-w64-mingw32\lib folder.
- Step 6: Copy the ConsoleAppGraphics.template, ConsoleApp_cpp_graph.txt files and paste them inside the template folder of the devc++ installer location.
Now we are done with configuring of the DevC++ to support graphics programming. We shall write our very first graphics program now.
Running the first graphics program
- Open DevC++. Click file ->New ->Project.
- Make sure you get the Console Graphics option. However, we are not going to click on it.
- Choose Empty Project option and Give a project name and make sure the selected language is C++.
- Copy the following code to the editor window.
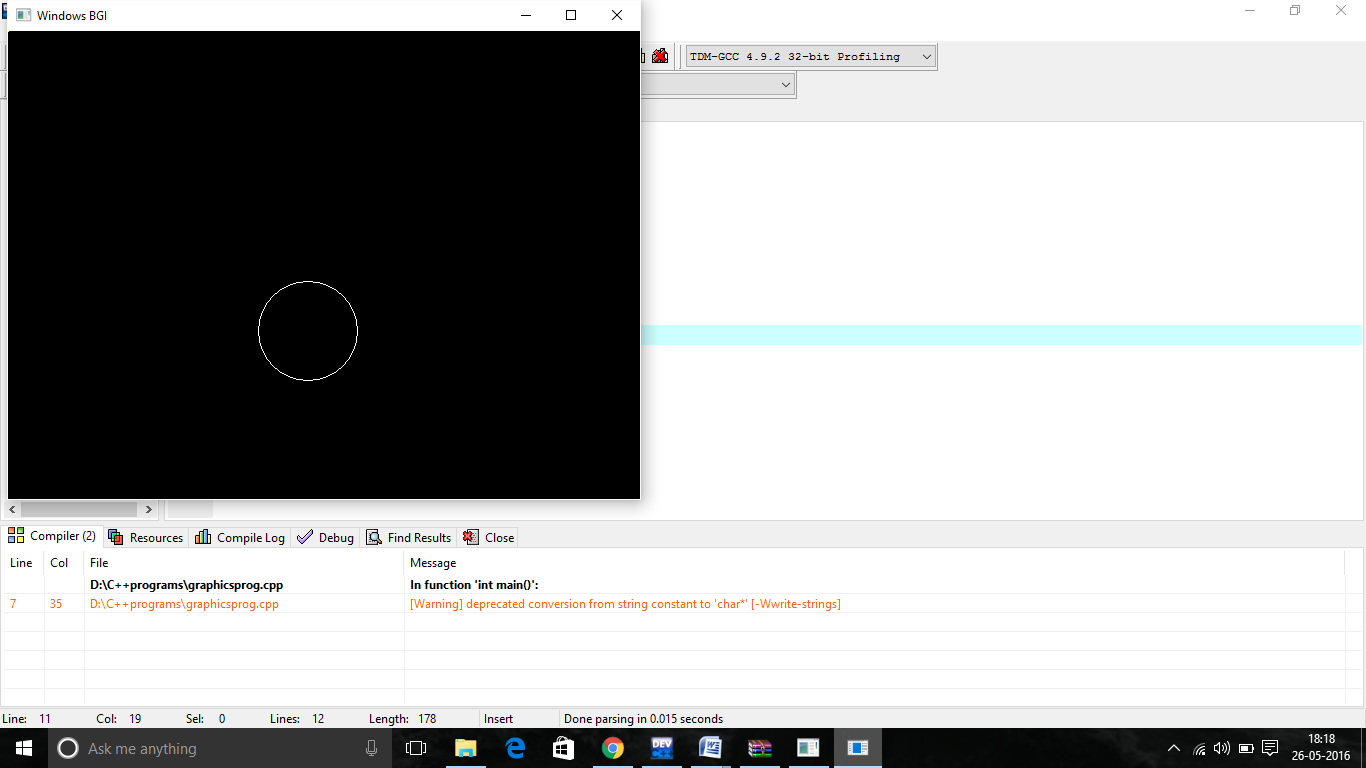
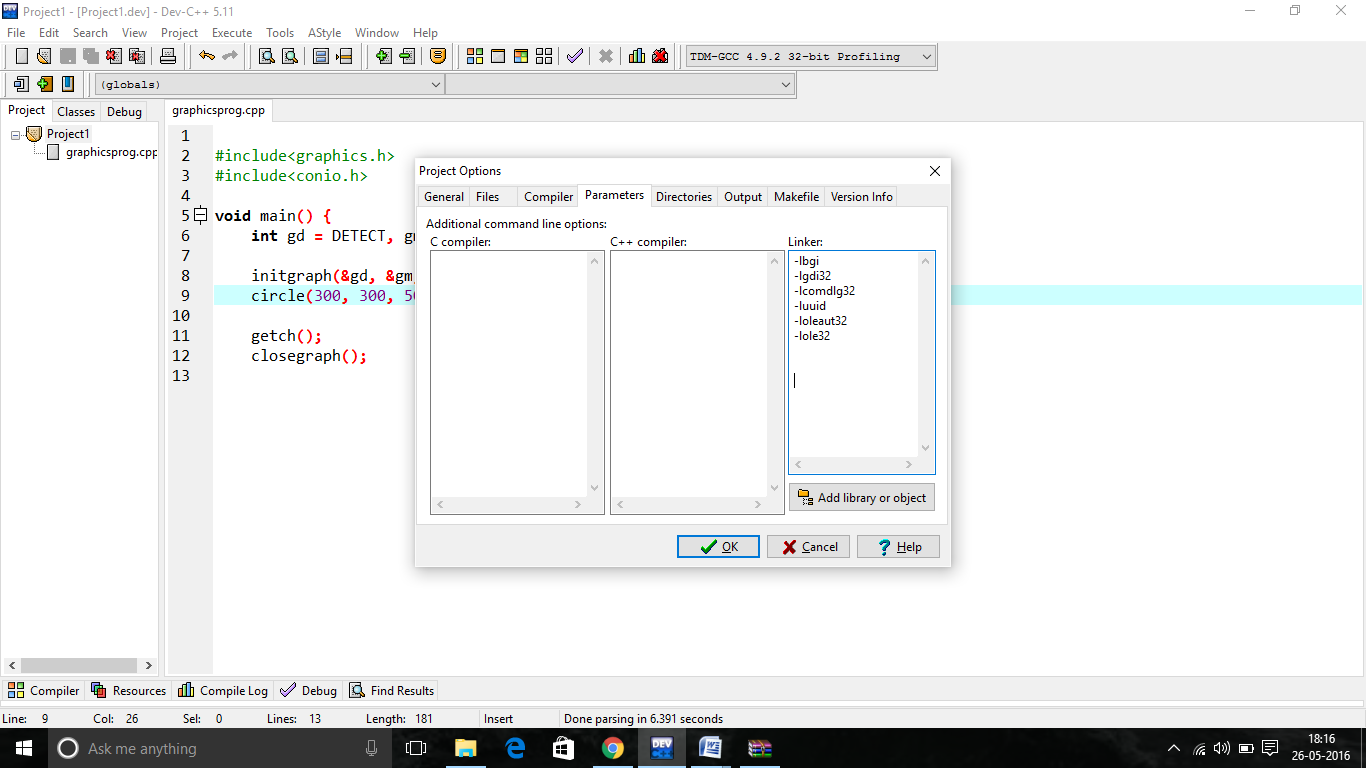
#include<graphics.h> #include <conio.h> int main() { int gd = DETECT, gm; initgraph(&gd,&gm, "C:\\tc\\bgi"); circle(300,300,50); closegraph(); getch(); } - Go to “Project” menu and choose “Project Options” (or just press ALT+P).
- Go to the “Parameters” tab In the “Linker” field, enter the following text:
-lbgi
-lgdi32
-lcomdlg32
-luuid
-loleaut32
-lole32
- Click OK and Compile and run the project and you’ll get this output:
Program Explanation
- The initgraph function- ?Initializes the graphics system.
- In C Program execution starts with main() similarly Graphics Environment Starts with this function.
- initgraph() initializes the graphics system by loading a graphics driver from disk (or validating a registered driver) then putting the system into graphics mode
Article Tags :