Automatic License/Number Plate Recognition (ANPR) is an image processing technique used to identify a car based on its number plate. In this article, we'll walk through the steps to implement ANPR using Python.
Techniques for ANPR are:
- License Plate Recognition with OpenCV and Tesseract OCR
- Automatic License/Number Plate Recognition System with EasyOCR
Automatic Number Plate Recognition (ANPR) With EasyOCR
Automatic License/Number Plate Recognition (ANPR) is the process of detecting the position of a number plate and then using the Optical Character Recognition technique to identify the text on the plate. This process is widely used in real-life scenarios where accuracy is important.
Following are the steps involved in the process of implementing Automatic License/Number Plate Recognition (ANPR) with Python.
- Installing and importing required dependencies.
- Read the image. apply filters like grayscale and blur.
- Perform edge detection.
- Find contours and apply mark to separate out actual number plate.
- Extract text from images using OCR.
- Render Result.
In this tutorial, we will be using a test image on which we will perform ANPR. we will be executing every step mention above.
Image used for demonstration:

Demo Image
Steps to implement Automatic Number Plate Recognition (ANPR) with Python
Step 1: Installing and Importing Required Dependencies
We are using OpenCV, EasyOCR, PyTorch and imutils. Before using these dependencies let us understand why we are using it.
- OpenCV: An open-source computer vision and machine learning library designed to facilitate various computer vision applications.
- EasyOCR: A Python library for Optical Character Recognition, designed for extracting text from images.
- PyTorch: An open-source machine learning framework, required for EasyOCR.
- imutils: A collection of utility functions for image processing.
Since we have understand why we are using the above dependencies, we can install them using following command:
pip install easyocr
pip install imutils
pip install opencv-python
pip install matplotlib
Now, the installation part is done let's import the dependencies we need in our code.
import cv2
from matplotlib import pyplot as plt
import numpy as np
import easyocr
import imutils
import random
Step 2: Image Preprocessing
Before proceeding next step we need to clean up the image by using some image preprocessing techniques. This includes converting image to grayscale, applying noise reduction techniques, etc.
img = cv2.imread("Test1.img") #read image
plt.imshow(cv2.cvtColor(img, cv2.COLOR_BGR2RGB))
plt.title('Original Image')
plt.show()
gray = cv2.cvtColor(img, cv2.COLOR_BGR2GRAY) #convert image to gray
bfilter = cv2.bilateralFilter(gray, 11, 17, 17) #Noise reduction
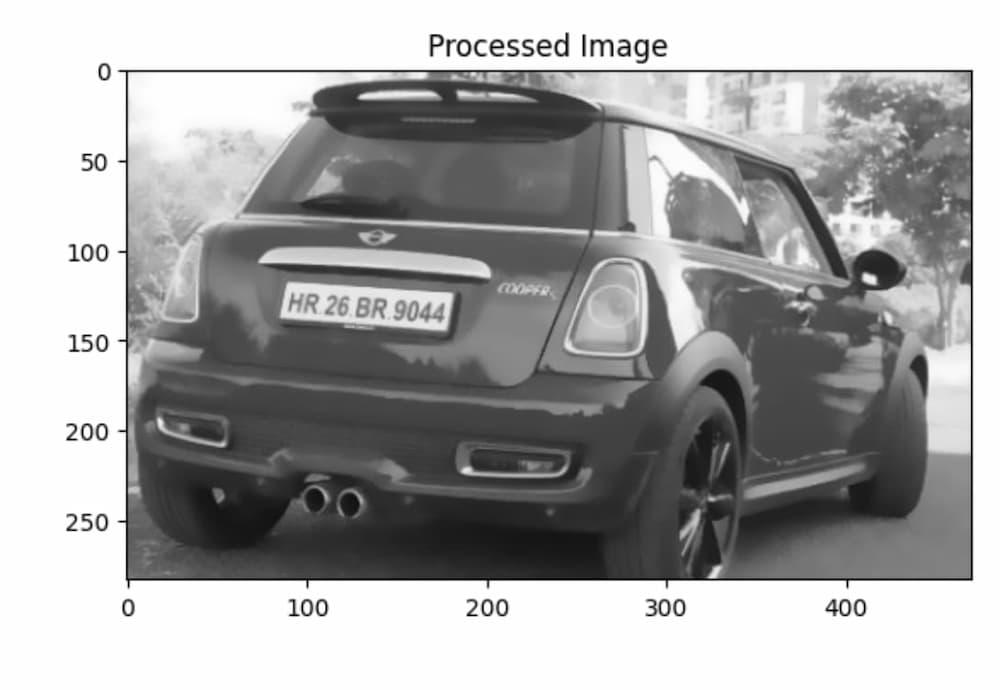
plt.imshow(cv2.cvtColor(bfilter, cv2.COLOR_BGR2RGB)) #show processed image
plt.title('Processed Image')
Output:
Step 3: Edge detection
- Here in this image we need to find where the edges are, so that we can separate out the number plate from image. The Canny edge detection algorithm help us to do so. it acts like a super-sharp eye. it detects even the faintest edges. It works in steps:
- In first step, it smooths the photo to remove noise, then it scans for areas where brightness changes sharply (these are likely edges). it used double thresholding for segregating strong and weak edges.
- Lastly it perform edge tracking by hysteresis.
- This will leaves us with a clean image highlighting only the important edges, making it easier to see the shapes and outlines in the photo.
edged = cv2.Canny(bfilter, 30, 200) #Edge detection
plt.imshow(cv2.cvtColor(edged, cv2.COLOR_BGR2RGB))
Output:

Step 4: Find contours and apply mark to separate out actual number plate
If you are wondering what are contours, Contours can be understood as the boundaries of a shape with the same intensity in an image. They are used in image analysis to identify objects in an image or separate an object from the background. The cv2.findContours() function is used to detect these contours in binary images.
keypoints = cv2.findContours(edged.copy(), cv2.RETR_TREE, cv2.CHAIN_APPROX_SIMPLE) #Find contours
contours = imutils.grab_contours(keypoints) #Grab contours
contours = sorted(contours, key=cv2.contourArea, reverse=True)[:10] #Sort contours
- First line of the given snippet will find all the contours in the provided image. then based on the tuple value of those contours are stored in contours variable. after that sorting is performed to based on contours area and top 10 contours are finalized for further processing.
- This code is will find a contour that approximates a polygon with four sides, which could potentially be the license plate in an Automatic Number Plate Recognition (ANPR) system. We are looping over top 10 contours and finding best fit for number plate. We are checking whether any contour have potentially 4 sides, because our number plate have 4 sides and if found it could be our number plate.
#Loop over our contours to find the best possible approximate contour of 10 contours
location = None
for contour in contours:
    approx = cv2.approxPolyDP(contour, 10, True)
    if len(approx) == 4:
        location = approx
        break

print("Location: ", location)
Output:
Location: [[[ 85 137]]
[[178 145]]
[[182 126]]
[[ 89 118]]]
Here, you can see we are getting the co-ordinates of number plate as output. After this our next step will be masking out only area which include number plate so that later when we are going to extract text from it using OCR, we can do it efficiently. To mask out we will execute the following code.
mask = np.zeros(gray.shape, np.uint8) #create blank image with same dimensions as the original image
new_image = cv2.drawContours(mask, [location], 0,255, -1) #Draw contours on the mask image
new_image = cv2.bitwise_and(img, img, mask=mask) #Take bitwise AND between the original image and mask image

plt.imshow(cv2.cvtColor(new_image, cv2.COLOR_BGR2RGB)) #show the final image
Output:

- Now, here comes the part where we are going to crop the number plate region from the image (contour). below code will help to achieve this.
(x,y) = np.where(mask==255) #Find the co-ordinates of the four corners of the document
(x1, y1) = (np.min(x), np.min(y)) #Find the top left corner
(x2, y2) = (np.max(x), np.max(y)) #Find the bottom right corner
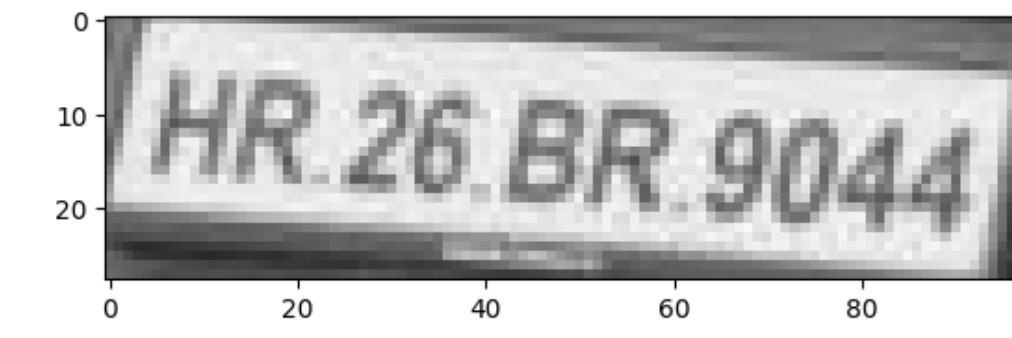
cropped_image = gray[x1:x2+1, y1:y2+1] #Crop the image using the co-ordinates
plt.imshow(cv2.cvtColor(cropped_image, cv2.COLOR_BGR2RGB)) #show the cropped image
The above code will identify the region in the image where the license plate is located i.e. where the mask is white and crops the image to this region. It uses np.where() function to find the coordinates of all white pixels in the mask, and np.min() and np.max() to find the minimum and maximum x and y coordinates, respectively. These represent the bounding box of the license plate in the image. Lastly the image is then cropped to this bounding box using numpy array slicing, resulting in an image that only contains the license plate.
Step 5: Extract text from images using OCR
- Now it is crucial step in ANPR to convert image into text. This step will help us to use the number plate data. we can store the data on number plate on database and use it later for number of applications, like automatic toll or automatic parking charges, etc.
Following code will convert the image into text using EasyOCR library.
reader = easyocr.Reader(['en']) #create an easyocr reader object with english as the language
result = reader.readtext(cropped_image) #read text from the cropped image
result
Output:
[([[0, 0], [98, 0], [98, 28], [0, 28]], 'HR.26 BR 9044', 0.8064767816895628)]Step 6: Display the final output
Now we got the text from the number plate it is time to show it on original image. code will extracts the recognized text from the OCR result, then uses OpenCV to draw this text and a rectangle around the license plate on the original image. The text is positioned just near the license plate and the rectangle is drawn around the license plate based on its approximated location. The final image, with the overlaid text and rectangle, is then displayed.
text = result[0][-2] #Extract the text from the result
font = cv2.FONT_HERSHEY_SIMPLEX #Font style
res = cv2.putText(img, text=text, org=(approx[0][0][0], approx[1][0][1]+60), fontFace=font, fontScale=1, color=(0,255,0), thickness=2, lineType=cv2.LINE_AA) #put the text on the image
res = cv2.rectangle(img, tuple(approx[0][0]), tuple(approx[2][0]), (0,255,0),3) #Draw a rectangle around the text

plt.imshow(cv2.cvtColor(res, cv2.COLOR_BGR2RGB)) #show the final image with text
Output:
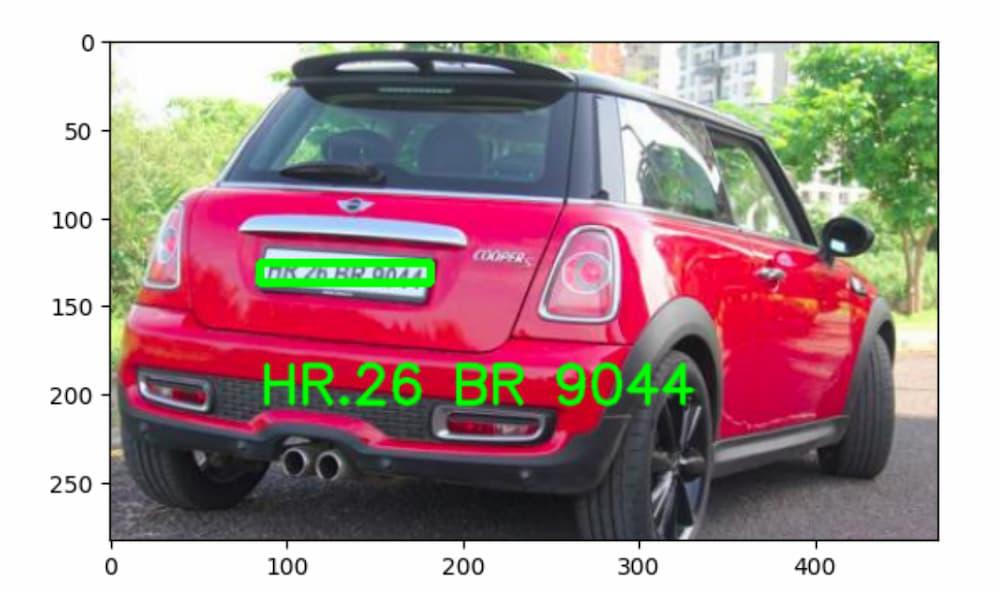
This is how we perform Automatic License/Number Plate Recognition (ANPR) using python. we performed filters on the images, them mask out after finding contours. then using EasyOCR we detected the text which was provided as output.