How To Set Custom Vite Config Settings In Angular 17?
Last Updated :
23 Jul, 2025
Vite is a powerful tool that enhances the development experience for web applications, especially large and complex applications. Angular doesn’t use Vite by default; it uses the Angular CLI and Webpack for build tooling. However, you can configure Angular to use Vite instead of Webpack with a bit of setup. Here’s a guide to integrating Vite into an Angular project:
Prerequisites
Approach
- After the initial setup, install Vite in your application.
- We will create a vite.config.ts file containing the configuration settings for vite.
- We will update index.html and package.json as per Vite.
Steps To Set Custom Vite Config Settings In Angular
Step 1: Set Up a New Angular Project
First, create a new Angular project if you haven’t already:
ng new vite
cd vite
Step 2: Install Vite and Related Dependencies
You’ll need to add Vite and some additional packages for Vite to work with Angular. Install them using npm or yarn:
npm install --save-dev vite vite-tsconfig-paths
Step 3: Create a Vite Configuration File
In the root of your Angular project, create a vite.config.ts file. This file will contain the configuration settings for Vite.
import { defineConfig } from 'vite';
import viteTsconfigPaths from 'vite-tsconfig-paths';

export default defineConfig({
    plugins: [
        viteTsconfigPaths(),
    ],
    server: {
        port: 4200,
    },
    build: {
        outDir: 'dist',
    },
});
Folder Structure
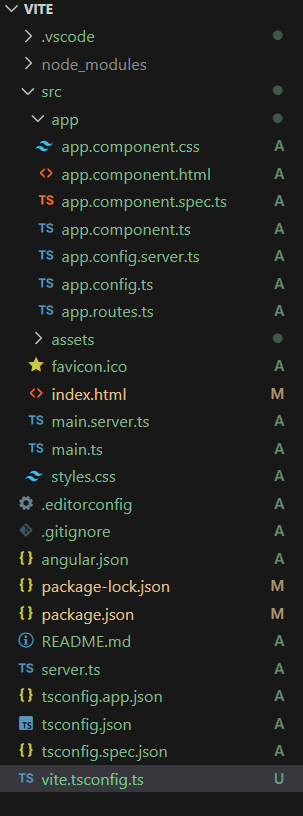 Folder Structure
Dependencies
"dependencies": {
    "@angular/animations": "^17.3.0",
    "@angular/common": "^17.3.0",
    "@angular/compiler": "^17.3.0",
    "@angular/core": "^17.3.0",
    "@angular/forms": "^17.3.0",
    "@angular/platform-browser": "^17.3.0",
    "@angular/platform-browser-dynamic": "^17.3.0",
    "@angular/platform-server": "^17.3.0",
    "@angular/router": "^17.3.0",
    "@angular/ssr": "^17.3.0",
    "express": "^4.18.2",
    "rxjs": "~7.8.0",
    "tslib": "^2.3.0",
    "zone.js": "~0.14.3"
}
Step 4: Modify index.html
index.html: Vite requires an index.html file at the root of your project. You might need to modify or create this file to fit your Angular project structure. Ensure it includes the necessary <script> tags for your application.
HTML
<!--index.html-->

<!DOCTYPE html>
<html lang="en">

<head>
    <meta charset="UTF-8">
    <meta name="viewport"
     content="width=device-width,
      initial-scale=1.0">
    <title>My Angular App</title>
</head>

<body>
    <app-root></app-root>
    <script type="module" src="/src/main.ts"></script>
</body>

</html>
Step 5: Add Scripts to package.json
Modify the scripts section of your package.json to use Vite for development and build tasks:
"scripts": {
    "start": "vite",
    "build": "vite build",
    "serve": "vite preview"
}
Step 6: Run Your Application
Now you can start your application with Vite:
npm start
Output
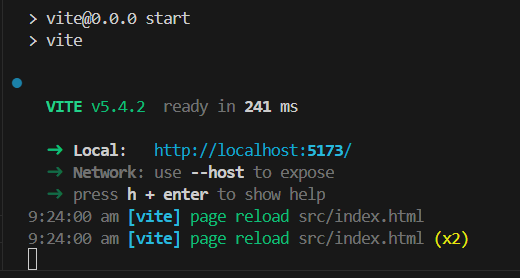 Output of Custom Vite Config Settings
Explore
AngularJS Basics
AngularJS Directives
AngularJS Filters
AngularJS Converting Functions
AngularJS Comparing Functions
AngularJS Questions
AngularJS Examples
2 min read