Adding Texture to a Mesh in Python Open3d
Last Updated :
23 Jul, 2025
Open3D is seen as a contemporary library that deals with the processing and visualization of 3D information. It is commonly used for working with 3D meshes, point clouds, and other types of geometric data. Amongst the important characteristics of 3D rendering are putting textures on the meshes which make them look more appealing by mapping images onto the three-dimensional models.
This article shows how to apply texture on a 3D mesh using Python and Open3D. We will cover all the steps including loading in a mesh, applying texture, displaying it as well as saving it as a textured file.
Prerequisites
To start coding, we ought to have Open3D on our computer. We can use the pip to download it:
pip install open3d
In addition to this, make sure that there is a mesh file (a .obj file) and an image file, which will be used as the texture (like .jpg or .png). These two files are available on the internet, we can download them for free and use them.
Loading a Mesh
We can start by loading a 3D object using Open3D, for instance, we will employ an .obj file. This is the process used when loading a mesh:
Python
import open3d as o3d

#Load the mesh from a file
mesh = o3d.io.read_triangle_mesh("path_to_your_mesh.obj")

#check if the mesh has vertex normals and compute them if missing
if not mesh.has_vertex_normals():
  mesh.compute_vertex_normals()

#Display the mesh before applying any texture
o3d.visualization.draw_geometries([mesh], mesh_show_wireframe=True)
To get the mesh in this code, we use the read_triangle_mesh() and also compute its vertex normals so that it can be rendered properly.
Applying Texture
To apply texture to the mesh, we need a texture image that we can map to the mesh. Here's how to apply the texture:
Python
import numpy as np

#Load the texture image
texture_image = o3d.io.read_image("path_to_your_texture.jpg")

#Assign the texture image to mesh
mesh.textures = [texture_image]

#Display the textured mesh
o3d.visualization.draw_geometries([mesh], mesh_show_texture=True)
In this step, the texture image is loaded and assigned to the mesh using the textures attribute. If the mesh contains UV coordinates, the texture will be mapped accordingly.
Displaying the Textured Mesh
An Open3D window allows for the visualization of a textured mesh. This is how you display a textured mesh:
Python
# Display the textured mesh
o3d.visualization.draw_geometries([mesh], mesh_show_texture=True)
A window showing the mesh onto which the texture has been applied will pop-up. This interactive Open3D viewer provides you with options such as rotating, zooming and panning around the mesh.
Saving the Textured Mesh
Once the texture has been successfully applied and verified, we can save the textured mesh to a file for later use. Here's how to save it:
Python
#Save the textured mesh to an output file (ex: in .obj format)
o3d.io.write_triangle_mesh("output_mesh_write_texture.obj", mesh)
This code will export the textured mesh to an .obj file.
Complete Code
Here's the complete example code:
Python
import open3d as o3d

#Load the mesh from a file
mesh = o3d.io.read_triangle_mesh("Mickey Mouse.obj")

#Check if the mesh has vertex normals and compute them if missing
if not mesh.has_vertex_normals():
  mesh.compute_vertex_normals()

#Display the mesh before applying any texture
o3d.visualization.draw_geometries([mesh], mesh_show_wireframe=True)

#Load the texture image
texture_image = o3d.io.read_image("Mickey Mouse.jpg")

#Assign the texture image to the mesh
mesh.textures = [texture_image]

#Display the textured mesh
o3d.visualization.draw_geometries([mesh], mesh_show_texture=True)

#Save the textured mesh to an output file (ex: .obj format)
o3d.io.write_triangle_mesh("output_mesh_with_texture.obj", mesh)
Make sure to have both the mesh '.obj' file and the textured image ('.jpg or .png') in our project directory, the project directory looks like:
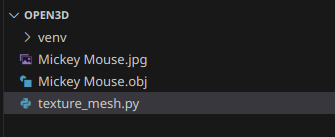 project structure
Output
Conclusion
Applying textures in an exceedingly simple way to 3D meshes with Open3D for the purposes of creating three-dimensional models that are more realistic and easier to visualize is very helpful. The tutorial began from saving the final result, displaying and applying using both describing how we got here via loading a mesh. Additionally, Open3D allows one to discover more sophisticated texturing methods such as UV mapping or multi-texturing techniques.
Explore
Python Fundamentals
Python Data Structures
Advanced Python
Data Science with Python
Web Development with Python
Python Practice