Working with PDF files in Python
Last Updated :
08 Mar, 2024
All of you must be familiar with what PDFs are. In fact, they are one of the most important and widely used digital media. PDF stands for Portable Document Format. It uses .pdf extension. It is used to present and exchange documents reliably, independent of software, hardware, or operating system.
Invented by Adobe, PDF is now an open standard maintained by the International Organization for Standardization (ISO). PDFs can contain links and buttons, form fields, audio, video, and business logic.
In this article, we will learn, how we can do various operations like:
- Extracting text from PDF
- Rotating PDF pages
- Merging PDFs
- Splitting PDF
- Adding watermark to PDF pages
Installation: Using simple python scripts!
We will be using a third-party module, pypdf.
pypdf is a python library built as a PDF toolkit. It is capable of:
- Extracting document information (title, author, …)
- Splitting documents page by page
- Merging documents page by page
- Cropping pages
- Merging multiple pages into a single page
- Encrypting and decrypting PDF files
- and more!
To install pypdf, run the following command from the command line:
pip install pypdf
This module name is case-sensitive, so make sure the y is lowercase and everything else is uppercase. All the code and PDF files used in this tutorial/article are available here.
1. Extracting text from PDF file
Python
from pypdf import PdfReader
reader = PdfReader('example.pdf')
print(len(reader.pages))
page = reader.pages[0]
print(page.extract_text())
|
The output of the above program looks like this:
20
PythonBasics
S.R.Doty
August27,2008
Contents

1Preliminaries
4
1.1WhatisPython?...................................
..4
1.2Installationanddocumentation....................
.........4 [and some more lines...]
Let us try to understand the above code in chunks:
reader = PdfReader('example.pdf')
- Here, we create an object of PdfReader class of pypdf module and pass the path to the PDF file & get a PDF reader object.
print(len(reader.pages))
- pages property gives the number of pages in the PDF file. For example, in our case, it is 20 (see first line of output).
pageObj = reader.pages[0]
- Now, we create an object of PageObject class of pypdf module. PDF reader object has function pages[] which takes page number (starting from index 0) as argument and returns the page object.
print(pageObj.extract_text())
- Page object has function extract_text() to extract text from the PDF page.
Note: While PDF files are great for laying out text in a way that’s easy for people to print and read, they’re not straightforward for software to parse into plaintext. As such, pypdf might make mistakes when extracting text from a PDF and may even be unable to open some PDFs at all. It isn’t much you can do about this, unfortunately. pypdf may simply be unable to work with some of your particular PDF files.
2. Rotating PDF pages
Python
from pypdf import PdfReader, PdfWriter
def PDFrotate(origFileName, newFileName, rotation):
reader = PdfReader(origFileName)
writer = PdfWriter()
for page in range(len(reader.pages)):
pageObj = reader.pages[page]
pageObj.rotate(rotation)
pdfWriter.add_page(pageObj)
newFile = open(newFileName, 'wb')
pdfWriter.write(newFile)
newFile.close()
def main():
origFileName = 'example.pdf'
newFileName = 'rotated_example.pdf'
rotation = 270
PDFrotate(origFileName, newFileName, rotation)
if __name__ == "__main__":
main()
|
Here, you can see how the first page of rotated_example.pdf looks like ( right image) after rotation:
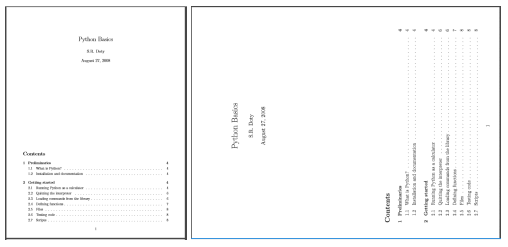
Some important points related to the above code:
- For rotation, we first create a PDF reader object of the original PDF.
writer = PdfWriter()
- Rotated pages will be written to a new PDF. For writing to PDFs, we use the object of PdfWriter class of pypdf module.
for page in range(len(pdfReader.pages)):
        pageObj = pdfReader.pages[page]
        pageObj.rotate(rotation)
        pdfWriter.add_page(pageObj)
- Now, we iterate each page of the original PDF. We get page object by .pages[] method of PDF reader class. Now, we rotate the page by rotate() method of page object class. Then, we add a page to PDF writer object using addage() method of PDF writer class by passing the rotated page object.
newFile = open(newFileName, 'wb')
pdfWriter.write(newFile)
newFile.close()
- Now, we have to write the PDF pages to a new PDF file. Firstly, we open the new file object and write PDF pages to it using write() method of PDF writer object. Finally, we close the original PDF file object and the new file object.
3. Merging PDF files
Python
from pypdf import PdfMerger
def PDFmerge(pdfs, output):
pdfMerger = PdfMerger()
for pdf in pdfs:
pdfMerger.append(pdf)
with open(output, 'wb') as f:
pdfMerger.write(f)
def main():
pdfs = ['example.pdf', 'rotated_example.pdf']
output = 'combined_example.pdf'
PDFmerge(pdfs=pdfs, output=output)
if __name__ == "__main__":
main()
|
The output of the above program is a combined PDF, combined_example.pdf, obtained by merging example.pdf and rotated_example.pdf.
- Let us have a look at important aspects of this program:
pdfMerger = PdfMerger()
- For merging, we use a pre-built class, PdfMerger of pypdf module.
Here, we create an object pdfMerger of PDF merger class
for pdf in pdfs:
    pdfmerger.append(open(focus, "rb"))
- Now, we append file object of each PDF to PDF merger object using the append() method.
with open(output, 'wb') as f:
    pdfMerger.write(f)
- Finally, we write the PDF pages to the output PDF file using write method of PDF merger object.
4. Splitting PDF file
Python
from pypdf import PdfReader, PdfWriter
def PDFsplit(pdf, splits):
reader = PdfReader(pdf)
start = 0
end = splits[0]
for i in range(len(splits)+1):
writer = PdfWriter()
outputpdf = pdf.split('.pdf')[0] + str(i) + '.pdf'
for page in range(start,end):
writer.add_page(reader.pages[page])
with open(outputpdf, "wb") as f:
writer.write(f)
start = end
try:
end = splits[i+1]
except IndexError:
end = len(reader.pages)
def main():
pdf = 'example.pdf'
splits = [2,4]
PDFsplit(pdf, splits)
if __name__ == "__main__":
main()
|
Output will be three new PDF files with split 1 (page 0,1), split 2(page 2,3), split 3(page 4-end).
No new function or class has been used in the above python program. Using simple logic and iterations, we created the splits of passed PDF according to the passed list splits.
5. Adding watermark to PDF pages
Python
from pypdf import PdfReader
def add_watermark(wmFile, pageObj):
reader = PdfReader(wmFileObj)
pageObj.merge_page(reader.pages[0])
return pageObj
def main():
mywatermark = 'watermark.pdf'
origFileName = 'example.pdf'
newFileName = 'watermarked_example.pdf'
pdfFileObj = open(origFileName, 'rb')
reader = PdfReader(pdfFileObj)
writer = PdfWriter()
for page in range(len(reader.pages)):
wmpageObj = add_watermark(mywatermark, reader.pages[page])
writer.add_page(wmpageObj)
newFile = open(newFileName, 'wb')
writer.write(newFile)
newFile.close()
if __name__ == "__main__":
main()
|
Here is how the first page of original (left) and watermarked (right) PDF file looks like:
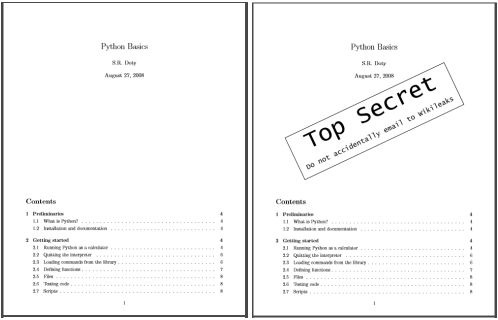
- All the process is same as the page rotation example. Only difference is:
wmpageObj = add_watermark(mywatermark, pdfReader.pages[page])
- Page object is converted to watermarked page object using add_watermark() function.
- Let us try to understand add_watermark() function:
reader = PdfReader(wmFile)
pageObj.merge_page(reader.pages[0])
wmFileObj.close()
return pageObj
- Foremost, we create a PDF reader object of watermark.pdf. To the passed page object, we use merge_page() function and pass the page object of the first page of the watermark PDF reader object. This will overlay the watermark over the passed page object.
And here we reach the end of this long tutorial on working with PDF files in python.
Now, you can easily create your own PDF manager!
References:
If you like GeeksforGeeks and would like to contribute, you can also write an article using write.geeksforgeeks.org or mail your article to review-team@geeksforgeeks.org. See your article appearing on the GeeksforGeeks main page and help other Geeks.
Please write comments if you find anything incorrect, or if you want to share more information about the topic discussed above.
Like Article
Suggest improvement
Share your thoughts in the comments
Please Login to comment...