WordPress Insert Media
Last Updated :
21 Mar, 2022
WordPress is a tool and an open-source Content Management System that is totally based on PHP and MySql which is used to create a dynamic website. WordPress was written in PHP language by Matt Mullenweg. It is one of the most popular interfaces that allow users to customize and manage the website from its back-end content management system. To organize the whole process of creating, storing, and showcasing web content in an optimal way WordPress can be used. WordPress was the tool that enhances the regular typography of day-to-day writing, nowaday it is modified.
In this article, we are going to discuss how we can Insert Media files in WordPress Posts or Pages.
Insert Media files in WordPress Posts or Pages: WordPress allows users to insert media files to their website posts and pages. You can insert any type of media files that you want to insert like videos, galleries, test files, audio, and images. You can insert it from libraries, from local storage, or from URLs.
Let’s see the steps to Insert Media files in WordPress Posts or Pages Easily and Quickly:
Step 1: First go to the WordPress login panel and try to login into the WordPress Dashboard by providing the username and password. To access the login panel You can add ‘/wp-login.php’ at the end of your website URL.

WordPress Login Panel
After login into your own WordPress, you will be able to see a dashboard in a similar way to this:
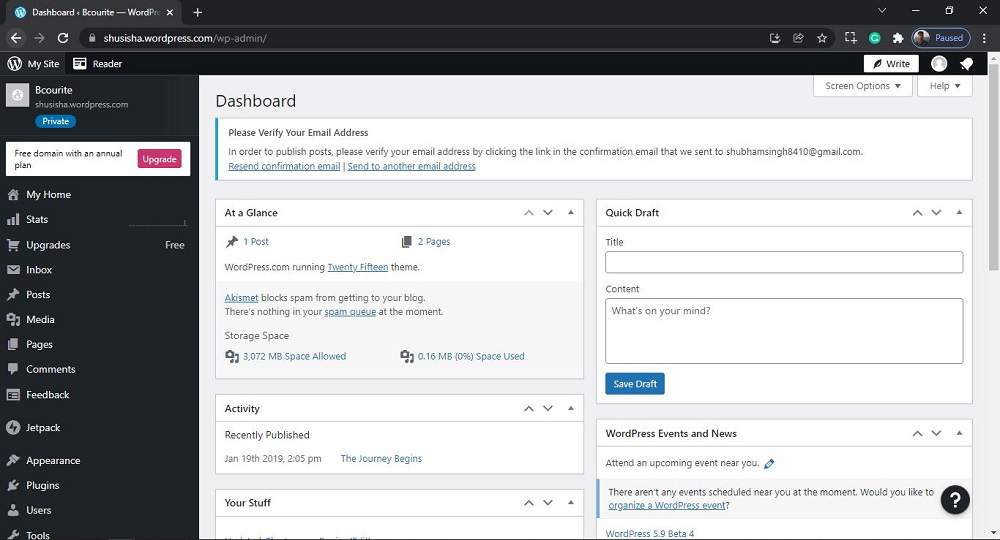
WordPress Dashboard
Step 2: We have to search and open the Add New section under Posts. For that,
From the menu option on the left side of the WordPress page. Go to the Posts >> Add New.

Opening the Add New Post Section
After clicking on Add New section under Posts, you will see a similar Page like this:

Add New Post Section
Step 3: Now you just need to click on the Toggle block inserter to insert media in the post.

After clicking the Toggle block inserter, you will see a similar Page like this:

Step 4: Now search for the Media section, once you search the media section you will be able to see the multiple options to insert different media files.

Media Section1

Media Section2
Here in this example, we are inserting the image in the post, just click on the Image icon to insert the image, after clicking the icon, the image section will be open in a similar way as shown in the screenshot.

Here you have 3 different options to insert the image:
- Upload the image. Check the WordPress Add Media to know more.
- Select the images from Media Library, google photos, etc.
- Inserting the URL.

After Inserting the Image, the post will be updated with the inserted image in a similar way as shown in the screenshot. You can also update the content as you want.

Step 5: Click on the Publish Button, once Post/page content is updated. After clicking the Publish Button, a confirmation screen will be appearing there like this. Again click on Publish button to publish the post.

You will get post Published messages and now live statues for the post.

That’s it, you have now successfully learned how to insert media in WordPress posts or pages on your WordPress website.
Like Article
Suggest improvement
Share your thoughts in the comments
Please Login to comment...