WordPress Host Transfer
Last Updated :
13 Jan, 2023
WordPress Host Transfer is the process to migrate your data from one server(usually hosting services like GoDaddy, Hostinger, Bluehost, etc.) to another hosting server of a different service provider.
An important point to remember is that Host Transfer Does Not mean **Domain Transfer** i.e changing your WordPress website URL (like www.example.com) name to a different name.
Advantages of Host Transfer:
- To get all WordPress blogs or pages under a single host for better manageability.
- Faster access to user by hosting the website on the server nearer to the targeted audience location.
- Different host servers have different costs and migrating to another host can be cost-effective.
Disadvantages of Host Transfer:
- Data Loss is the most common side effect of transferring your website between different servers. So, maintaining a data backup of all items is recommended always.
- Downtime in between Migration occurs if the mapping of the DNS record of the website is not completed by the time the new server is ready. DNS is used by browsers and clients to get the host IP address. So, keeping the same URL we can transfer to another host but there can be a time when no host is serving the website. Better Solution is to keep the current Host running till the DNS records are updated successfully.
Steps For Host Transfer:
Step 1: First login to the current hosting provider cPanel or hPanel ( These are the webpages from which you manage your host server).
Step 2: From Databases Menu, Select PhpMyAdmin.
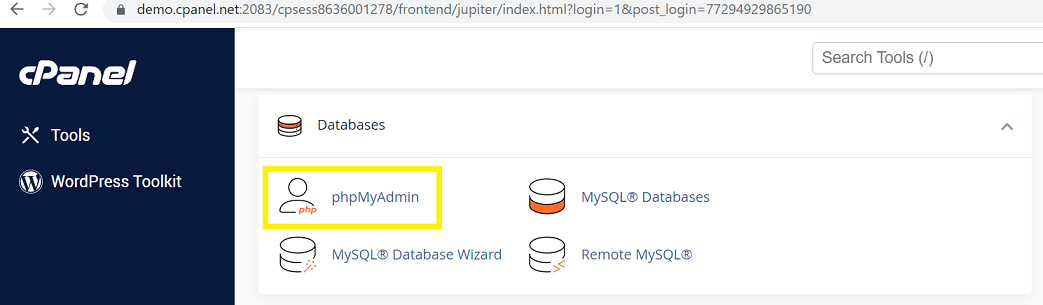
cPanel Database Menu
Step 3: Select the Database of the Website which is to be transferred. Click on the Export tab and then Quick for the type of export, and SQL as the file type. (Remember the database name, it is required in the future).
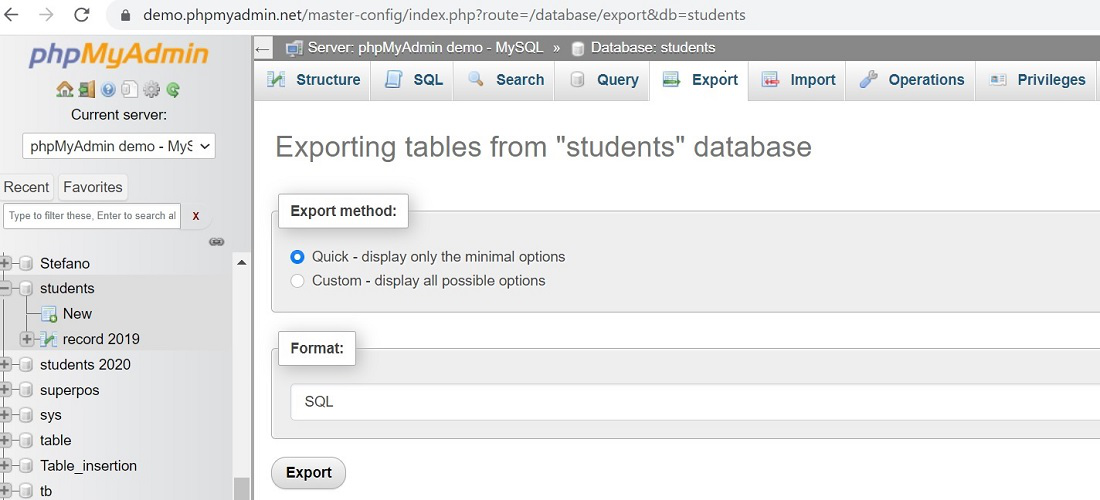
PhpMyAdmin Export Menu
Step 4: Save the downloaded .sql file.
Step 5: Now Get the FTP details of the current website by navigating to FTP Accounts sections from the cpanel or hpanel of the current host.
Note Down: Write down the below details somewhere safe and accessible, as we will need this before:
Host:ftp://domain.tld
username: username
Password: password
Step 6: Download and install FTP Client WinSCp(https://winscp.net/eng/index.php )or FileZilla .
Step 7: After Opening enter, the details noted down before.

WinSCP Connect Menu
Step 8: Now select all files on the Right Side Pane and drag and save them on the left side Folder (Create an Empty Folder).Including all folders (wp-content,wp-includes,wp-admin).
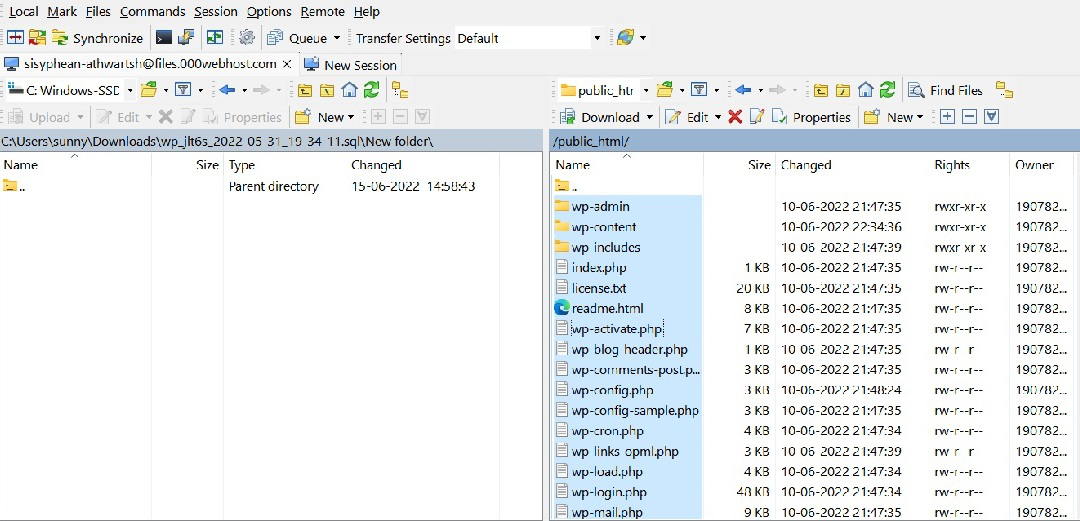
WinSCP Transfer
Step 9: Now Login to the new Host cPanel.
Step 10: Select Site Publisher, create a website with the same name, and select Under Construction template. Then Publish.
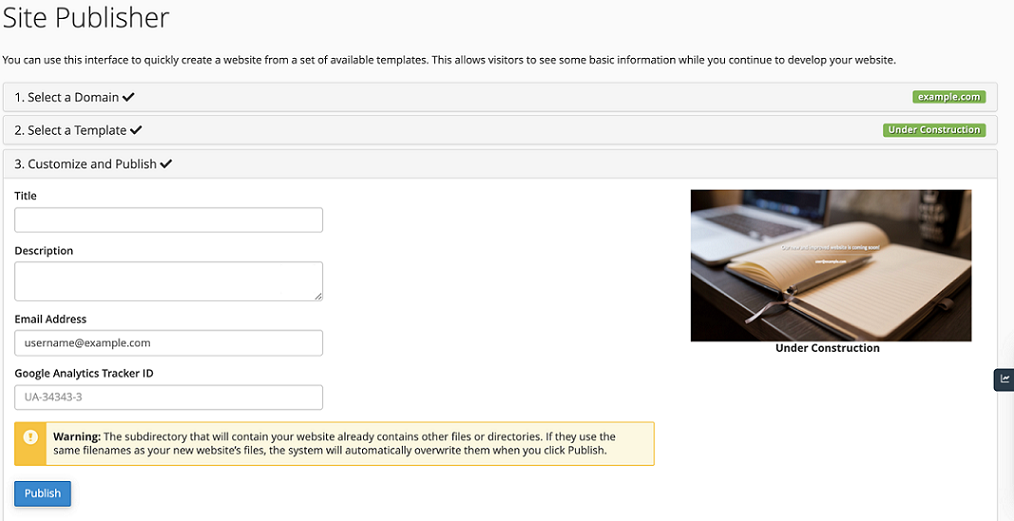
Site Publish
Step 11: Get FTP details of this new host website and log in to the FTP Client.
Step 12: Select all the copied files from step 8 and copy them to the right side panel i.e the new host.
Step13: Now All your website data is transferred except for the Database.
Step14: Now Go to the folder where u copied the website data.
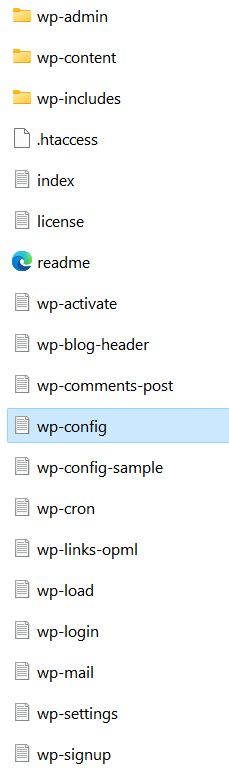
Open wp-config.php File
Step 15: Now from the copied files open “wp-config.php “on the Notepad. And note down the username after ‘DB_USER’ and password of Database after ‘DB_PASSWORD’.
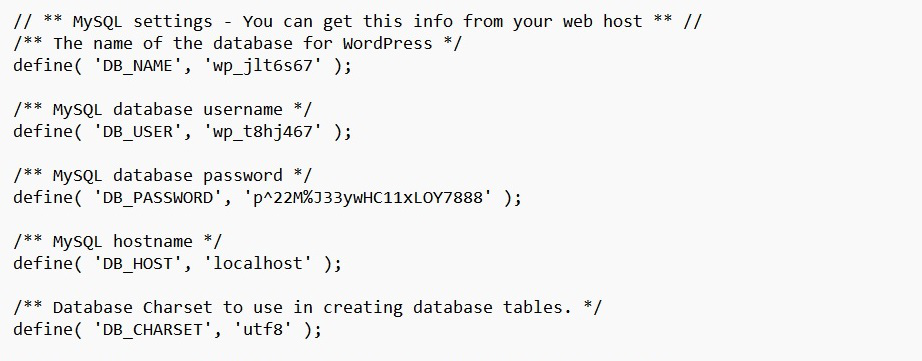
wp-config.php
Step 16: Select Databases and MySQL Databases then create a database and user with the data copied from step 15.
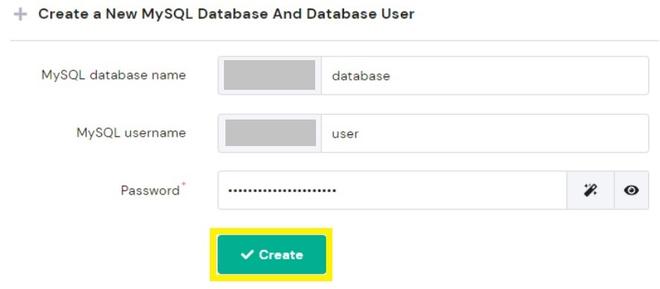
Create Database and User
Step 17: Now login to PhpMyAdmin of a new host.
Step 18: Select the Database and go to import. Select browse from the computer to upload the downloaded .sql file (from step 4). And Click Go.
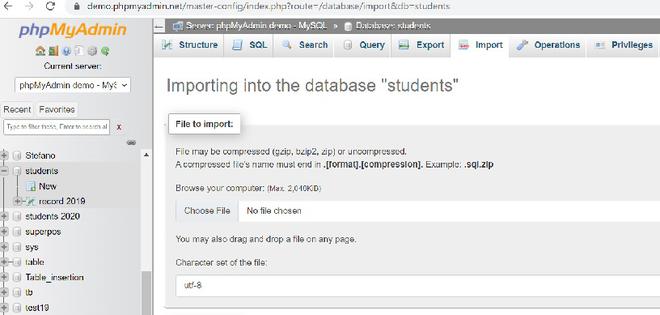
PhpMyAdmin Import File
Step 19: Now all the database content is also copied.
Step 20: Finally get the New Host DNS Nameservers (available on the right side of cPanel )and save them into the domain provider. For Example, if u have a GoDaddy domain, Select Manage DNS and Click Change. Enter the Nameservers and click Save.
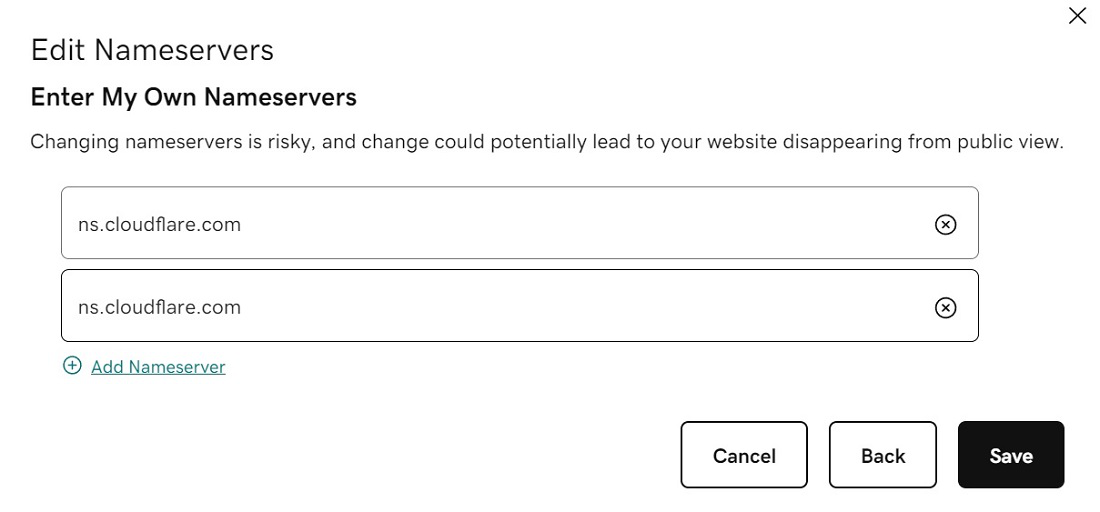
Change Nameservers
Step 21: After the DNS update (which can take up to 3 days) the users will be directed to the new host server.
Congratulations you have successfully transferred the website from one Host to Another.
Like Article
Suggest improvement
Share your thoughts in the comments
Please Login to comment...