Wand selective_blur() function in Wand python
Last Updated :
10 Mar, 2023
Another kind of Blur that can be performed using Wand library in python is Selective Blur. Selective blur is similar to normal blur. Difference is that it only effect the part of the image that have contrast below a given quantum threshold. A new attribute named as threshold is introduced in this function.
Syntax :
Python3
wand.image.selective_blur(radius= radius_value, sigma= sigma_value,
threshold= thrshold_value,
channel = "optional_channel_value")
|
Parameters :
| Parameter |
Input Type |
Description |
| radius |
numbers.Real |
the radius of the, in pixels, not counting the center pixel. |
| sigma |
numbers.Real |
the standard deviation, in pixels |
| threshold |
number.Real |
Only pixels within contrast threshold are effected. |
Image Used :
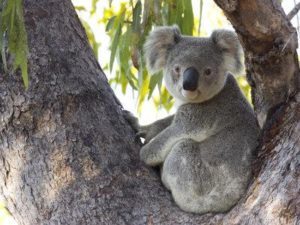
Example #1:
Python3
from wand.display import display
from wand.image import Image
with Image(filename ="koala.jpeg") as img:
img.selective_blur(radius = 8, sigma = 4,
threshold = 0.15 * img.quantum_range)
img.save(filename ="mb_koala.jpeg")
display(img)
|
Output:
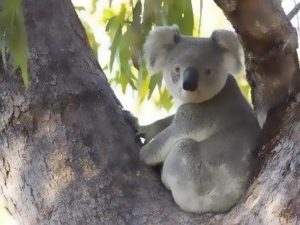
Example #2: Increase threshold value to 0.5.
Python3
from wand.display import display
from wand.image import Image
with Image(filename ="koala.jpeg") as img:
img.selective_blur(radius = 8, sigma = 4,
threshold = 0.25 * img.quantum_range)
img.save(filename ="mb_koala.jpeg")
display(img)
|
Output:

Like Article
Suggest improvement
Share your thoughts in the comments
Please Login to comment...