Vue.js Form Input Value Binding
Last Updated :
06 Apr, 2022
Vue.js is a progressive javascript framework for developing web user interfaces. It is a performant, approachable, and versatile framework. We can create Single Page Applications as well as Full Stack applications. It is built on top of HTML, CSS, and Javascript which makes it easier for developers to integrate Vue.js in any application at any stage.
Form Input Value Binding is handled by the v-model directive that helps to bind the static strings, to simplify the input value binding. The v-model can be used on different types of elements like input, textarea, checkbox, radio, and select. It automatically adjusts to the different DOM properties and event pairs as per the elements used.
The v-model can be used to create two-way data bindings on form input and textarea. The input with text types and textarea uses value property and input event to handle value binding. It does not count the placeholder text and initial value for checkbox, radio, and select elements.
Form Input Value Binding v-model for different elements:
- input and textarea: These elements use value property and input event.
- checkbox and radio type of input: These elements use the checked property and change event for the v-model.
- select element: It uses the value as a prop and change event.
Syntax: For the different input elements, we have different syntax and hence different approaches. Here is the list of syntaxes for the different elements.
- input element of type text: It stores a single line of text.
<input type="text" v-model="name" />
<p> {{ message }} </p>
- textarea element: The v-model store multiline text.
<textarea v-model="about"></textarea>
- input element of the checkbox type: The v-model stores either true or false.
<input type="checkbox" v-model="checked" />
- input element of the radio type: The v-model stores the value of the radio element.
<input type="radio" value="first" v-model="choose" />
<input type="radio" value="second" v-model="choose" />
- select element: The v-model stores the value of the option selected.
<select v-model="select">
  <option>A</option>
  <option>B</option>
  <option>C</option>
</select>
Installation Process:
Step 1: Create a new Vue.js project with the npm node.js package manager using the following command.
npm init vue@latest
Enter the project name and preset the project as follows:
Project Structure: After successful installation, the following project structure will be formed.
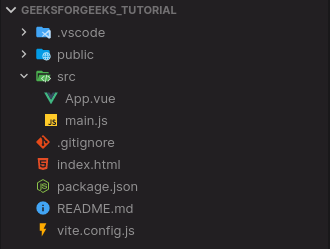
Project Structure
Example 1: input element – Single-line input
Here we have a single line input element with v-model as the name variable. The v-model will save the updated value in the input element.
App.vue
<script>
export default {
data() {
return {
name: "",
};
},
};
</script>
<template>
<center>
<h1 style="text-align: center; color: green">
GeeksforGeeks
</h1>
<strong>
Vue.js Form Input Value Binding
</strong>
<br />
</center>
<center>
<p>Input Element</p>
<input type="text"
placeholder="Your name"
v-model="name" />
<p>Name: {{ name }}</p>
</center>
</template>
|
Output:
Example 2: textarea element – multiline input
In this example, we have a textarea element that can store multiline input, and the v-model will handle the change event and store the updated value in a variable called about.
App.vue
<script>
export default {
data() {
return {
about: "",
};
},
};
</script>
<template>
<center>
<h1 style="text-align: center;
color: green">
GeeksforGeeks
</h1>
<strong>
Vue.js Form Input Value Binding
</strong>
<br />
</center>
<center>
<p>Textarea Element</p>
<textarea type="text"
placeholder="Your description"
v-model="about">
</textarea>
<p style="white-space: pre-line">
{{ about }}
</p>
</center>
</template>
|
Output:
Example 3: checkbox element
In this example, we have a checkbox type of input element where we can choose either true or false based on our selection of the input element.
App.vue
<script>
export default {
data() {
return {
check: "",
};
},
};
</script>
<template>
<center>
<h1 style="text-align:
center; color: green">
GeeksforGeeks
</h1>
<strong>
Vue.js Form Input Value Binding
</strong>
<br />
</center>
<center>
<p>Checkbox Element</p>
<label for="checkbox">
GeeksforGeeks is best computer science portal for geeks:
{{ check }}
</label>
<input type="checkbox"
name="checkbox"
v-model="check" />
</center>
</template>
|
Output:
Example 4: radio element
In the following example, we have three radio options from which we can choose any one of them and the chosen value will be stored by the v-model which we can display on our webpage.
App.vue
<script>
export default {
data() {
return {
tutorial: "",
};
},
};
</script>
<template>
<center>
<h1 style="text-align:
center; color: green">
GeeksforGeeks
</h1>
<strong>
Vue.js Form Input Value Binding
</strong>
<br />
</center>
<center>
<p>Radio Input Element</p>
<p>Tutorial: {{ tutorial }}</p>
<input
type="radio"
name="Data Structures"
value="Data Structures"
v-model="tutorial"/>
<label for="Data Structures">
Data Structures
</label>
<input
type="radio"
name="Machine Learning"
value="Machine Learning"
v-model="tutorial"/>
<label for="Machine Learning">
Machine Learning
</label>
<input
type="radio"
name="Web Development"
value="Web Development"
v-model="tutorial"/>
<label for="Web Development">
Web Development
</label>
</center>
</template>
|
Output:
Example 5: select element
In this example, we have a list of items in the select element from where we will select one of the options. The v-model is written for only the select element and fetches the value from the option elements by itself.
App.vue
<script>
export default {
data() {
return {
tutorial: "",
};
},
};
</script>
<template>
<center>
<h1 style="text-align: center;
color: green">
GeeksforGeeks
</h1>
<strong>
Vue.js Form Input Value Binding
</strong>
<br />
</center>
<center>
<p>Select Element</p>
<p>Tutorial: {{ tutorial }}</p>
<label for="select">Choose tutorial</label>
<select name="select" v-model="tutorial">
<option>Data Structures</option>
<option>Algorithms</option>
<option>Web Development</option>
</select>
</center>
</template>
|
Output:
Reference: https://vuejs.org/guide/essentials/forms.html#value-bindings
Like Article
Suggest improvement
Share your thoughts in the comments
Please Login to comment...