Google Firebase is an integrated service that uses all the facilities the backend can provide. In traditional app development/web development, the application’s front end is connected to a server (also a computer device) in which the authentication program, database program, metadata of the program, etc. are stored. This whole picture changed when Google Firebase was introduced. Google Firebase provides all these services from their servers. Google Firebase is a go-to for developers who don’t have that much knowledge of backend programming.
Step By Step Implementation
Step 1: Adding dependencies to pubspec.yaml file
To be able to use Google Firebase service in the app/web you’ll first need to get these two dependencies to your Flutter codebase.
dependencies:
    firebase_core: ^2.3.0
    firebase_auth: ^4.1.3
If you are developing a web app then use the following dependencies than the above once.
dependencies:
    firebase_auth: ^4.1.3
    firebase_core_web: ^2.0.1
Note: These dependencies only work with Flutter 3.0.0+ versions, to update the Flutter version type flutter update in the command prompt/terminal.
Step 2: Create a Firebase Project on Google Firebase Console
As we add dependencies to the Flutter codebase we also need to create a project service on Google Firebase Console. You can name your project according to your Flutter project name or any other preferable name.
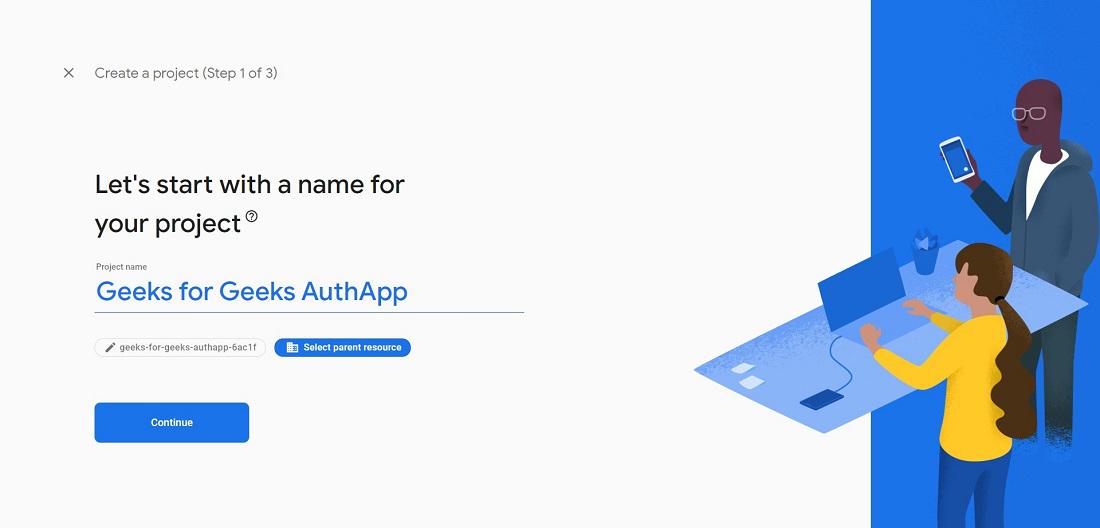
Name the Google Firebase Project
Step 3: Activating Email-Password Service on Google Firebase
Now we can activate the email-password service in the Firebase Console. This service is the actual backend service that Google Firebase provides.
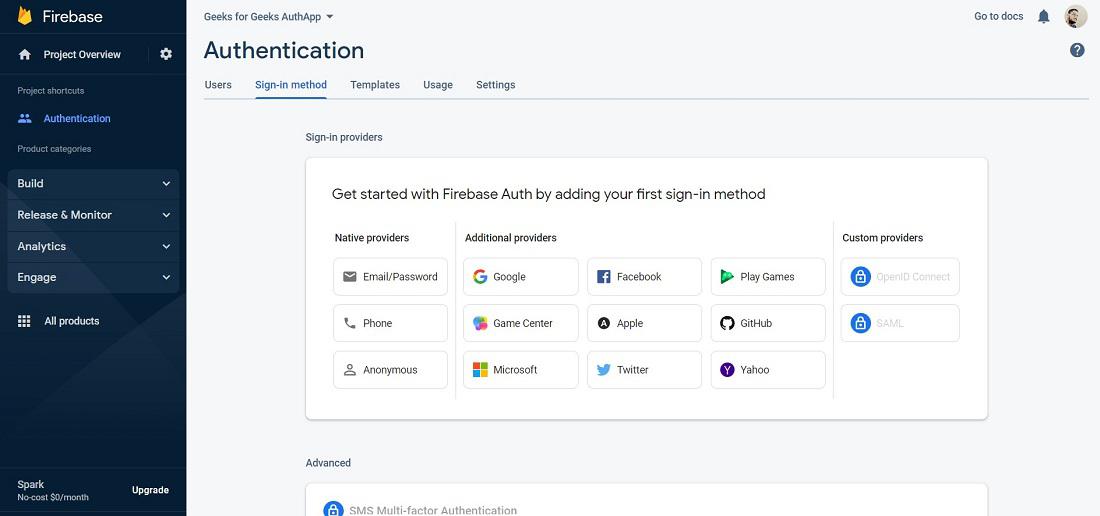
List of service providers, you need to select Email/Password
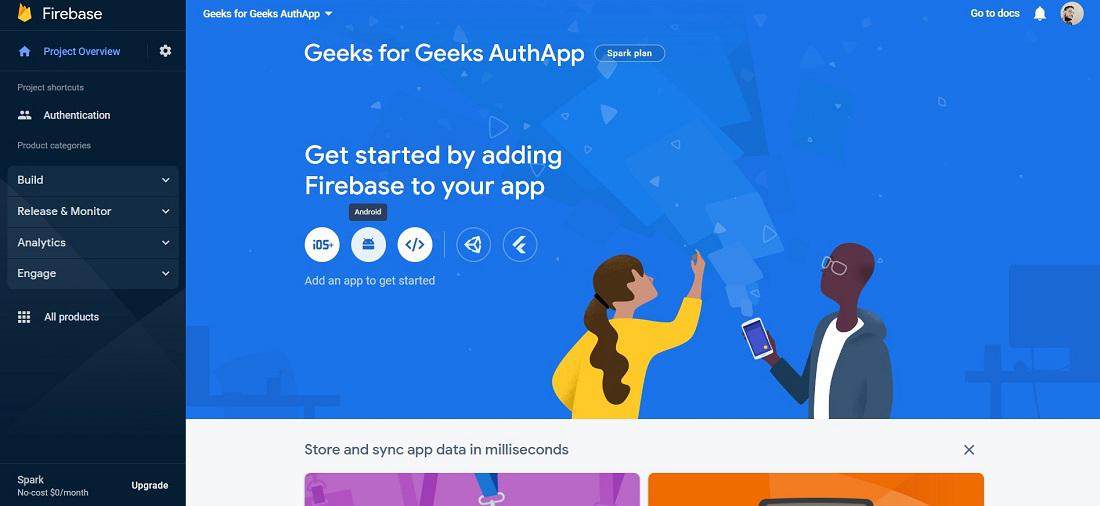
Step 4: Registering Flutter Project to Firebase Console
Go to the home screen of the Firebase Console, and add your android app to the console.
Adding Flutter app to Firebase Console
Now, you’ll see 3 steps screen in the first step you’ll need to add the android package name, which is in the Flutter codebase in the following path.
Path: android/app/build.gradle
After opening this file go to the dependencies section and copy the applicationID, for example, it will be like the following line.
applicationID: com.example.geeks_for_geeks_fire_auth_web
Paste this into the Firebase console and click on the register app button.
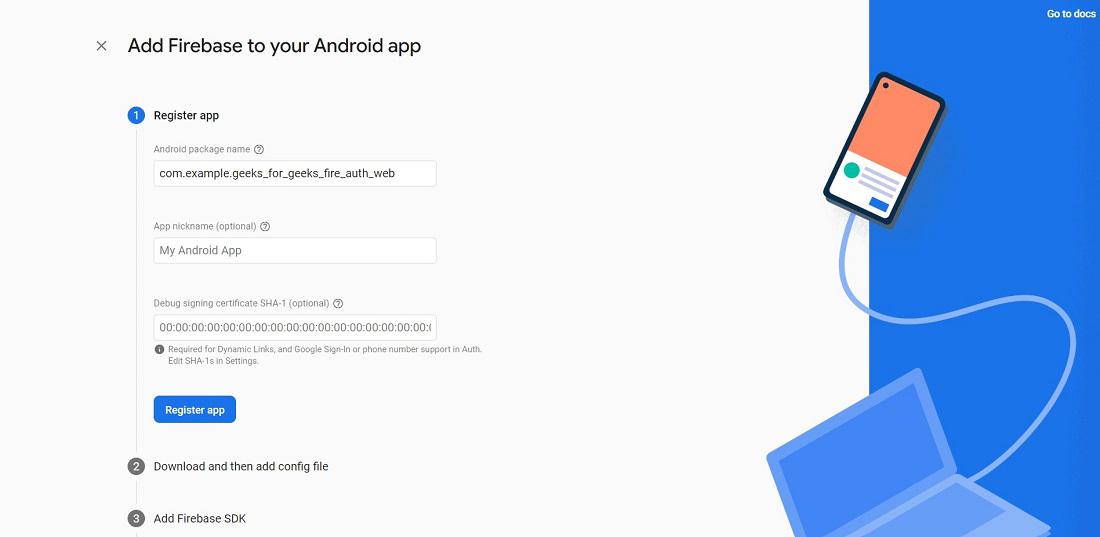
Registering android package
Download the google-services.json file to the same path we obtain the android package name. After downloading the file this last step is important to make Firebase services work in your app/web. Go to the following path and paste the classpath line under the dependencies section of that file.
Path: android/build.gradle
After pasting the line that section should look like the following code.
build.gradle file ↓
buildscript {
    ext.kotlin_version = '1.6.10'
    repositories {
        google()
        mavenCentral()
    }
    dependencies {
        classpath 'com.android.tools.build:gradle:7.1.2'
        classpath "org.jetbrains.kotlin:kotlin-gradle-plugin:$kotlin_version"
        classpath 'com.google.gms:google-services:4.3.13'
    }
}
allprojects {
    repositories {
        google()
        mavenCentral()
    }
}
Now, the next code block of the same level on the Firebase console will be done on the file that is on the following path.
Path: android/app/build.gradle
Copy id ‘com.google.gms.google-services’ this like and write it as apply plugin: ‘com.google.gms.google-services’ paste this line to build.gradle file on the above path. After pasting the line code should look like the following code.
def flutterVersionName = localProperties.getProperty('flutter.versionName')
if (flutterVersionName == null) {
    flutterVersionName = '1.0'
}
apply plugin: 'com.android.application'
apply plugin: 'kotlin-android'
apply plugin: 'com.google.gms.google-services'
apply from: "$flutterRoot/packages/flutter_tools/gradle/flutter.gradle"
android {
    compileSdkVersion flutter.compileSdkVersion
    ndkVersion flutter.ndkVersion
Now in the same file under the dependencies section paste these two lines.
implementation platform('com.google.firebase:firebase-bom:31.1.0')
implementation 'com.google.firebase:firebase-analytics'
The code should look like the following part.
flutter {
    source '../..'
}
dependencies {
    implementation platform('com.google.firebase:firebase-bom:31.1.0')
    implementation 'com.google.firebase:firebase-analytics'
    implementation "org.jetbrains.kotlin:kotlin-stdlib-jdk7:$kotlin_version"
}
Step 5: Coding a Signup/Login Page for the App/Web
This section is totally up to you, you can code the page however you want to, but there are a few code snippets that need to be integrated with the Firebase Auth library that will be covered now.
Path: lib/pages/
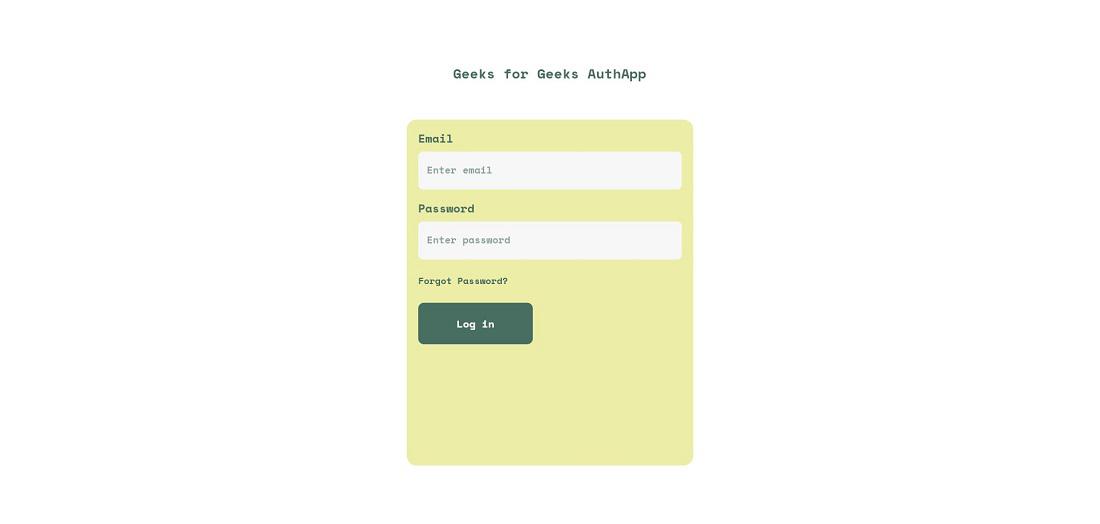
Login Page
Step 6: Creating fireAuth.dart file
This fireAuth.dart file will contain 3 functions, signInWithEmailAndPassword(), createUserWithEmailAndPassword() and signOut(). All these functions are Firebase functions.
signInWithEmailAndPassword(): This function requires two string parameters, one is email and another one is password.
Path: lib/controllers/
Dart
Future<void> signInWithEmailAndPassword({
required String email,
required String password,
}) async {
await _firebaseAuth.signInWithEmailAndPassword(
email: email,
password: password,
);
}
|
createUserWithEmailAndPassword(): Similar to the sign-in function this function also needs two parameters email and password.
Dart
Future<void> createUserWithEmailAndPassword({
required String email,
required String password,
}) async {
await _firebaseAuth.createUserWithEmailAndPassword(
email: email,
password: password,
);
}
|
signOut(): This function simply sign-out the currently logged-in user, and switches back to the login page.
Dart
Future<void> signOut() async {
await _firebaseAuth.signOut();
}
|
The Completed Dart file should look like the following code:
Dart
import 'package:firebase_auth/firebase_auth.dart';
class FireAuth {
final FirebaseAuth _firebaseAuth = FirebaseAuth.instance;
User? get currentUser => _firebaseAuth.currentUser;
Stream<User?> get authStateChanges => _firebaseAuth.authStateChanges();
Future<void> signInWithEmailAndPassword({
required String email,
required String password,
}) async {
await _firebaseAuth.signInWithEmailAndPassword(
email: email,
password: password,
);
}
Future<void> createUserWithEmailAndPassword({
required String email,
required String password,
}) async {
await _firebaseAuth.createUserWithEmailAndPassword(
email: email,
password: password,
);
}
Future<void> signOut() async {
await _firebaseAuth.signOut();
}
}
|
Step 7: Writing Login/Signup Functions using Exception Catching
We are writing this function because by catching exceptions/errors in the process you will be able to show it in the snack bar notification. The following are variables defined in login/signup screen files.
Path: lib/pages/
String errormsg = "";
final TextEditingController _controllerEmail = TextEditingController();
final TextEditingController _controllerPassword = TextEditingController();
Dart
Future<void> signInWithEmailAndPassword() async {
try {
await FireAuth().signInWithEmailAndPassword(
email: _controllerEmail.text,
password: _controllerPassword.text,
);
} on FirebaseAuthException catch (e) {
setState(() {
errormsg = e.message!;
});
}
}
|
This function will either complete the task successfully or will return an error message. Similarly, the code for the signup function is below, for which the same three variables are used.
Dart
Future<void> createUserWithEmailAndPassword() async {
try {
await FireAuth().createUserWithEmailAndPassword(
email: _controllerEmail.text,
password: _controllerPassword.text,
);
} on FirebaseAuthException catch (e) {
setState(() {
errormsg = e.message!;
});
}
}
|
These functions will be called whenever the user taps of submit/login/signup button.
Step 8: Writing widgetTree.dart file
This file will decide which screen to show, i.e. if the user was logged in then it’ll show the home screen and if no user was logged in then it’ll show the login/signup screen.
Path: lib/
Dart
import 'package:flutter/material.dart';
import 'package:geeks_for_geeks_fire_auth_web/controllers/fireAuth.dart';
import 'package:geeks_for_geeks_fire_auth_web/pages/loginPage.dart';
import 'package:geeks_for_geeks_fire_auth_web/pages/dashboard.dart';
class WidgetTree extends StatefulWidget {
const WidgetTree({Key? key}) : super(key: key);
@override
State<WidgetTree> createState() => _WidgetTreeState();
}
class _WidgetTreeState extends State<WidgetTree> {
@override
Widget build(BuildContext context) {
return StreamBuilder(
stream: FireAuth().authStateChanges,
builder: (context, snapshot) {
if (snapshot.hasData) {
return const DashboardPage();
} else {
return const LoginPage();
}
},
);
}
}
|
Step 9: Updating main.dart file
To choose between the login/signup screen and the dashboard/home screen main.dart will be returning Future<void> as the return type.
Dart
import 'package:firebase_core/firebase_core.dart';
import 'package:firebase_core_web/firebase_core_web.dart';
import 'package:flutter/material.dart';
import 'package:flutter_screenutil/flutter_screenutil.dart';
import 'package:geeks_for_geeks_fire_auth_web/pages/loginPage.dart';
import 'package:geeks_for_geeks_fire_auth_web/utilities/palette.dart';
import 'package:geeks_for_geeks_fire_auth_web/widgetTree.dart';
Future<void> main() async {
WidgetsFlutterBinding.ensureInitialized();
await Firebase.initializeApp();
runApp(const GeeksForGeeksAuthWeb());
}
class GeeksForGeeksAuthWeb extends StatelessWidget {
const GeeksForGeeksAuthWeb({Key? key}) : super(key: key);
@override
Widget build(BuildContext context) {
return MaterialApp(
debugShowCheckedModeBanner: false,
theme: ThemeData(
backgroundColor: Palette.stormcoludDark,
fontFamily: 'SpaceMono',
),
home: WidgetTree(),
);
}
}
|
Like Article
Suggest improvement
Share your thoughts in the comments
Please Login to comment...