Upgrading from Python2 to Python3 on MacOS
Last Updated :
29 Dec, 2020
Python is a high level and general-purpose programming language. It is widely used in a variety of fields such that it fulfills the need of developers who are in the front end, backend, or both. It is being used rigorously in Machine Learning, Artificial Intelligence, Web Development, and in various other domains.
But, there’s an issue that mac devices come with python 2 as default and you cannot use Python 3 as your default in your device. In this article, we will look into the steps of changing the default python setting to Python 3 and discuss its pros and cons.
Disadvantages of Python 2:
Following are the list of disadvantages of using Python 2 on your Mac machine:
- The primary reason to get rid of Python 2 is that it is already discontinued since January 1, 2020.
- Community support of Python 2 is catastrophically decreasing.
- Syntax of Python 2 is comparatively difficult to understand.
- To store Unicode string value, you need to define them with “u”.
- For iteration, xrange() is used.
- Rules of ordering comparison are quite complex.
Advantages of Python 3 over Python 2:
The following list states the advantages of Python 3 over Python 2:
- Since Python 2 is discontinued and no more development will be carried out in Python 2 so sticking to Python 2 makes no sense. So, Python is obviously a go-to option.
- Community support of Python 3 is incredible.
- Syntax of Python 3 is made much simpler and understandable.
- Python 3 stores Unicode string value as default.
- For iteration, range() is used.
- We can port Python 2 to Python 3 but it is not that reliable.
- Rules of ordering comparison have been simplified.
- Library support of Python 3 is just fabulous.
And several more features are added as time is passing by, to read more on the difference between the Python 2 and Python 3 refer to this GeeksforGeeks article. Many of you must have installed python 3 from (python.org) but still, it might be showing python version is python 2. To make sure that this fact is true or not check your python version by running the below command in your terminal:
python --version
Output:
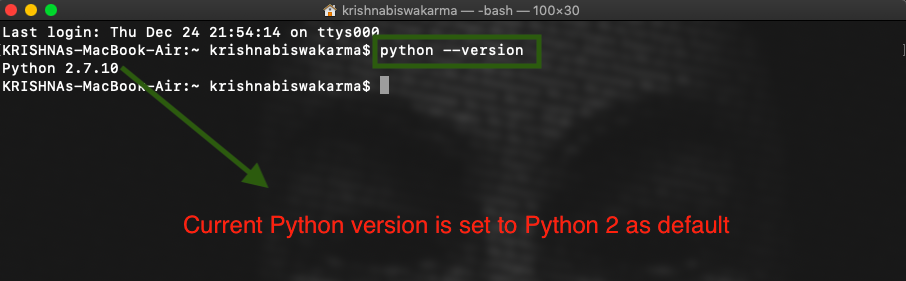
Check Python Version
To get rid of this issue follow the steps given below:
Installing Python 3 on the system:
Step 1: Firstly we have to change the Login Shell from Bash to Zsh. To change it navigate to System preferences and click on Users and Groups. Now Click on the Lock Icon and authenticate with your credentials. After authentication right-click on the current user and select Advanced Options and change the login shell from /bin/bash to /bin/zsh.

Change the bash Shell to Zsh shell
At this stage, you will find your Terminal shell is changed from bash shell to Zsh shell.
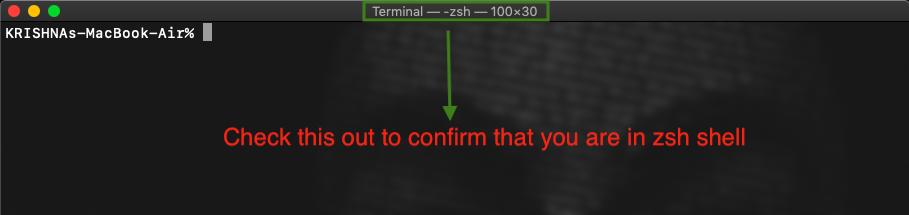
Confirm whether your bash is converted to zsh shell
Step 2: Now you have to install Xcode from the App Store. To install Xcode, go to App Store and search for Xcode. Now click on get and click on the Install button to get Xcode.

Installing XCode
Step 3: After installing Xcode you’ll have to install the command-line tool for mac using the below command:
xcode-select --install
Now click on the Install button and Agree to the terms and condition when a window pops up as shown below:

Installing the Command Line Tool
Step 4: Now you’ll have to install a package manager (eg: HomeBrew, MacPorts, Fink, etc) for mac which makes the installation process really easy and hassle-free. Here we are using HomeBrew Package Manager. To install this run the below command in your terminal:
/bin/bash -c "$(curl -fsSL https://raw.githubusercontent.com/Homebrew/install/HEAD/install.sh

Installing HomeBrew Package Manager
You can also manually install it from the link.
Step 5: Now we are all set to install python, To install python use the below command and press Enter:
brew install python
This will take some time to install python in your system. This command will install the latest version of Python.

Installing Python
Setting Python 3 as Default:
To set Python 3 as a default on your Mac system, follow the below steps:
Step 1: Copy the path of the directory where Python is installed as shown below:
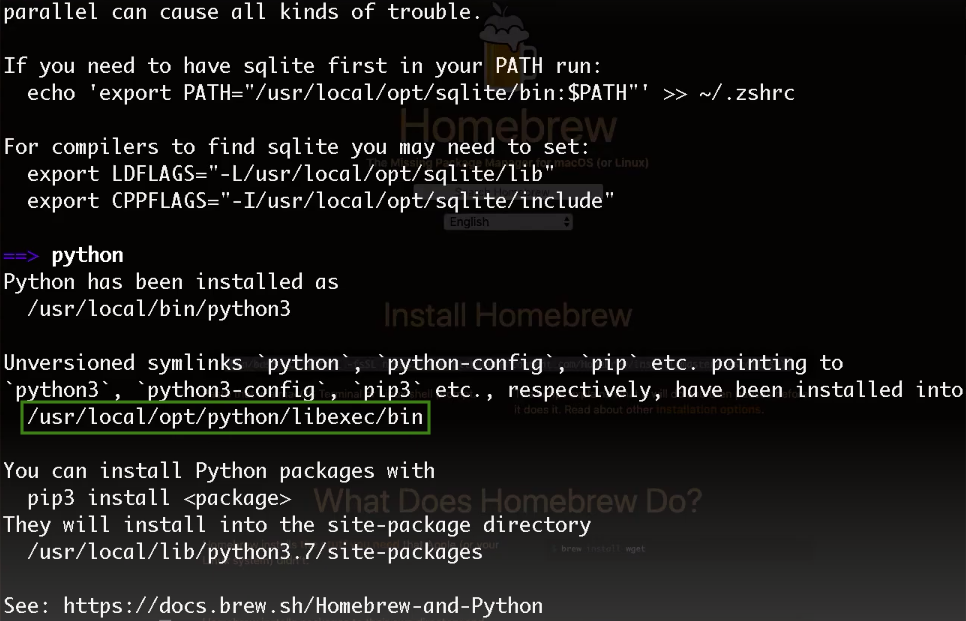
Python 3 Path
Step 2: Run ls -a command in your terminal but make sure that you are in your home directory or simply run the cd ~ command to move to the home directory.

Listing all the hidden files using this command
Step 3: Now we have to create a file by using the vim .zshrc command to overwrite the path so that python 3 becomes the default.

Creating a file named .zshrc
Step 4: To write in the file press ‘i’ from the keyboard to go to insert mode. Now add the path using the below command:
export PATH=copied path from the above point:$PATH
Now to save it press ESC and write (:wq) and press Enter. And we are done.

Overwriting the Path of Python 2 with the Path of Python 3
Step 5: Quit the terminal for the changes to take place and now write the python command to see that now python 3 is set as your default python for your mac device.
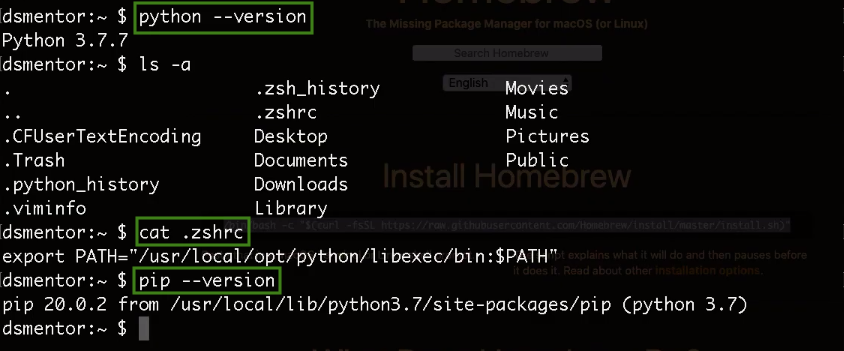
Confirmation of Python 3 version
Like Article
Suggest improvement
Share your thoughts in the comments
Please Login to comment...