Text Localization, Detection and Recognition using Pytesseract
Last Updated :
03 Jan, 2023
Pytesseract or Python-tesseract is an Optical Character Recognition (OCR) tool for Python. It will read and recognize the text in images, license plates etc. Python-tesseract is actually a wrapper class or a package for Google’s Tesseract-OCR Engine. It is also useful and regarded as a stand-alone invocation script to tesseract, as it can easily read all image types supported by the Pillow and Leptonica imaging libraries, which mainly includes –
Also additionally, if it is used as a script, Python-tesseract will also print the recognized text instead of writing it to a file. Python-tesseract can be installed using pip as shown below –
pip install pytesseract
If you are using Anaconda Cloud, Python-tesseract can be installed as shown below:-
conda install -c conda-forge/label/cf202003 pytesseract
or
conda install -c conda-forge pytesseract
Note: tesseract should be installed in the system before running the below script.
Below is the implementation.
Python3
from pytesseract import*
import argparse
import cv2
ap = argparse.ArgumentParser()
ap.add_argument("-i", "--image",
required=True,
help="path to input image to be OCR'd")
ap.add_argument("-c", "--min-conf",
type=int, default=0,
help="minimum confidence value to filter weak text detection")
args = vars(ap.parse_args())
images = cv2.imread(args["image"])
rgb = cv2.cvtColor(images, cv2.COLOR_BGR2RGB)
results = pytesseract.image_to_data(rgb, output_type=Output.DICT)
for i in range(0, len(results["text"])):
x = results["left"][i]
y = results["top"][i]
w = results["width"][i]
h = results["height"][i]
text = results["text"][i]
conf = int(results["conf"][i])
if conf > args["min_conf"]:
print("Confidence: {}".format(conf))
print("Text: {}".format(text))
print("")
text = "".join(text).strip()
cv2.rectangle(images,
(x, y),
(x + w, y + h),
(0, 0, 255), 2)
cv2.putText(images,
text,
(x, y - 10),
cv2.FONT_HERSHEY_SIMPLEX,
1.2, (0, 255, 255), 3)
cv2.imshow("Image", images)
cv2.waitKey(0)
|
Output:
Execute the command below to view the Output
python ocr.py --image ocr.png
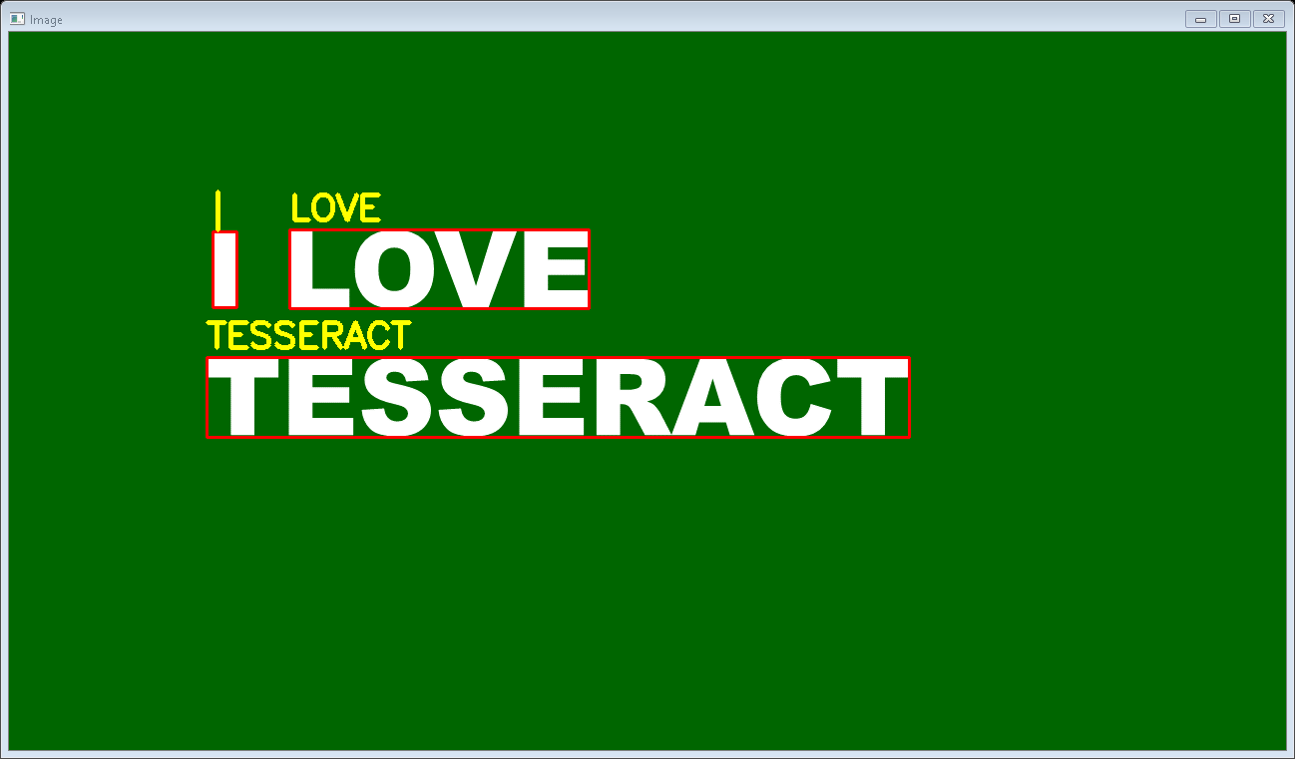
In addition to Output, we will see the Confidence Level and the Text In Command Prompt as shown below –
Confidence: 93
Text: I

Confidence: 93
Text: LOVE

Confidence: 91
Text: TESSERACT
Like Article
Suggest improvement
Share your thoughts in the comments
Please Login to comment...