Terminal Mail and Linux Security Mail
Last Updated :
20 Mar, 2024
While working on Eudyptula Challenge, I was needed to mail them the tasks in the plain text format, since the server rejects all the HTML mails it receives due to security reasons. So I started mailing them from terminal which is quite simple to configure and very fast.
HTML vs Plain text Mail
Actually the difference between the two mail formats is the fact that when you send an HTML mail(which is default for Gmail) you can send the web pages and email templates are coded so that text is formatted and images like the promotional mails. On the other hand, plain text mail is regular text, with no formatting options such as bold, italics, underlines, or special layout options. HTML mails are unsafe since XSS can be done through it but Gmail do a security scan to protect you from the threats.
Linux Security Mail
When your mailing client is setup, and someone tries to access your system with sudo, you will be mailed of the incident with the command they were trying to use. So next time you will know the friends who must not be trusted. Something like this
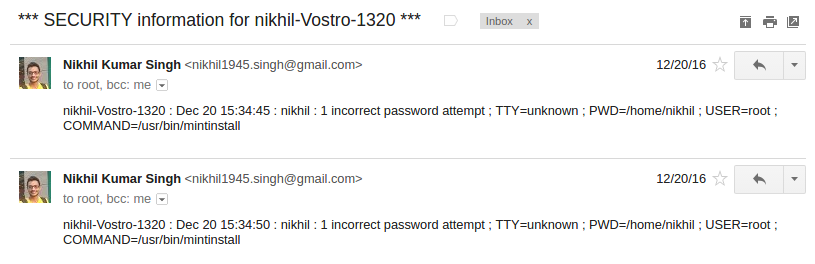
The above screenshot shows that I was trying to install something but gave a wrong password.
In order to mail anyone from terminal you can use any of the terminal mail-clients. Some of them are:
In this article we will take both mutt and ssmtp. Let’s get started.
Step-1 : Installing the mail client
You must install both mutt and ssmtp using the commands as:
sudo apt-get install ssmtp
sudo apt-get install mutt
Although mutt itself is self sufficient but note that we are also dealing with security mails, this is the reason to install ssmtp. Ssmtp gives you the linux security mail feature but mutt has a good interface for mailing. But you can if you want it.
Step:2 : Configuring the client
To achieve security mails you must not configure mutt, since till start it’s own mailbox type of system looking something like this.
The configuration for ssmtp can be done by editing the configuration file “/etc/ssmtp/ssmtp.conf”. Use your favorite text editor to change the configuration file to
root=myemailaddress@gmail.com
mailhub=smtp.gmail.com:587
AuthUser=mygmailusername
AuthPass=mypassword
UseSTARTTLS=YES
If you are using gmail you must get the gmail app password from this link and use the same for AuthPass.
You can now test ssmtp using the command
ssmtp myemailaddress@gmail.com < msg.txt
Where msg.txt must be a file formatted like
To: myemailaddress@gmail.com
From: myemailaddress@gmail.com
Subject: Testing SSMTP

We are testing ssmtp
Once the test passes you are ready to get send the mails
Step-3: Using mutt
Open terminal and type 'mutt'. You will be prompted to create a new mailbox press 'y'. You will see the mailbox like this 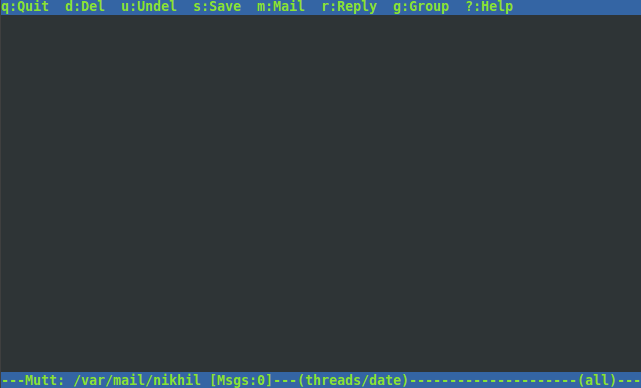 . Note if you have configured mutt it will fetch all the mails from gmail.
You can now send mail by pressing 'm' and then follow the instructions (it's easy).
After you are ready with body of your mail with subject and the recipient's address, mutt will look like. 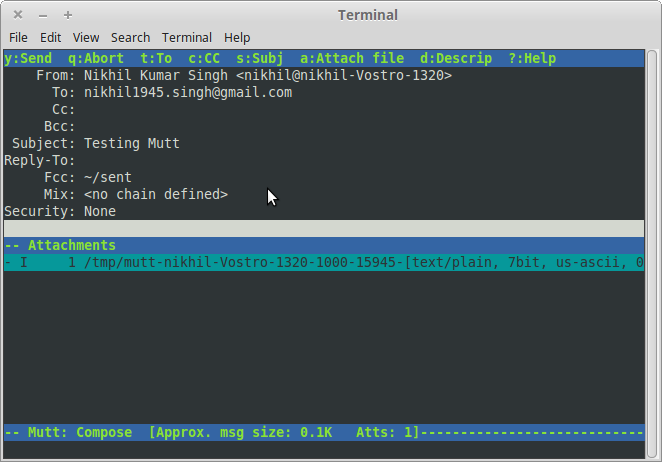
You can send an attachment by pressing 'a' and then again following the instructions. Press 'y' to send the mail.
Like Article
Suggest improvement
Share your thoughts in the comments
Please Login to comment...