Task Scheduler is vital component of Microsoft Windows that gives its users capacity to plan initiation of projects or programs at the user’s discretion or after indicated time spans. This was firstly introduced in “Microsoft Plus” for Windows-95 as “System Agent” however, it was renamed to “Task Scheduler”. Windows Event Log administration must be running before Task Scheduler starts up. This administration ought not to be mistaken with scheduler, which is central part of OS kernel that assigns CPU assets to measures previously running.
Task Scheduler administration works by controlling Tasks. Task alludes to activity (or activities) taken because of trigger(s). A task is collectively characterized by lot of activities, which can incorporate initiating an application or making some exclusively characterized move, to lot of triggers, which can either be time sensitive or occasion-based.
Moreover, task additionally can contain metadata that characterizes how activities will be executed. Example – security setting task will run in. Tasks are serialized to “.job” records and are put away in the exceptional organizer named Task Folder, composed in sub-directories. Implicitly, task organizer is made accessible by utilizing the ITaskFolder interface or Task-folder scripting object and individual tasks utilizing IRegisteredTask interface or Registered-task object.
Now, Before using Task Scheduler for automation of tasks, we need to have basic understanding of following points –
Triggers :
- Trigger will execute specific program consequently when some already defined occasions will happen.
- Task scheduler has two sorts of triggers: “time-sensitive trigger”, and “event-based trigger”.
- Time-sensitive occasion-based trigger is utilized to play out the tasks at a specific time.
- Occasion-based trigger is utilized to play out task when any system-event happens.
Actions :
- The “action” is cycle, that happens when triggers are executed in system, for example, to start program, send letters and show message, etc.
Procedure for Scheduling Basic Task :
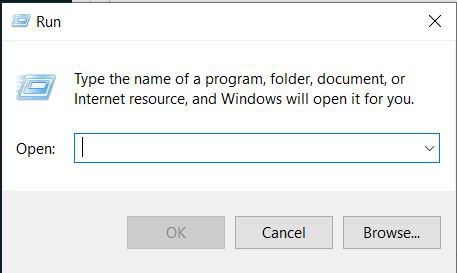
Step-1 : Right-click on Windows logo being displayed on bottom-left corner of your screen. Then, click on “Run” option, and run-prompt opens up.
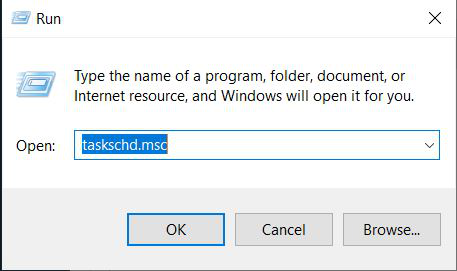
Step-2 : Type in left pane following command in Run dialog box already opened, then click on “Ok” for executing the command.
taskschd.msc
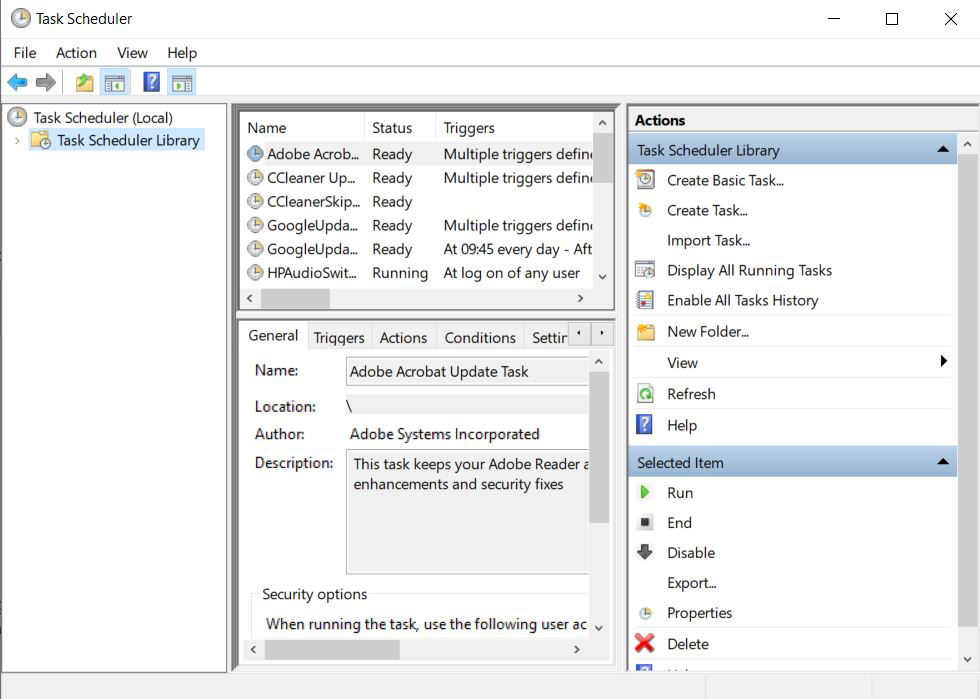
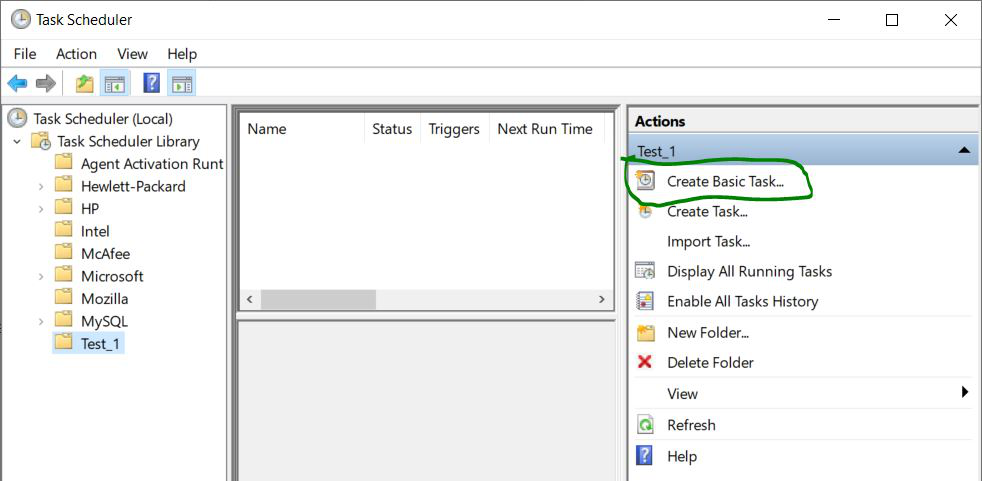
Step-3 : “Task-Scheduler” dialog-box is opened now. On left pane of window, click on “Task Scheduler Library” in order to select folder, then right-click on that folder, and choose “New folder” option.
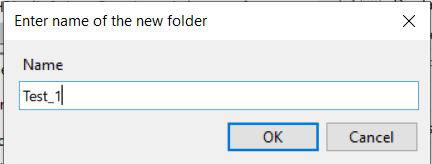
Step-4 : Enter desired name of folder, then click on “Ok” button.
Step-5 : Now, navigate to new folder created under “Task Scheduler Library” directory, and select folder you created, then click on “Create Basic Task…” option on right pane of the window.
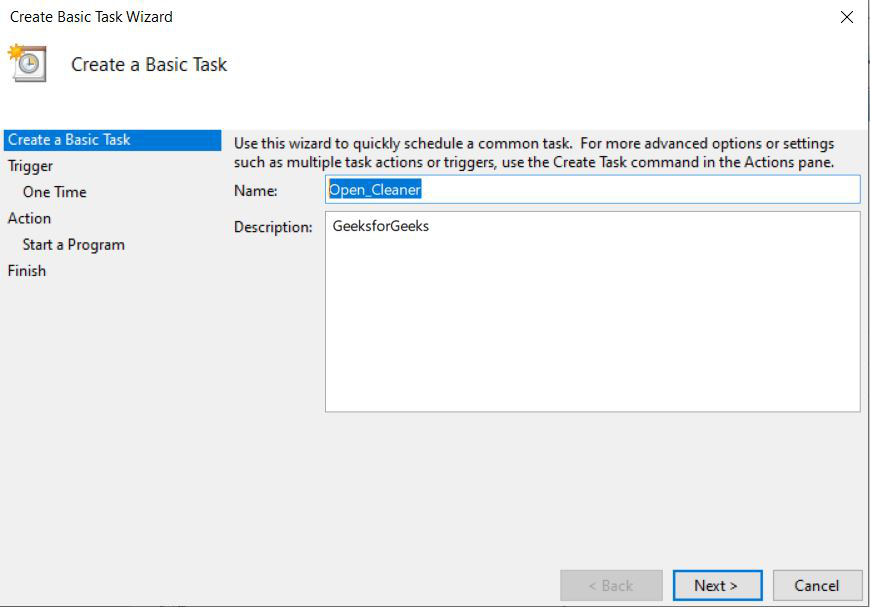
Step-6 : After clicking on the previous option mentioned in step-5, you have to name your task, and it is suggested that name should always be similar to task being performed by it as it reduces ambiguity, you can also provide description for your task, then click on “Next” button.
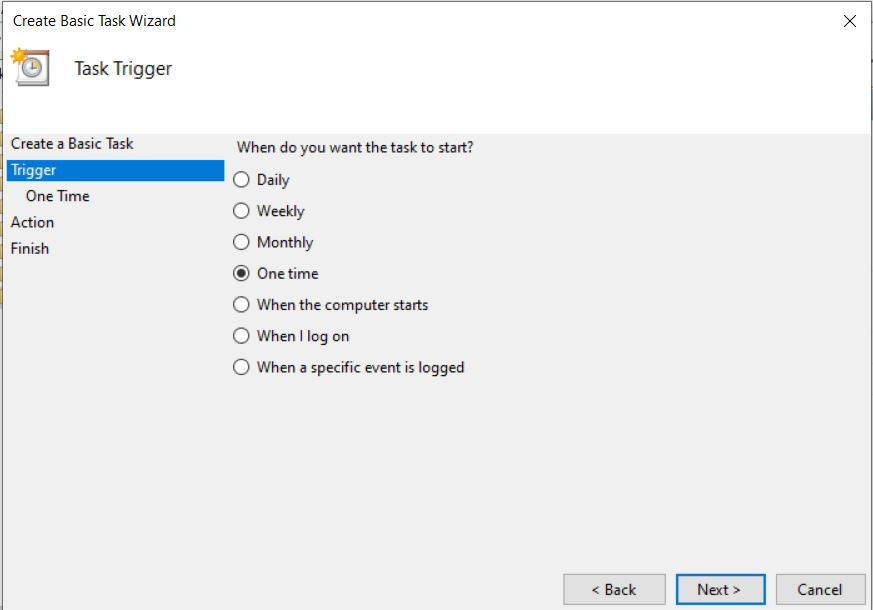
Step-7 : The next dialog box that appears is of “Trigger” option, here you can select any option according to your preferences, then click on the “Next” button.
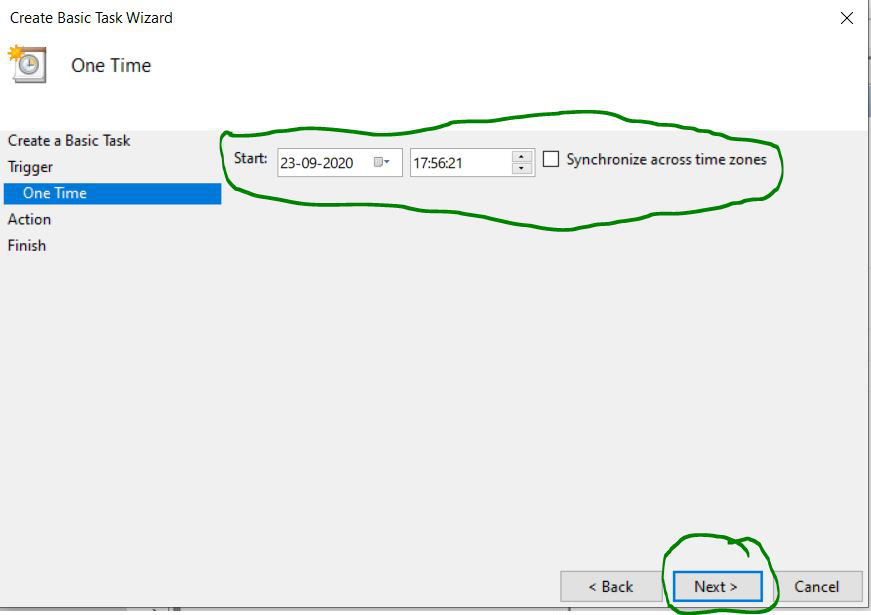
Step-8 : Based on your option you will see options appeared on your screen, so thereafter set-up starting Date and Time of task, and then click on “Next” button.
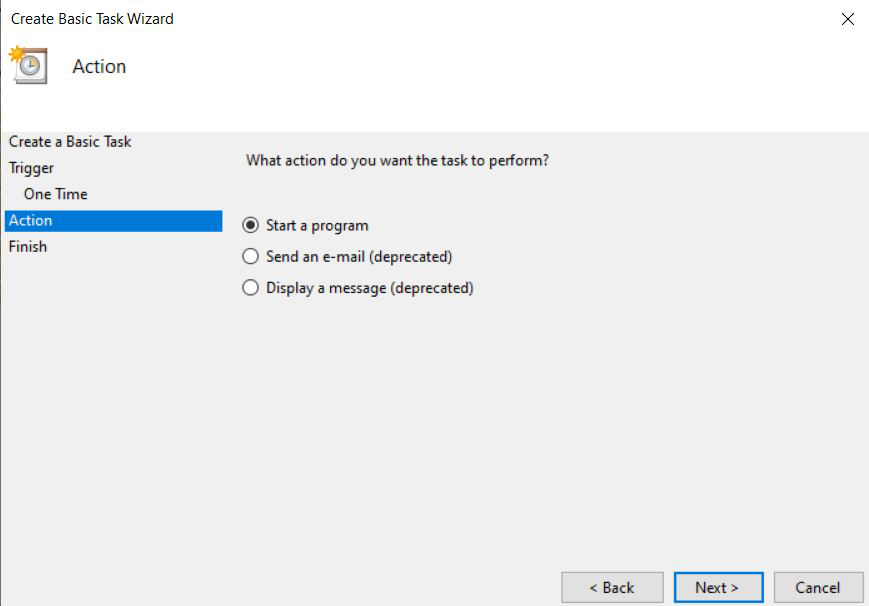
Step-9 : Now, choose “Start Program” option from three options appearing, but any option can be chosen according to your task.
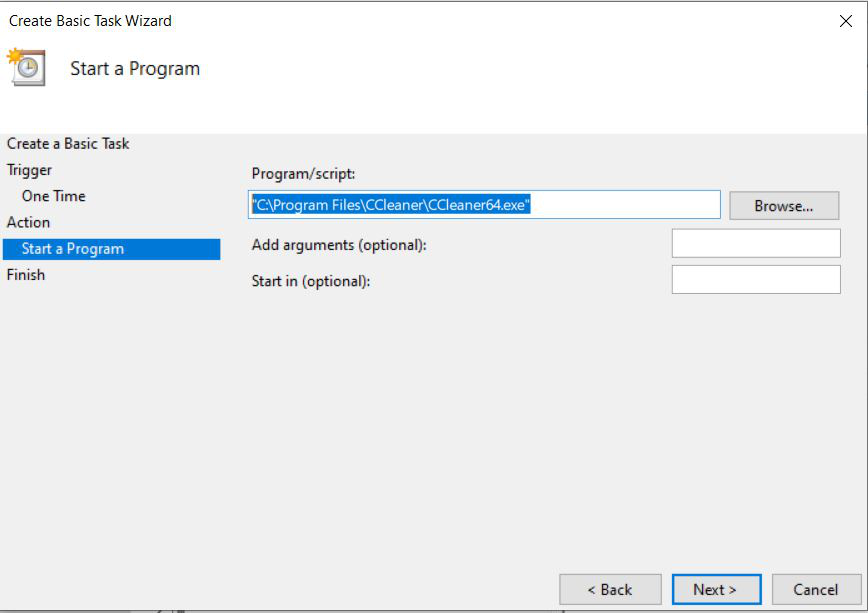
Step-10 : Choose desired program that you want to run on already assigned time by clicking on “Browse” button, then click on “Next” option.
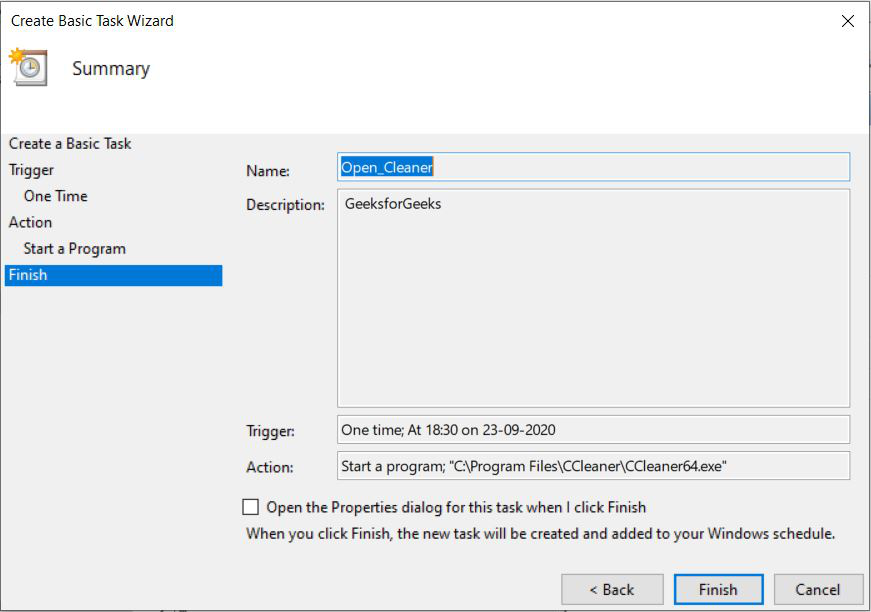
Step-11 : After clicking on “Next” option, we will get last dialog box showing us all information already filled, and then we have to acknowledge by clicking on “finish” button, and then our task would be successfully created.
Now, the assigned task will be initiated at the decided time.
Procedure for Automating an Advanced Task :
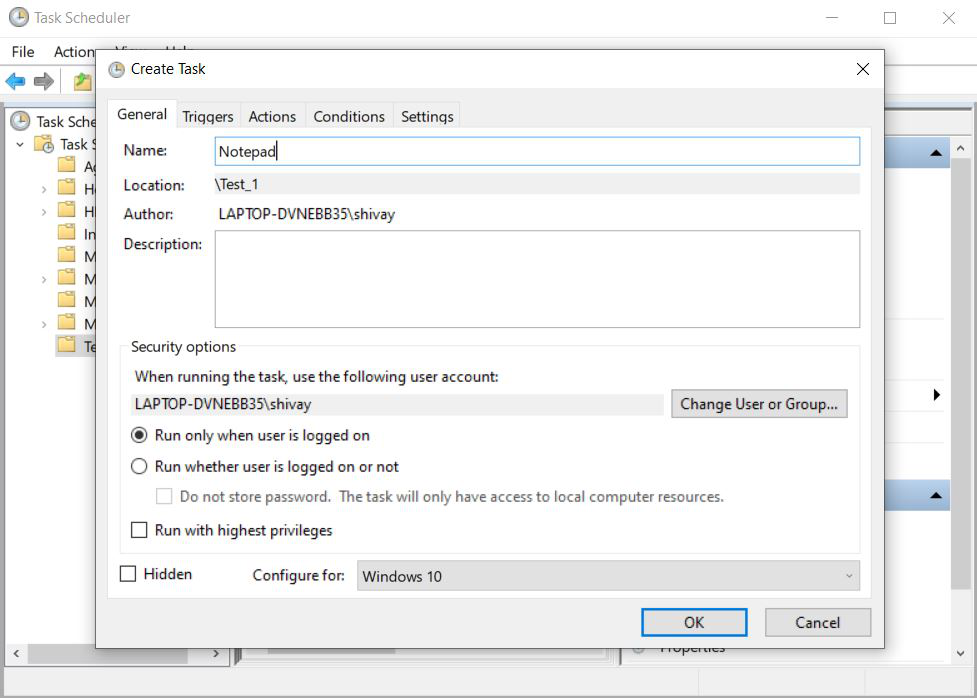
Step-1 : Follow earlier step-1 to step-4 as it is, and create folder accordingly, then click on that folder and choose “Create Task” option on right window pane. Also, once the dialog box appears fill-up name-field on top with your desired task, that is going to be performed and under “Security Options” choose preferred choice according to your need.
Step-2 : Click on “Triggers” tab on top, then click on the “New” button.
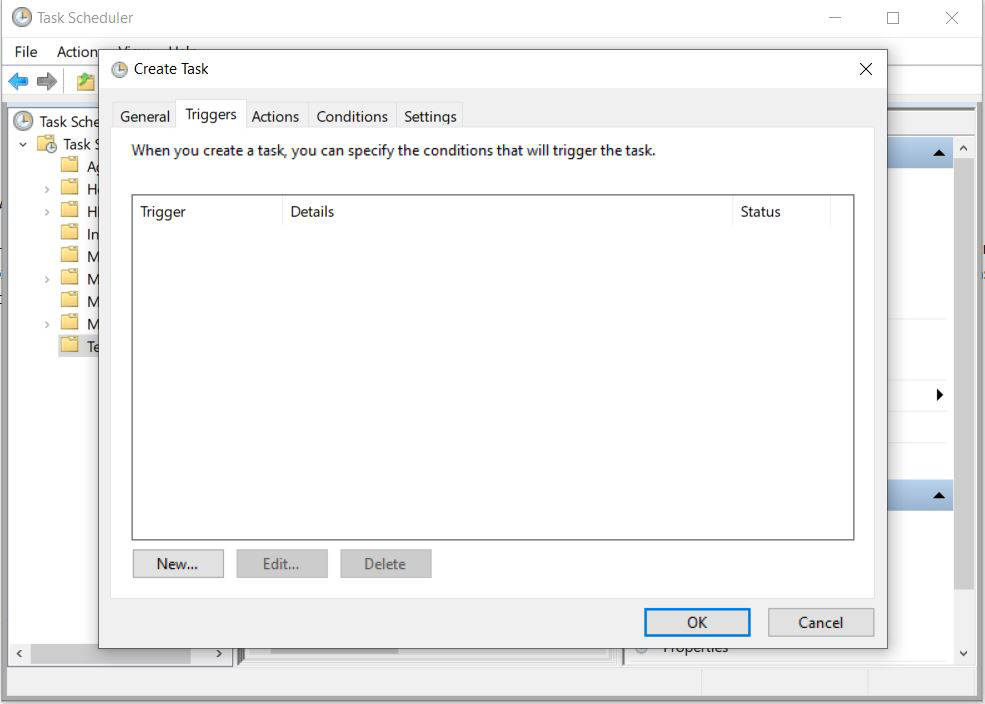
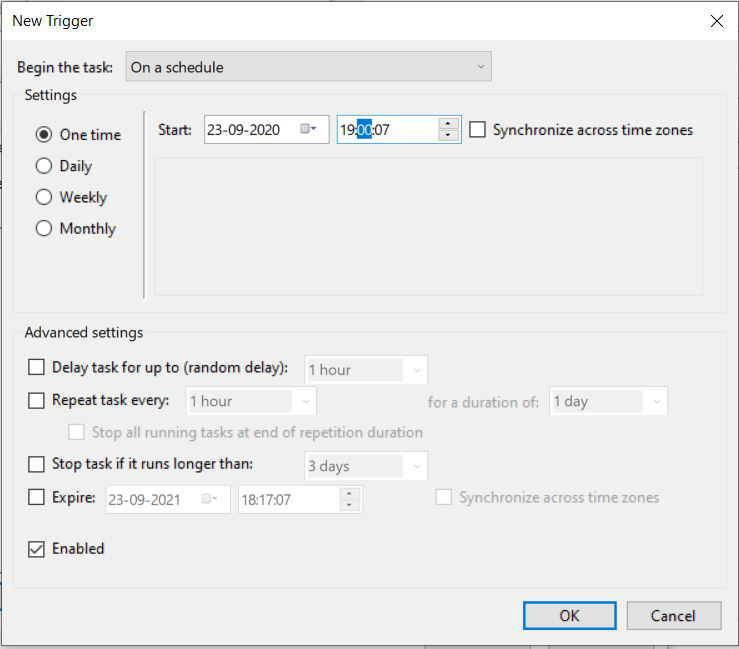
Step-3 : In the New options dialog box, select all options according to your need and set-up timing schedule for execution of the program, you can also choose options from advanced options, then click on “Ok” button.
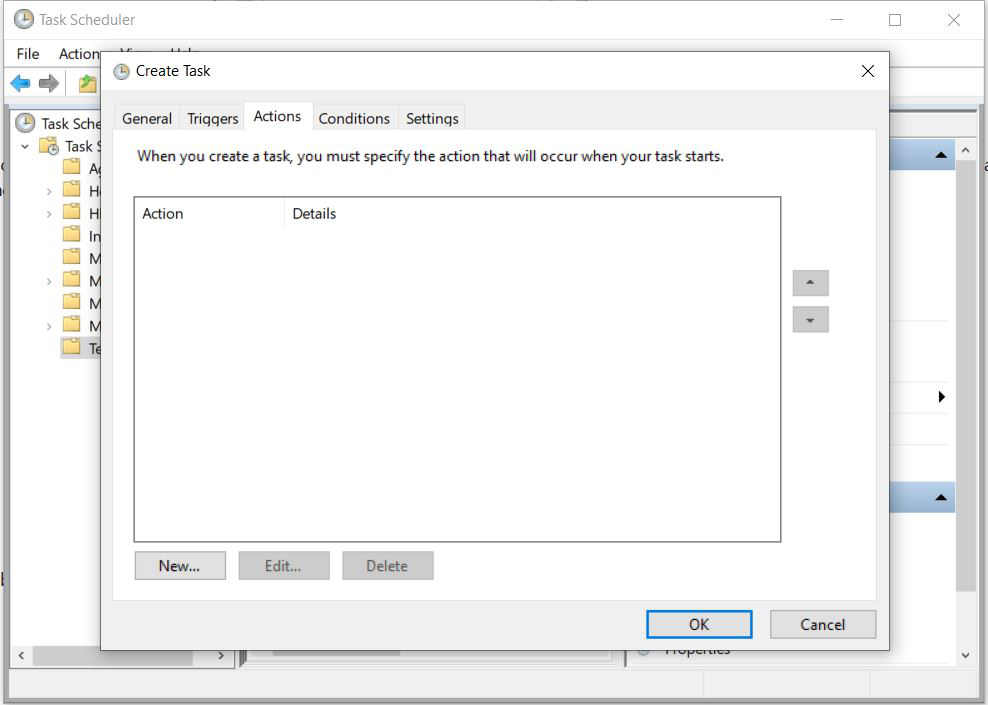
Step-4 : Click on Action” tab on top, and click on “New” option at bottom.
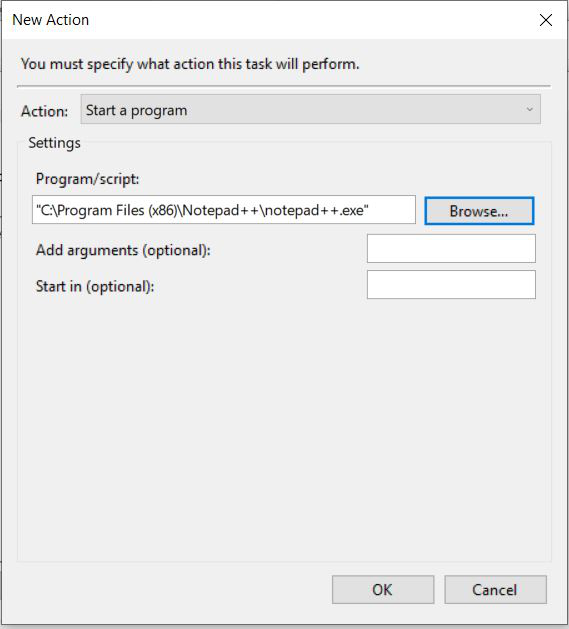
Step-5 : Choose path of application you want to make it run automatically by clicking on “browse” button and then click on “Ok” option.
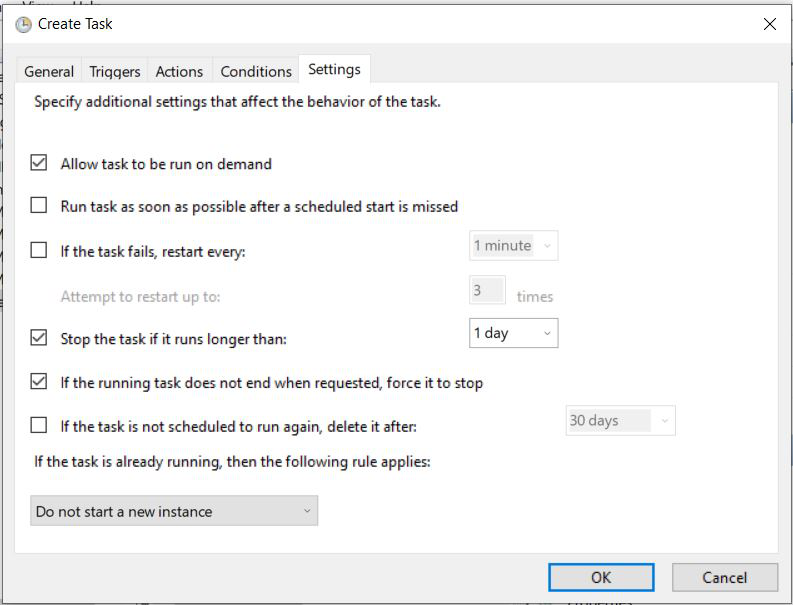
Step-6 : You can similarly go to “Conditions” and “Settings” tab, and configure all your desired settings for automated task accordingly.
Step-7 : After you have configured all settings for program, then you can click on “Ok” option and the task will be created in the folder specified already and it will be successfully initiated on the already assigned time.
Conclusion : We have successfully assigned or created task to be completed automatically on thedeclared time in Windows 10.
Like Article
Suggest improvement
Share your thoughts in the comments
Please Login to comment...